Native Instruments Maschine Manual
Summary of Maschine
Page 1
Manual.
Page 2
The information in this document is subject to change without notice and does not represent a commitment on the part of native instruments gmbh. The software described by this document is subject to a license agreement and may not be copied to other media. No part of this publica‐ tion may be copied...
Page 3
Native instruments gmbh schlesische str. 29‐30 d‐10997 berlin germany www.Native-instruments.De native instruments north america, inc. 6725 sunset boulevard 5th floor los angeles, ca 90028 usa www.Native-instruments.Com native instruments k.K. Yo building 3f jingumae 6‐7‐15, shibuya‐ku, tokyo 150‐00...
Page 4
Table of contents 1 welcome to maschine .................................................................................................. 25 1.1 maschine documentation .............................................................................................. 25 1.2 document conventions ...........
Page 5
2.4 native kontrol standard .................................................................................................... 57 2.5 stand‐alone and plug‐in mode ....................................................................................... 59 2.5.1 differences between stand‐alone and pl...
Page 6
3.1.1 the maschine library ................................................................................. 96 3.1.2 browsing the library vs. Browsing your hard disks ....................... 97 3.2 searching and loading files from the library ...........................................................
Page 7
3.5 editing the files’ tags and properties ......................................................................... 135 3.5.1 attribute editor basics ..................................................................................135 3.5.2 the bank page ..............................................
Page 8
4.2.4 changing the sound’s color .......................................................................168 4.2.5 saving sounds ..................................................................................................169 4.2.6 copying and pasting sounds ........................................
Page 9
5.1.1 the pad view in the software ....................................................................204 5.1.2 choosing a pad input mode ........................................................................206 5.1.3 adjusting the base key ...........................................................
Page 10
5.6.5 morphing between lock snapshots ........................................................242 5.6.6 deleting a lock snapshot ............................................................................242 5.6.7 triggering lock snapshots via midi .....................................................
Page 11
6.2.5 page 5: lfo ........................................................................................................275 6.2.6 page 6: velocity / modwheel ......................................................................277 6.3 using native instruments and external plug‐ins ..................
Page 12
8.2.4 kick – grit ............................................................................................................309 8.2.5 kick – rasper .....................................................................................................311 8.2.6 kick – snappy ............................
Page 13
8.5 the toms ................................................................................................................................. 348 8.5.1 tom – tronic ......................................................................................................350 8.5.2 tom – fractal ...........
Page 14
10.1.6 adjusting the arrange grid and the pattern length ........................388 10.1.7 adjusting the step grid and the nudge grid ......................................391 10.2 recording patterns in real time ................................................................................... 39...
Page 15
10.5 recording and editing modulation ................................................................................ 436 10.5.1 which parameters are modulatable? .....................................................437 10.5.2 recording modulation ......................................................
Page 16
11.1.2 configuring the main output of sounds and groups .....................484 11.1.3 setting up auxiliary outputs for sounds and groups ....................489 11.1.4 configuring the master and cue outputs of maschine ..............493 11.1.5 mono audio inputs .......................................
Page 17
12.2.4 managing your channels in the mixer ...................................................541 12.2.5 adjusting settings in the channel strips ..............................................542 12.2.6 using the cue bus ..................................................................................
Page 18
13.3.2 step 2: route audio to the send effect ................................................590 13.3.3 a few notes on send effects ....................................................................592 13.4 creating multi‐effects ......................................................................
Page 19
14.4.3 reflex ....................................................................................................................630 14.4.4 reverb (legacy) ...............................................................................................631 14.4.5 reverb .................................
Page 20
14.7.7 tremolo ................................................................................................................669 14.7.8 scratcher .............................................................................................................672 15 working with the arranger .............
Page 21
15.3.2 creating sections ............................................................................................702 15.3.3 assigning a scene to a section .................................................................703 15.3.4 selecting sections and section banks ...............................
Page 22
16 sampling and sample mapping ...................................................................................730 16.1 opening the sample editor .............................................................................................. 730 16.2 recording a sample ...............................
Page 23
16.5.4 selecting and editing zones in the map view .....................................784 16.5.5 editing zones in the sample view ............................................................788 16.5.6 adjusting the zone settings ........................................................................
Page 24
17.3.3 load long audio files and play with the start point .......................802 18 troubleshooting ................................................................................................................803 18.1 knowledge base ..............................................................
Page 25
1 welcome to maschine thank you for buying maschine! Maschine is a groove production studio that implements the familiar working style of classical groove boxes along with the advantages of a computer based system. Maschine is ideal for making music live, as well as in the studio. It’s the hands‐on ...
Page 26
2. Maschine manual (this document): the maschine manual provides you with a compre‐ hensive description of all maschine software and hardware features. Additional documentation sources provide you with details on more specific topics: ▪ controller editor manual: besides using your maschine hardware ...
Page 27
1.2 document conventions this section introduces you to the signage and text highlighting used in this manual. This manual uses particular formatting to point out special facts and to warn you of potential issues. The icons introducing these notes let you see what kind of information is to be expect...
Page 28
→ results of actions are introduced by this smaller arrow. Naming convention throughout the documentation we will refer to maschine controller (or just controller ) as the hardware controller and maschine software as the software installed on your computer. The term “ effect ” will sometimes be abbr...
Page 29
For better reference, we applied a special formatting here: throughout the document, the ele‐ ments are capitalized and numbered, so the buttons above the displays are written button 1 to button 8, while the knobs under the displays are written knob 1 to knob 8. E.G., whenever you see an instruction...
Page 30
▪ hardware preferences on maschine mk3 have been introduced which replicate the gen‐ eral , audio , midi and hardware software preference panel pages. These are now available di‐ rect from the maschine mk3 controller using the settings button. For more information on using the preferences from the h...
Page 31
2 basic concepts this chapter will reintroduce you to maschine’s main elements and terminology and explain how they relate to one another. You will also learn how to set up your audio interface and how to con‐ nect midi devices. Before reading this chapter it is strongly recommended that you read th...
Page 32
Project a project contains all data needed for a song: groups with their patterns, all scenes and all set‐ tings, modulation, effects, routings, sounds and samples. It’s like a snapshot of the entire state of maschine. Please read the maschine getting started for a complete overview of the ma‐ schin...
Page 33
Scene a scene is a combination of patterns for each group. They can be used to combine patterns in order to create musical ideas. Scenes are created in the ideas view and then added to sections in the arranger view to create an arrangement. Refer to chapter ↑15.3, using arranger view for more inform...
Page 34
Tem also allows you to create send effects, multi‐effects, and side‐chains. For more details on us‐ ing effects in maschine, refer to chapter ↑13, using effects . You will find an exhaustive de‐ scription of all internal effects included in maschine in chapter ↑14, effect reference . Please refer to...
Page 35
The view submenu in the maschine menu. Full screen view is also available from your computer keyboard via [ctrl]+[f] (macos: [cmd]+[f]). 2.2.2 switching between ideas view and arranger view at any time you can quickly switch between the ideas view and the arranger view, using the ar‐ ranger view but...
Page 36
For more information about ideas view and arranger view see ↑15.3, using arranger view . Switching between ideas view and arranger view using the controller on your controller: 1. Press navigate + button 2 ideas to access the ideas view. 2. Press navigate + button 3 arranger to access the arranger v...
Page 37
2.2.4 minimizing the mixer when maschine is in mix view, you can minimize/maximize the mixer in the top part of the ma‐ schine window: ► click the arrow button at the bottom left of the mixer to show and hide the channel details in the mixer. Minimizing/maximizing the mixer. 2.2.5 showing/hiding the...
Page 38
Click the arrow button at the bottom left of the pattern editor to show/hide the control lane. 2.3 common operations this sections introduces a few very common operations in maschine you will encounter in nu‐ merous situations. 2.3.1 pinning a mode on the controller besides the default control modes...
Page 39
But in some situations you might want to release the mode button of a temporary mode without leaving that mode, e.G., to free your hand and tweak other controls more easily. For this purpose, maschine lets you pin (or “lock”) temporary modes so that they behave like permanent modes. 2.3.2 pinning a ...
Page 40
2.3.3 undo/redo undoing and re‐doing your last actions can be useful to cancel operations you have performed or to compare two versions before and after a change. You can undo nearly everything you did after loading or creating your project. Note: if you save your project, you will no longer be able...
Page 41
Take undo/redo is the default undo/redo in maschine. In the software use the common key‐ board shortcuts for the undo and redo functions: ► to cancel your last group of actions, press [ctrl]+[z] ([cmd]+[z] on macos). To re‐execute your last group of actions, press [ctrl]+[y] ([cmd]+[y] on macos). Yo...
Page 42
Setting the focus on a sound or group is slightly different than selecting it: the focus defines what will be displayed, whereas the selection defines what will be affected by your edits. Note that a focused sound/group is always selected. The distinction is of importance because you can select mult...
Page 43
The focused group is highlighted and the pattern editor show its content. If the desired group does not appear in the group list, use the scroll bar at the right end of the arranger or turn your mouse wheel while hovering the arranger to display any hidden groups. You can also extend the arranger by...
Page 44
1. Set the focus to the group containing the desired sound by clicking it in the group list on the left of the arranger (see above). The focused group is highlighted. The pattern editor displays the sounds and patterns of that group. 2. Click the desired sound slot in the sound list of the pattern e...
Page 45
If the desired sound does not appear in the sound list, use the scroll bar at the right end of the pattern editor or turn your mouse wheel while hovering the pattern editor to display any hidden sounds. You can also select multiple sounds at once to apply changes to all of them. See section ↑4.1.3, ...
Page 46
Once the sound is focused you can use button 1–3 above the left display to quickly switch be‐ tween the master, the containing group and the focused sound! See section ↑2.3.5, switching between the master, group, and sound level for more information. You can also select multiple sounds at once to ap...
Page 47
→ the selected tab lights up. The name of your project, the focused group or the focused sound appears on the left display (under the master , group , and sound tabs), and the displays show the plug‐in parameters and channel properties of the master, the focused group or the focused sound, respectiv...
Page 48
Trol area, showing a square of four buttons representing the various sets of channel prop‐ erties available for the selected sound, group or the master: 2. Click the desired button ( input , output , groove , or macro ) in the channel property selector to select that set of channel properties. → the...
Page 49
If the plug‐in list only shows a “ + ” sign, it means that there are no plug‐ins loaded in this sound, group or the master. Clicking the “ + ” sign allows you to load a new plug‐in: see section ↑6.1.3, loading, removing, and replacing a plug‐in for more on this. Navigating parameter pages in some si...
Page 50
Adjusting the parameters in the parameter area, each parameter includes a control element and a label. Following types of control elements are available: element action knob : click the knob and drag your mouse vertically to change the param‐ eter value. Hold [shift] on your computer keyboard and dr...
Page 51
3. Press button 5 ( channel ) to display the channel properties or button 6 ( plug-in ) to dis‐ play the plug‐in slots of the selected sound, group or the master. 4. Press button 7/8 to navigate the channel properties or plug‐ins (the name of the selected channel properties or plug‐in appears betwee...
Page 52
6. Use knobs 1–8 under the displays to adjust the value of the parameters available on the se‐ lected page. For continuous parameters, hold shift while turning the knobs to adjust the values in finer increments. The displays showing the audio page from the group’s output properties (out tab). Using ...
Page 53
8. Release navigate to get back to control mode (or press navigate a second time if you pinned the navigate mode). → the selected parameter page now appears on the displays. Extended navigate mode on your controller the navigate mode on your controller can be used to navigate the parameter pages of ...
Page 54
Action shortcut follow song press button 8 ( follow ) timeline zoom in/out (arranger view only) turn knob 1 or press pad 14 / 10 timeline scroll left/right (arranger view only) turn knob 2 or press pad 9 / 11 pattern editor zoom in/out turn knob 5 or press pad 6 / 2 pattern editor scroll left/right ...
Page 55
► to access another page with the page bank press buttons 7 and 8. The pages for the selected bank are displayed in the software and the controller. ► to access page navigation mode press navigate + shift + button 2. → when page navigate mode is enabled, your controller displays the page navigation ...
Page 56
A controller not connected to any maschine software instance can be used in midi mode (i.E. As a midi controller) at the same time as the other controller(s). See the controller editor manual for more information on midi mode. You can choose which controller you want to use with the maschine softwar...
Page 57
▪ maschine studio controller: press shift + plug‐in , turn the jog wheel to select the de‐ sired instance, and press the jog wheel or button 8 to load it. ▪ maschine (mk1 & mk2) controller: press shift + step , turn knob 8 (or press button 5/6) to select the desired instance, and press button 8 to l...
Page 58
Installing kontakt instruments with nks support third‐party developers of kontakt instruments provide you with a folder that contains all in‐ strument files, including presets and samples. Instead of running an installer, this folder needs to be stored on the hard drive. The instrument can then be a...
Page 59
2.5 stand-alone and plug-in mode you can run the maschine software as a stand‐alone application or integrate it into your favor‐ ite host by loading it as a plug‐in. The maschine software is available in the vst, audio unit, and aax plug‐in formats. For further information on plug‐in compatibility a...
Page 60
On the contrary, when maschine is used as a plug‐in within a host application, the communica‐ tion with your audio and midi interfaces is managed by the host — the maschine plug‐in only communicates with the host. Native instruments’ online knowledge base provides how‐tos that will help you route th...
Page 61
Click the connect button to connect the controller to that instance. Switching instances using the controller to switch from one maschine instance to another: ▪ press shift + step . ▪ turn knob 5 (or press button 5/6) to select the desired instance. ▪ press button 8 to load that instance. 2.5.3 cont...
Page 62
Preferences… in the file menu of the application menu bar (windows depicted), and in the file submenu of the maschine menu. The following pages are available in the preferences panel: ▪ general : see ↑2.6.1, preferences – general page . ▪ audio : see ↑2.6.2, preferences – audio page . ▪ midi : see ↑...
Page 63
The preferences – general page. Setting description startup reload last project click this checkbox to automatically reload the last project on startup. Recording audio basic concepts preferences maschine ‐ オペレーション マニュアル ‐ 63.
Page 64
Setting description prefer project folder if this checkbox is marked, the samples you record will be put in a subdir‐ ectory of the folder where your project is saved. If not, your recordings will be saved in the generic recordings folder in your standard user direc‐ tory (see section ↑2.6.4, prefer...
Page 65
Setting description quantize input quantize automatically quantizes your input to maschine as you record. Select one of the following input quantization modes: none : input quantization is disabled. Events you play or record on the pads are not quantized. Record : input quantization is applied only ...
Page 66
Preferences – audio page. Setting description interface driver select your audio driver from the drop‐down menu. Device select the available devices if you have more than one audio interface connected. Basic concepts preferences maschine ‐ オペレーション マニュアル ‐ 66.
Page 67
Setting description status this confirms whether your audio interface is currently running. Sample rate this displays the selected sample rate of your audio interface. Please re‐ start maschine after changing the sample rate. Asio config (windows only) click open panel to access specific controls re...
Page 68
► to display the midi page, click the midi tab on the left of the preferences panel. The preferences – midi page. Basic concepts preferences maschine ‐ オペレーション マニュアル ‐ 68.
Page 69
Setting description sync mode click the drop‐down menu to set the midi sync mode preference for ma‐ schine: off : no midi sync mode is selected. Master (send clock) : if maschine is running as a stand‐alone application, it can also send a midi clock signal to any device that is capable of receiving ...
Page 70
The preferences – default page. Basic concepts preferences maschine ‐ オペレーション マニュアル ‐ 70
Page 71
Setting description project standalone here you can select a project to load automatically when you start a new project in maschine used as a stand‐alone application. The field displays the location of the template project selected for use. Click the folder icon to select another template project. A...
Page 72
Setting description duplicate select from the drop‐down menu how the duplicate function in ma‐ schine will operate when duplicating scenes. Scene only only the scene is duplicated. The result is a new unlinked scene with the same patterns referenced. Scene and patterns the scene itself and additiona...
Page 73
Setting description sound default midi input mode maschine allows you to play your sound(s) via midi notes, for example, from a midi keyboard. By default and without any configuration, incoming midi notes on any midi port and any midi channel will trigger the pitch of the focused sound. In addition,...
Page 74
The preferences panel – the library page’s factory pane. The factory pane displays all factory libraries available. These includes the maschine factory li‐ brary, libraries imported from other ni products, as well as installed maschine expansions. These libraries will appear in the factory view of t...
Page 75
Element description location column displays the path of each library. If you have moved any library to another loca‐ tion on your computer, click the folder icon on the left of that library and select its new path. Product column displays the name of each product. These names cannot be edited. Resc...
Page 76
The preferences panel – the library page’s user pane. The user pane displays all user libraries currently in use. This includes the standard maschine user directory as well as any other user directory you might have defined. These libraries will ap‐ pear in the user view of the browser’s library pan...
Page 77
Element description location column displays the path of each library. If you have moved any library to another loca‐ tion on your computer, click the folder icon on the left of that library and select its new path. Alias column displays the alias stored for each library. Click an alias to edit it. ...
Page 78
Standard user directory cannot be removed the standard user directory can neither be renamed nor removed from the list in the user pane of the library page in the preferences panel. You can modify its path in the location column. Cancelling library rescan in the library page of the preferences panel...
Page 79
▪ if you still want to cancel the scan, click cancel rescan at the bottom right, and the scan will be cancelled. ▪ if you prefer instead not to cancel the scan, click continue or press [esc] on your computer keyboard, and the scan will go on. If you cancelled the scan, any inconsistencies or missing...
Page 80
▪ for all file types, any attributes already in the files will be retained. ▪ for samples, if the product/bank/sub‐bank attributes are empty, they will be set to the fold‐ ers in which the samples are located: ◦ the product will be set to the name of the folder you have selected. ◦ if samples reside...
Page 81
Manager pane ► to display the manager pane, click the manager button at the top of the plug‐ins page. In the manager pane of the plug‐ins page, you can enable/disable vst/au plug‐ins, rescan their directories, and set default presets for your native instruments and external plug‐ins. When a native i...
Page 82
The preferences panel – the plug‐ins page’s manager pane. Basic concepts preferences maschine ‐ オペレーション マニュアル ‐ 82.
Page 83
Element description plug‐in column lists all available vst/au plug‐ins from the directories specified in the locations pane (see below). This includes all enabled or disabled 32‐bit vst/au plug‐ins, when maschine is running in 32‐bit mode or otherwise all enabled or disabled vst/au 64‐bit plug‐ins, ...
Page 84
▪ if this checkbox is disabled (default setting), the au versions of your native instruments plug‐ ins are still listed in the list above but they are disabled (checkbox unchecked): these plug‐ins won’t appear in the native instruments submenu of the plug‐in menus (software) or in the plug‐in browse...
Page 85
The preferences panel – the plug‐ins page’s locations pane. The locations pane also contains the following controls: element description plug‐in column lists all plug‐in directories used in maschine. Click the folder icon on the left of an entry to change the path of that plug‐in directory. Add butt...
Page 86
Element description remove button click remove to remove the selected directory. Rescan button if you have changed the content of a directory (such as installed or removed plug‐ins), you should rescan your plug‐in directories in order to keep the list of available plug‐ins up to date. Click rescan t...
Page 87
The preferences panel – hardware page. Basic concepts preferences maschine ‐ オペレーション マニュアル ‐ 87.
Page 88
Setting description controller the controller menu allows you to select a connected device and modify its settings. You can have two devices simultaneously focused on a ma‐ schine instance: a controller from the maschine family and a kom‐ plete kontrol s‐series keyboard. After a new device has been ...
Page 89
For more information on the midi mode, please refer to the controller editor manual. 2.6.8 preferences – colors page the colors page enables you to choose default colors for your scenes, groups, and sounds. ► to display the colors page click the colors tab on the left of the preferences panel. The p...
Page 90
Setting description scene default select the default color for your scenes. In the menu, you can select the desired color from the 16‐color palette or white (default setting). The col‐ or selected as default is highlighted in the menu. If you select auto each scene will have a different default colo...
Page 91
You can use midi in maschine in various ways. Notably: ▪ you can synchronize a midi clock signal between maschine and other midi devices: ↑2.7.2, sync to external midi clock and ↑2.7.3, send midi clock . ▪ if you connect a midi keyboard to the midi in , you can directly play the focused sound with i...
Page 92
2.7.2 sync to external midi clock if maschine is running as a stand‐alone application, it can be controlled externally via midi clock by any device that is capable of sending midi clock. This could be hardware such as a drum machine, another groovebox or sequencer, or even another software sequencer...
Page 93
2.7.3 send midi clock if maschine is running as a stand‐alone application, it can also send a midi clock signal to any device that is capable of receiving midi clock. This could be hardware such as a drum machine, another groovebox, or even another software sequencer. If you use maschine as a plug‐i...
Page 94
2.8.1 connecting to a network applications that support ableton link can join a link session when connected to the same net‐ work. To enable link within maschine, simply make sure the computer running maschine is connected to the same local network as the other applications you want to link to. This...
Page 95
▪ maschine will either join an existing link session or begin a new session. 2. Start maschine’s playback by clicking the play button. ▪ maschine’s playback is now synchronized with the link timeline. 3. To stop using link, and leave the session, click link again. While connected, the link button di...
Page 96
3 browser the browser is the place where you can organize and categorize all of your projects, groups, sounds, plug‐in presets, and samples. This is done by tagging them, which means categorizing them by using keywords. Given that the maschine software has some advantages over the hardware in this c...
Page 97
Which files are included in the maschine library? The files included in the maschine library are all maschine‐relevant files found in the folders whose paths are listed in the library page of the preferences panel. For more information on how to manage these library folders, please refer to ↑2.6.4, ...
Page 98
The library pane is described in section ↑3.2, searching and loading files from the library , and the files tab is described in section ↑3.6, loading and importing files from your file sys‐ tem . 3.2 searching and loading files from the library the browser’s library pane allows you to search for any...
Page 99
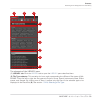
1 2 3 4 5 6 7 8 9 the elements of the library pane. ( 1 ) library tab : click the library tab to open the library pane described here. ( 2 ) file type selector : this contains six icons, each representing the different files types of ma‐ schine. From the left to right the file types are project, gro...
Page 100
( 3 ) content selector : click the ni icon (on the left) to select factory content or the user icon (on the right) to select user content instead. Only the files of the content selected here will be displayed in the result list ( 8 ). See section ↑3.2.5, choosing between factory and user content . (...
Page 101
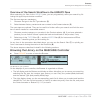
Overview of the search workflow in the library pane when searching for files via the library pane, you can progressively refine your search by fol‐ lowing this typical top‐to‐bottom workflow. The first two steps are mandatory: 1. Choose a file type in the file type selector ( 2 ). 2. Select between ...
Page 102
The above steps are described in detail in the following sections. In addition, you will find on your controller most of the browsing aids available in the software, as described in section ↑3.3, addi‐ tional browsing tools . Make sure you tag all the files extensively that you want to use often, as...
Page 103
Selecting a product category ► click on the product selector header to open it. → the product selector opens up, showing you all products available in your maschine li‐ brary. 1 2 3 the opened product selector. ( 1 ) product selector header : the header shows the selected product—if there is no sele...
Page 104
► to select a product and show only the preset files associated with it, click on the product in the list. → upon your selection, the product selector automatically closes, the product name and icon appear in the header, and the tag filter and results list below will be filtered accordingly. Product...
Page 105
The bank menu showing all banks for polyplex the bank menu allows you to select a particular bank of files for the selected product (poly‐ plex in the picture above). Banks can be additional libraries (for example massive expansions), different versions of the original factory library (for example f...
Page 106
► as with the product selection, you can remove the selected bank by clicking the little cross next to the bank name in the closed menu. Loading a product from the product selector if you wish to not only filter the results list by selecting a product, but also load the product along with its defaul...
Page 107
→ the product selector opens up and displays the following: 1 2 3 the opened product selector (for instrument presets). ( 1 ) product selector header : the header shows the product or the selected product category — if there is no selection it shows a generic label ( all instruments in the picture a...
Page 108
( 2 ) product category filter : shows the categories of the products that have files available in the maschine library. Click a category of a product to select/deselect it. Selecting a category limits the number of products shown in the product list below ( 3 ). Only one category can be se‐ lected a...
Page 109
→ the product selection is cancelled. The product selector displays the generic label corre‐ sponding to the selected file type (project, group, sound, instrument preset, effect preset or sample). The tag filter and the result list under the product selector now include files for all products. Selec...
Page 110
Similarly, some banks are split into several sub‐banks. In that case a sub‐bank menu appears un‐ der the bank menu and allows you to select a particular sub‐bank. For example, in the picture be‐ low the grain delay sub‐bank of the maschine 2.0 library bank is selected for the maschine ef‐ fect prese...
Page 111
► press either page button (left of the displays) so that the header above the three fields of knob 1–3 read product . Selecting a product, a bank, and a sub‐bank on your controller. You can then use knob 1–3 as follows: 1. Turn knob 1 to select a product. Turn the knob at full left to remove any pa...
Page 112
( 4 ) instrument plug-in presets : (.Mxinst) ( 5 ) effect plug-in presets : (.Mxfx) ( 6 ) samples : (.Wav, .Aiff) ► click the desired icon in the file type selector to display only the files of that type in the result list. → the selected icon is highlighted and the files are filtered accordingly. S...
Page 113
Types and modes filters for the massive threat bank of the massive plug‐in. ► click the desired tags in the tag filter to select them and limit the search to the files marked with them. Click the selected tags again to deselect them and broaden the search. Tags for projects, groups, sounds, and samp...
Page 114
▪ you have already selected the maschine product in the product selector, and the maschine 2.0 library bank of this product (for more information on this, see section ↑3.2.3, selecting a product category, a product, a bank, and a sub‐bank ). For now the types filter shows only top‐level tags: ▪ in o...
Page 115
▪ now imagine that you have loaded an acoustic shaker sample and want to find a sample for another drum instrument, e.G., a tom: you leave the drums tag selected at the top level of the types filter and directly go to the second level, where you select tom instead of shaker . As you select tom , the...
Page 116
If you don’t select any tag in the types or the modes filter, the result list will include all files sat‐ isfying any of their tags. Selecting multiple tags from the same level in both types and modes filter you can select multiple tags from the same level: 1. Hold [shift] on your computer keyboard ...
Page 117
Highlighted triangle next to the attributes (types and modes). Selecting type and mode tags on the maschine controller on your controller in browse mode: ► press either page button (left of the displays) so that the header above the three fields of knob 1–3 read types or types / modes . Browser sear...
Page 118
Selecting type tags on your controller (here for sounds). Selecting tags for projects, groups, sounds, and samples when browsing projects, groups, sounds or samples, the header above the three fields reads types . You can then use knob 1–3 as follows: 1. Turn knob 1 to select a type. Turn the knob a...
Page 119
The search field. ► click in the search field and type the desired text to limit the results to files containing this text. The search will be performed on the file paths, the file names, the products/banks/sub‐banks, the tags, and the properties directly as you type. If you want to search for a com...
Page 120
If the list is too long to fit in the display, use your mouse wheel or drag the scroll bar on the right to show the remaining items. The result list allows you to: ▪ select the desired file(s). ▪ load the selected file(s) into your project (or load another project). ▪ delete the selected file(s) fro...
Page 121
▪ if it is a sample, it will be loaded into the sound slot currently in focus. The sampler plug‐in will be automatically loaded in the first plug‐in slot in order to play the sample. The sample will spread over the entire velocity and note range. The file loaded will replace the object previously at...
Page 122
◦ if you drop the sounds onto an existing group, the sounds will be loaded in the empty sound slots of that group — if there are not enough empty sound slots, the sounds will be loaded in the first sound slots of the group, replacing the sounds previously loaded in these slots. ◦ if you drop the sou...
Page 123
Deleting files in the result list you can delete user files directly from the result list: 1. Right‐click ([ctrl]‐click on macos) the desired user file and select delete from the context menu. If you want to delete several files at once, first select them as described above, and right‐click ([ctrl]‐...
Page 124
Check that the desired group or sound slot is focused and/or the desired plug‐in slot is selected before loading the file from the browser to avoid loading it at the wrong place! To set the focus to a group or a sound slot, you can use group buttons a – h and the pads without leaving browse mode (se...
Page 125
3.3.1 loading the selected files automatically ► click the autoload button to enable/disable autoload. The autoload button. When autoload is enabled, any item that you select in the result list of the library pane or files pane is automatically loaded into the focused group or sound slot or into the...
Page 126
3.3.2 auditioning instrument presets when you are browsing instrument presets, a prehear button and prehear volume slider appear next to the autoload button. The prehear controls. ► click the prehear button (showing a little speaker icon) to enable/disable prehear. When prehear is enabled, you can d...
Page 127
▪ button 5 ( prev ) and 6 ( next ) do not automatically load the instrument preset they select as they usually do (see section ↑3.3.1, loading the selected files automatically ), but instead they play it back as well. ▪ to load the instrument preset, press the control encoder or button 8 ( load ). W...
Page 128
► press shift + button 6 ( prehear ) to enable/disable the prehear function. When prehear is enabled: ▪ turn knob 4 to adjust the prehear volume. ▪ the sample selected in the result list can be triggered from the pad of the focused sound or from any pad without being loaded into that sound. ▪ pressi...
Page 129
+patterns is only available when browsing groups. Loading groups with patterns using the controller when browsing groups on your controller: ► press shift + button 4 ( + pat ) to include or exclude patterns when groups are loaded. → when the option is enabled (button 4 lit and + pat label highlighte...
Page 130
The information box provides various information on the selected file(s). If the selected files have different characteristics, the corresponding fields in the information box will read multi . 3.4 using favorites in the browser favorites in the maschine browser allow you to quickly view and browse ...
Page 131
The maschine browser showing all favorite instruments tagged with the type bass. To activate the favorites filter: browser using favorites in the browser maschine ‐ オペレーション マニュアル ‐ 131.
Page 132
1. Click on the filter favorites control next to the search field to filter the results by favorites: 2. The filter favorites control is now lit and the results list shows all favorites that match the selected search criteria: adding an item to the favorites list to add an item to the favorites, fol...
Page 133
2. Click on the set favorite icon to add the corresponding item to the favorites. → the item is added to the favorites, indicated by the lit set favorite icon next to its name: you can add any item in the results list to the favorites, no matter if it is selected or not. The set favorites icon will ...
Page 134
1. Click on the lit set favorite icon to remove the corresponding item from the favorites. 2. The item is removed from the favorites, indicated by the hidden set favorite icon. The next time you select the favorites filter, the item will not be shown in the results list. Using favorites with the con...
Page 135
► the favorites filter is now activated and the results list shows all favorites that match the selected search criteria. Adding an item to the favorites to add a preset to the favorites follow the instructions below: 1. Press the browse button. 2. Select the item you want to set as a favorite by tu...
Page 136
▪ when importing folders to the maschine library from the browser’s files pane, clicking import at the bottom right of the browser automatically opens the attribute editor so you can tag the files being imported. After you have finished tagging click ok to import the files to the library and apply t...
Page 137
Displaying attributes of factory files when browsing in the library pane, if the files selected in the result list are factory files (i.E. Files from any factory content) this will be indicated by a yellow read only item label next to the edit button at the bottom of the browser: factory files are l...
Page 138
▪ the types page is available for all file types when opening the attribute editor both from the library pane and the files pane. It shows three columns (for projects, groups, sounds, and samples) or two columns (for instrument and effect presets) according to the hierarchi‐ cal levels of the type t...
Page 139
▪ in the types page, click the name of a tag to select it and display its sub‐types in the next column to the right. In each column only one tag can be selected. The selected tag is high‐ lighted: assigning tags ► click the empty check box right of the desired tag name to assign this tag to the sele...
Page 140
Adding a new sub‐type for the loops type. Deleting tags tags in the types and modes pages cannot be deleted manually. However, if a tag is not as‐ signed to any file anymore, it will be automatically removed from its column. 3.5.4 the properties page the properties page is only available when openin...
Page 141
3.6 loading and importing files from your file system the browser’s files pane allows you to browse your file system and import the desired folders to your maschine library. ► to display the files pane, click the files tab in the top left corner of the browser. 3.6.1 overview of the files pane the f...
Page 142
4 5 6 1 2 3 the elements of the files pane. ( 1 ) files tab : click the files tab to open the files pane described here. ( 2 ) favorite bar : displays all your favorites. Click any favorite to directly jump to that particular path and display its content in the result list ( 5 ). See section ↑3.6.2,...
Page 143
( 5 ) result list : the result list displays the content (files and folders) of the folder loaded in the location bar ( 3 ). Only maschine‐compatible files are displayed. See section ↑3.6.5, using the result list . ( 6 ) control bar : at the bottom of the browser, the control bar provides a few usef...
Page 144
The default favorites are the roots of each of your hard disks, your desktop folder, and your user folder. Adding and removing favorites you can add your own favorites to the favorite bar. This is done in the result list: 1. Navigate to the parent folder containing the folder you want to use as favo...
Page 145
◦ click any right-pointing arrow after a folder name to open a list of its subfolders, and select any entry in the list to jump to that folder: ◦ if all the levels cannot be displayed in the path, click the double left‐pointing arrow left of the path to display the remaining upper levels (up to the ...
Page 146
Only maschine‐compatible files are shown in the result list. The result list of the files pane. If the list is too long to fit in the display, use your mouse wheel or drag the scroll bar on the right to show the remaining items. In front of each file, an icon indicates the type of the file: icons fo...
Page 147
Navigating your file system in the result list you can further browse your file system in the result list by opening any of the displayed folder: ► double‐click a folder to display its content. To return to the previous folder or to select any folder outside the folder currently displayed, use the v...
Page 148
The context menu in the result list of the files pane (windows depicted). Following commands are available: command description add to favorites (folders only) adds the selected folder to your favorites. See section ↑3.6.2, us‐ ing favorites for more information. Import to library (folders only) imp...
Page 149
For this you will have to import the files into the library first. Importing files does not mean they will be moved from the directory they currently reside in, they will only be referenced by the browser. That’s why whenever you move files, make sure to update the paths to their respective director...
Page 150
Paths of the imported folders are added to the list of user libraries in the user pane of the library page in the preferences panel — see section ↑2.6.4, preferences – default page for more information on this. If the folder(s) you are importing contain different types of files (e.G., samples, sound...
Page 151
The missing sample dialog allows you to locate missing samples. Sounds referencing missing samples are marked with an exclamation mark. Additionally, their groups are also marked with an exclamation mark when selected. The missing sample dialog shows you which sample cannot be found. Three buttons a...
Page 152
The purge missing samples and the find missing samples entries in the context menu of a sound whose sample is missing. 1. Select purge missing samples from the sound slot’s context menu to remove the missing sample(s) from that sound. 2. Select find missing samples from the sound slot’s context menu...
Page 153
Quick browse is available for samples, plug‐ins presets (instruments and effects), sounds, groups. Depending on the type of file you are looking for, the quick browse function is activated by clicking the magnifying glass in either of the following locations: ▪ quick browse for projects, groups and ...
Page 154
◦ if any other instrument or effect plug‐in is selected, it will recall the search query used for the plug‐in preset loaded in that plug‐in (the preset name appears next to the magni‐ fying glass): upon your click on the magnifying glass, the search query for the corresponding file will be re‐ store...
Page 155
1. Press browse to enter the browser. 2. Press button 1 and 2 to select the file type corresponding to the file you have focused/se‐ lected above. 3. Press button 3 ( locate ) to trigger the quick browse function. → the browser of your controller automatically recalls the search query used for that ...
Page 156
4 managing sounds, groups, and your project this chapter explains how to handle the various objects that structure any maschine project: sounds, groups, and the master. 4.1 overview of the sounds, groups, and master in a maschine project, objects are organized into three hierarchic levels, from the ...
Page 157
1 2 the group list (1) and the sound list (2) in the arrange view of the software. 4.1.1 the sound, group, and master channels from a routing point of view, each sound, each group, and the master represents a distinct channel in maschine. The channels of the 16 sounds in a group are mixed together a...
Page 158
When the software is in mix view, sounds, groups, and the master are represented by channel strips in the mixer. This view provides you with an intuitive control on both the audio and midi routings of any sound, group, and the master. Please refer to section ↑12.2, the mixer for more information. Th...
Page 159
▪ in each group you always have a fixed number of sound slots — namely 16. Some of these sound slots might be empty, and you can have gaps in your slots (i.E. Some empty sound slots between other slots containing sounds), depending on how you prefer to play your sounds from your pads. You cannot cre...
Page 160
▪ the selection , on the other hand, determines what will be affected by your actions (e.G., ad‐ justing a parameter). For example, the focused sound (i.E. The one you clicked in the sound list) is implicitly selected — nothing special here: this just means that the sound whose pa‐ rameters are curr...
Page 161
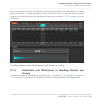
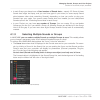
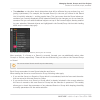
What is affected by the multiple selection, and how? When multiple sounds or multiple groups are selected, any change in the following settings of the focused sound/group will be mirrored in the other selected sounds/groups, respectively: ▪ channel properties : parameter adjustments apply to all sel...
Page 162
Action function selecting objects (sounds or groups) click unselected object selects the object and sets the focus to it. Click selected object sets the focus to this object while retaining the se‐ lection. [ctrl]‐click ([cmd]‐click on macos) unselected object adds the object to the selection. [ctrl...
Page 163
Selecting sounds and groups via the select mode. You have following selection tools at your disposal: selection tool description pads press any pad to set the focus to that particular sound slot. The pad lights up to indicate that the sound slot is focused (and selected). Unlit pads indicate unse‐ l...
Page 164
◦ pressing the group button / pad of an unselected group/sound adds it to the current group/sound selection without changing the current focus. The group button / pad lights up. ◦ pressing the group button / pad of a selected group/sound unselects it unless it is the focused group/sound. The group b...
Page 165
► click the pad view button to show or hide the pad view. → the pad view replaces the sound list on the left of the pattern editor. In the pad view, each cell represents a pad on your controller and corresponds to a sound slot in the current group. You can select sound slots in either the sound list...
Page 166
Please refer to chapter ↑3, browser for more information on the browser. Loading sounds on your controller on your controller, use the browser to load sounds: ▪ you can browse your maschine library for the desired sound. For more information on how to do this, please refer to section ↑3.2, searching...
Page 167
Setting the focus on sounds without triggering them you can also set the focus on any sound in the current group without triggering it. This comes in handy if you are in a live situation and don’t want to trigger every single sound you select. To do this, use the select mode: 1. Press and hold the s...
Page 168
4.2.4 changing the sound’s color you can change the color of each individual sound in the software. To do this: 1. Right‐click ([ctrl]‐click on macos) the desired sound slot in the sound list or in the pad view and select color from the context menu. A color palette appears. In the palette, the curr...
Page 169
Notes on changing the color of multiple sounds when opening the color palette (in order to set a new color setting for the selected sounds): ▪ if the selected sounds have the same color setting (a particular color or the default color), this color is highlighted in the color palette. ▪ if the select...
Page 170
► right‐click (on macos: [ctrl]‐click) the sound slot in the sound list or in the pad view and select save from the context menu: → your modifications are saved to the sound file. Even if you don’t save a sound individually, its current settings will still be saved with your project. But once a soun...
Page 171
► right‐click (on macos: [ctrl]‐click) the sound slot in the sound list or in the pad view and select save as… from the context menu: a save sound dialog appears. By default, the sound file inherits the name of its sound slot and it will be saved in your standard user directory (as defined in prefer...
Page 172
In the software, sounds are copied without their note content in the pattern. To include the note content in the copying operation, use duplicate on your controller (see below)! To copy and paste sounds in the software: 1. Right‐click (on macos: [ctrl]‐click) the sound slot (in the sound list or in ...
Page 173
When you copy a selection of sounds, they are both placed into the clipboard and kept in the sound list. The pasting procedure for multiple sounds is as follows: ▪ when you paste a selection of sounds onto a sound slot, the pasted sounds replace the cur‐ rent sound in that slot and in the following ...
Page 174
3. Press the pad of the sound you want to copy. The pad of the sound starts blinking. 4. Press the pad of the target sound slot (this can also be in another group, in this case first press the desired group button). → all parameters of the sound will be copied (including the pattern content for that...
Page 175
2. While holding the mouse button, drag your mouse toward the desired location in the sound list or in the pad view. As the mouse cursor moves an insertion line appears at the potential places where you can drop the sound slot(s). 3. When the insertion line appears at the desired location in the sou...
Page 176
You can select multiple sound slots to reset them all at once! See ↑4.1.3, selecting multiple sounds or groups for more information. ► to reset a sound slot, select it in the sound list or in the pad view and press [del] on your computer keyboard, or right‐click (on macos: [ctrl]‐click) the sound sl...
Page 177
Group menu many of the functions described in the following sections are available in the following two con- text menus : ▪ the context menu of the groups in the group list, opened via a right‐click ([ctrl]‐click on ma‐ cos) on the desired group: managing sounds, groups, and your project managing gr...
Page 178
▪ the context menu of the focused group in the pattern editor, opened via a right‐click ([ctrl]‐ click on macos) on the group name in the top left corner of the pattern editor: both context menus are equivalent: use either menu as you see fit. 4.3.1 creating groups creating a group will add a new em...
Page 179
▪ the focused group is indicated by the fully lit group button. ▪ the other groups of your project are indicated by half‐lit group buttons, each group button showing the color of the corresponding group. ▪ in the last group bank the last half‐lit group button is white: it doesn’t correspond to any e...
Page 180
▪ drag and drop : select the desired group in the browser or group file in your operating sys‐ tem and drag it onto the group list: ◦ drag it onto an existing group to replace this group in the group list. ◦ drag it between two groups to insert it between both. ◦ drag onto the “ + ” at the end of th...
Page 181
You can rename groups as you see fit. Naming is only available from within the software, but any changes will also show up on your controller. Group renaming is performed like sound renaming: 1. Double‐click the name of the desired group in the group list or right‐click ([ctrl]‐click on macos) the g...
Page 182
1. Right‐click ([ctrl]‐click on macos) the desired group in the group list or the group name in the top left corner of the pattern editor and select color from the context menu. A color palette appears. In the palette, the current color of the group is highlighted. 2. Select the desired color in the...
Page 183
Once you have set a custom color for a group as described above, the group will retain its color when you move it in the group list, and the color will be stored with the group when you save the group for later use. Note that you can select the same color as the one used by default: in that case the...
Page 184
Even if you don’t save a group individually, its current settings will still be saved with your project. But once a group is saved and tagged, it is available in the browser for use in other projects. You cannot save changes to factory files — these files are read‐only. If you run the save com‐ mand...
Page 185
3. Press [enter] to confirm and close the save group dialog. → your group is now saved. The group will be added to the library and is ready to be tagged in the browser — see section ↑3.5, editing the files’ tags and properties for more information on this. You can also save a group together with all...
Page 186
3. Right‐click (macos: [ctrl]‐click) any group in the group list and select paste from the con‐ text menu to replace that group with the copied one. If you want to paste the group without affecting the existing groups, first click the “ + ” under the last group to create a new empty group and paste ...
Page 187
▪ when you paste a selection of groups onto an existing group, the pasted groups replace that group and the following groups. Example : if you paste the groups a1 and b1 onto the group e2, the duplicates of a1 and b1 will replace the groups e2 and f2, respectively (if, say, f2 didn’t exist it is aut...
Page 188
4. Press the group button of your target group (this can also be in another group bank, in this case first press button 3/4 to select the group bank). If you want to paste the group with‐ out affecting the existing groups, press the dim white group button after the last colored group button to creat...
Page 189
→ the group takes its new place in the group list. This new place is also mirrored on the pads of your controller. 4.3.8 deleting groups deleting a group will remove it from the group list. It is not possible to have a project without any groups; attempting to delete the last remaining group in a pr...
Page 190
Deleting a group. Deleting a group on your controller on your controller in control mode, do the following to delete a group: ► to delete a group, hold shift + erase and press the group button of the group you want to delete. → the group is removed. All following groups are shifted left to fill the ...
Page 191
4.4.1 saving a group with its samples sometimes it is useful to have the ability to save a group with its samples outside of the ma‐ schine library. If you want to take a group to another studio or if you want to backup or share a custom drum kit with all the related files, this comes in handy. To s...
Page 192
Controls description group displays the name and location of the group file to be created. The sam‐ ples will be put in a folder with the same name in the same location. By default, the group file inherits the name of the group in the project and it will be saved in the “groups” subfolder of your st...
Page 193
1. Choose save project with samples… from the file menu or the file submenu in the ma‐ schine menu: you will be presented with the save project with samples panel: 2. In this panel, adjust the settings (see table below) and click save to confirm or close to can‐ cel the operation. Element descriptio...
Page 194
You can also save single groups with their samples. See ↑4.4.1, saving a group with its samples . 4.4.3 exporting audio use the export audio panel in the software to export as your complete arrangement as audio from the arranger view, or render individual scenes or sections as audio files in from th...
Page 195
2. Choose export audio… from the file menu or from the file submenu in the maschine menu. You will be presented with the export scenes as audio panel (see picture below). 3. Select the range and source and then the destination (see description below). 4. If you wish, adjust the export options in the...
Page 196
The export scenes as audio panel. The following parameters are available in the export audio panel, which is split into three distinct sections: source , options , and destination . Source section the source section allows you to define exactly what will be exported. Managing sounds, groups, and you...
Page 197
Element description range set the range for the audio you want to export. The options here will differ de‐ pending on whether maschine is in ideas view or arranger view. In ideas view the following options are available: all : select this option to export all scenes as audio. Selected : select this ...
Page 198
Element description options normalize check this option to normalize your audio as it is exported, i.E. The exported audio will be brought to the highest possible level without clipping (0 dbfs). Loop optimize optimize the audio file for use as a loop: check loop optimize to keep the exact loop rang...
Page 199
Element description options folder displays the folder on your hard disk where the exported audio file(s) will be saved. To change the destination folder, click the field and select the desired folder in the navigation dialog that opens. Name displays the name of the destination audio file which by ...
Page 200
Only rex2 files are currently supported. ▪ the samples are loaded into the sound slot. A new pattern is created in that group and di‐ rectly loaded in the pattern editor (switch the pattern editor to keyboard view to better see the pattern — see section ↑10.1.5, group view and keyboard view ). This ...
Page 201
Mpc parameter mpc500, 1000, 2500 mpc400 0 mpc2000 (xl) mpc300 0 maschine parameter sample level x x − − zone level sample pan − x − − zone pan range lower/higher x x − − high/low key tuning x x x x tune attack x x x x attack decay x x x x decay voice overlap x − x x polyphony filter1 type x − − − fi...
Page 202
2. Navigate to the mpc program file you want to import and double‐click it. You will be prompted with the mpc import panel: 3. In the input section of the panel, select one of the import options (see table below). 4. Click ok to start the import procedure (or cancel to close the panel without import...
Page 203
Control description import all banks select this to import all banks of the mpc program file. Each bank will be loaded into a separate group. Import one bank select this if you only want to import a single bank. Use the drop‐down menu to the right to select which bank you want to import. The list be...
Page 204
5 playing on the controller this chapter describes the numerous features available in maschine to adjust and enhance your playing, both during live performances and when recording patterns. 5.1 adjusting the pads you can optimize and fine‐tune the way the pads of your controller react to your playin...
Page 205
The pad view replaces the sound list. At the top of the pad view, the grid of pads gives you access to all sound slots of the current group. The focused pad is fully lit; other pads containing a sound are dim lit; pads without any sound are off. The following actions are available in the grid: ▪ cli...
Page 206
Parameter description key adjusts the base key for the selected pad. See section ↑5.1.3, adjusting the base key below. Choke configures the choke group for the selected pad. See section ↑5.1.4, using choke groups below. Link configures pad link for the selected pad. See section ↑5.1.5, using link gr...
Page 207
Parameter description keyboard (button 2) activates/deactivates keyboard mode . In this mode your pads play notes of the focused sound at 16 different pitches. This is well suited for melodic instru‐ ments. The right display indicates the pitches played by each pad. See the next paragraph for a deta...
Page 208
2. Now enter pad mode by holding pad mode and lock it by pressing button 1 (you can then release pad mode ). 3. Press button 2 to enter keyboard mode. → if you hit the pads now, you will hear that they all play the same sound, but each with a dif‐ ferent pitch. When you leave pad mode, the pad mode ...
Page 209
See also 2 preferences – midi page [ ➙ 67] 5.1.3 adjusting the base key in group mode, the base key defines the key (or pitch) at which the selected sound will be played when its pad is pressed. In keyboard mode, it defines the key played by pad 1 on your controller; pads 2 – 16 will then play keys ...
Page 210
Sound slots 1 to 4 are selected. If they have different key values, a multi label ap‐ pears (left). When you drag it (middle), a transpose value appears (right) that will be ap‐ plied to all selected sounds when you will release the mouse button. This is also true when adjusting the parameter from y...
Page 211
▪ if the pad is set to master (default setting) it will kill the sounds of other pads in the same choke group. ▪ if the pad is set to slave it won’t kill any other pad of the choke group — but be killed by pads set to master within the same group. You may set more than one pad as master or slave wit...
Page 212
Sound slots 1 to 4 are selected. If they have different choke values, a multi label ap‐ pears (left). When you click it and select a new choke from the list (middle), this new group is applied to all selected sounds. This is also true when adjusting the parameter from your controller. To assign the ...
Page 213
5.1.5 using link groups when your pads are in group mode, link groups allow you to link pads with each other: this can be used to trigger multiple sounds when pressing only one pad. Each pad of a group can be as‐ signed to one of eight link groups. A pad may be set as a master or slave in the link g...
Page 214
Adjusting the link parameter for multiple sounds with different link values ► click the multi label next to link and select the desired value from the list to set all select‐ ed sounds to that same link group. This also applies to the master/slave setting next to it. Sound slots 1 to 4 are selected....
Page 215
5. Release pad mode (or press it again if you pinned the mode). 5.2 adjusting the key, choke, and link parameters for multiple sounds in the software, if you select multiple sounds with different key , choke and/or link values, the corresponding parameters in pad view now display multi . On your con...
Page 216
This is also true when adjusting the parameter from your controller. Adjusting the choke or link parameter for multiple sounds with different choke or link values ► click the multi label next to choke or link and select the desired value from the list to set all selected sounds to that same choke or...
Page 217
The base key also affects the pitch of events created via the step sequencer. See section ↑10.3.1, step mode basics for more information on this. Adjusting the base key only affects the notes played by the pads of your controller. It does not affect the notes recorded in your patterns! To adjust the...
Page 218
5.4 playing tools on top of the various pad settings described in the previous section (see ↑5.1, adjusting the pads ), maschine also offers you a series of intuitive playing tools particularly useful when play‐ ing live: ▪ mute and solo allow you to selectively mute and solo sounds and groups: ↑5.4...
Page 219
(see section ↑11.1.2, configuring the main output of sounds and groups ) as well as in solo and mute mode on your controller: activating the audio mute for sounds will ensure that not only the events are muted, but any remaining audio as well. To momentarily mute all audio from all sounds and groups...
Page 220
Soloing a group. ► to unsolo a group, right‐click (on macos: [ctrl]‐click) the group index again. Muting a sound ► to mute a sound, click the number on the left side of the sound slot in the pattern editor. Muting a sound. ► to unmute the sound, click the number again. By default, the mute on sounds...
Page 221
Muting a group. ► to unmute the group, click the group index again. Mute and solo on your controller to enter solo mode on your controller: the solo mode on the controller. 1. Press and hold solo to enter solo mode. You can also press solo + button 1 to pin this mode and make it permanent. 2. Solo s...
Page 222
2. Mute sounds by pressing their pads, and mute groups of the current group bank by press‐ ing their group buttons. Press button 3 and 4 to switch to the previous/next group bank, respectively. In both solo and mute modes you will note the following: ▪ on your controller, the unmuted pads and group ...
Page 223
▪ as a workflow aid, to stop long one‐shot samples that still continue playing after you have stopped the sequencer, ▪ as a first panic button, if you are not sure where in your project a particular sound is coming from, and you want to get rid of it. Contrary to the mute function, choke all notes i...
Page 224
The groove properties for a sound in the software. The groove properties for a sound on the controller. Controls description swing section amount adjusts the amount of swing, i.E. The amount by which some events are shifted. At 0 % events are not shifted. Raise the amount value to increase the stren...
Page 225
This is how the same regular rhythm would be heard with various groove settings. The picture above only illustrates how the groove function affects the sound — adjusting the groove properties will not effectively move events in the patterns displayed in the pattern editor! 5.4.4 level, tempo, tune, ...
Page 226
Level shortcuts 1. To change the output level of the master (i.E. The overall output level of maschine), simply turn the volume knob. 2. To change the output level of a group, hold its group button (first navigate to its group bank if necessary) and turn the volume knob. 3. To change the output leve...
Page 227
3. To change the groove of an individual sound, hold its pad (or hold select + its pad if pads are in keyboard mode) and turn the swing knob. In keyboard mode you can also press select + the pad of the desired sound, then hold any pad (i.E. Any pitch of that sound) and turn the swing knob. → the adj...
Page 228
At the master level, the shortcut controls the tempo parameter in the header. The tempo parameter in the software’s header. At the group and sound level, the shortcut works only with sounds containing a sampler or a drumsynth plug‐in. The shortcuts control the tune parameter of the pitch / gate sect...
Page 229
The control signal flow—pads in keyboard mode the following diagram illustrates maschine s signal flow between your hits on the pads in key‐ board mode and the resulting sounds: the signal flow including the new perform features (scale, chord, and arp) when your pads are in keyboard mode. In this pi...
Page 230
The control signal flow—pads in group mode the following diagram illustrates signal flow between your hits on the pads in group mode and the resulting sounds: the signal flow including the perform features (note repeat, choke group, and link group) when your pads are in group mode. In this picture y...
Page 231
5.5.2 selecting a scale and creating chords maschine comes equipped with a vast amount of scales and chords that you can select and use to play your sounds. This opens up possibilities to play an instrument such as a piano ac‐ cording to, e.G., the minor pentatonic scale without hitting a “false” pa...
Page 232
1. Turn knob 3 ( chord mode ) to select harm . 2. Turn knob 4 ( chord type ) to select 1-3 . → hit a few pads: each pad triggers a chord containing the pad’s original note (the “ 1 ” in 1-3 ) and the note two pads above (the “ 3 ” in 1-3 ). No matter which pads you hit, all chords use notes within t...
Page 233
Komplete kontrol s‐series owners: input from your komplete kontrol s‐series key‐ board can also be processed by the scale and chord engine. This is described in section using the perform features. ▪ the output of the scale and chord engine is recorded into the pattern editor. ▪ the scale and chord p...
Page 234
Scale type degrees (1 = root note) minor 1 2 ♭3 4 5 ♭6 ♭7 harmonic minor 1 2 ♭3 4 5 ♭6 7 major pentatonic 1 2 3 5 6 minor pentatonic 1 ♭3 4 5 ♭7 blues 1 ♭3 4 #4 5 ♭7 japanese 1 2 ♭3 5 ♭6 freygish 1 ♭2 3 4 5 ♭6 ♭7 gypsy 1 2 ♭3 #4 5 ♭6 7 flamenco 1 ♭2 3 4 5 ♭6 7 altered 1 ♭2 ♭3 ♭4 ♭5 ♭6 ♭7 whole tone ...
Page 235
◦ harmonizer : generates chords based on the pads you hit and using notes from the se‐ lected scale, as specified by the root note and scale type parameters (see above). Use the chord type parameter to choose the particular notes to be used in the chord (see below). As the chord is triggered, pads o...
Page 236
Chord type semitones added above played note minor 7♭5 3, 6, and 10 diminished 7 3, 6, and 9 augmented 4 and 8 quartal 5, 10, and 15 trichord 5 and 11 when chord mode is set to harmonizer and scale type is set to any other scale than chro- matic , the chords are bound to the particular notes include...
Page 237
When chord mode is set to chord set , pad 1 is fully lit: type of pad led in default state led when pad triggered pad 1 fully lit flash pads 2–12 dimly lit flash pads 13–16 off (pad inactive) enharmonic spelling of the root note on your controller, depending on the scale type, chord mode, and chord ...
Page 238
▪ if chord mode is set to chord set, no notes are deleted, in other words erasing is disabled. 5.5.4 creating arpeggios and repeated notes maschine includes a flexible and versatile arp engine , an arpeggiator that effectively lets you play your sounds in note sequences. The arpeggios are created ac...
Page 239
Komplete kontrol s‐series owners: the central clock is shared by all connected devices, so that e.G. Repeated notes triggered from your maschine controller and arpeggios triggered from your komplete kontrol s‐series keyboard will be synchronized even if the transport is not running. 5.5.5 swing on n...
Page 240
5.6.1 creating a lock snapshot use the lock button to capture, update or recall a single lock snapshot. When a snapshot is created it also updates the snapshot in focus within extended lock. For more information on extended lock please read ↑5.6.2, using extended lock . To create a lock snapshot: 1....
Page 241
→ the pads change to provide an overview of all your lock snapshots. The dimly‐lit click‐pads represent your stored snapshots. The brightly lit pad represents the selected snapshot. 5.6.3 updating a lock snapshot if you have created a lock snapshot but find better settings you can update the lock sn...
Page 242
5.6.5 morphing between lock snapshots when switching between two stored snapshots you can set maschine to morph between them, adding movement and interest to a song. Within extended lock you can switch on morphing, and set the morph sync and timing parameters. To morph between your lock snapshots: 1...
Page 243
3. Press the pad containing the snapshot you want to delete. If necessary, press button 7 or 8 to access a lock snapshot from another bank. 4. Press button 6 delete to delete a snapshot. 5. Press the pad containing the snapshot you want to clear. → the snapshot is cleared. 5.6.7 triggering lock snap...
Page 244
Enabling the midi lock change to enable or disable the midi lock change feature, do the following: 1. In the maschine header, click the cog wheel icon. 2. Click midi change . 3. ▪ this opens the following dialog: ▪ click lock enabled from the dialog. 4. In the submenu that opens, select the source y...
Page 245
6. If necessary, reopen the same submenu and select the midi channel the lock changes should receive midi messages from (channel 1 by default). Midi scene change has priority over lock change. If you select the same midi source and channel for lock and scene changes, only scenes will be triggered by...
Page 246
6 working with plug-ins plug‐ins are the building blocks of all sound in maschine. They can be used at all three levels of the maschine audio routing system: in sounds, in groups, and in the master. This chapter includes various general or specific plug‐in topics: ▪ an overview of plug‐ins and how t...
Page 247
The control area displaying the content of the sound kick ordinance of the selected sound slot 1. Sounds, groups, and the master can each hold any number of plug‐ins. These are stacked up in the plug-in list , on the left of the control area. Working with plug-ins plug‐in overview maschine ‐ オペレーション...
Page 248
► to show the plug‐in list, click the little plug-in icon at the far left of the control area: in the plug‐in list, the processing order is always from top to bottom. In addition to plug‐ins, each sound, each group, and the master also provide a set of global set‐ tings called channel properties. Th...
Page 249
Instrument plug-ins effect plug-ins internal plug‐ins audio, sampler, drumsynth, bass synth maschine internal effects native instruments plug‐ ins vst/au instrument plug‐ins from na‐ tive instruments’ range of products vst/au effect plug‐ins from native in‐ struments’ range of products external plug...
Page 250
◦ external : you can also use vst/au effect plug‐ins from any third‐party manufacturers. What to load, and where the type of plug‐in that you can load depends on the selected level (sound, group or master) and slot: ▪ effect plug‐ins (both internal and external) can be loaded in all plug‐in slots at...
Page 251
The control area will now show the content (channel properties or plug‐ins) of the sound we have just selected. 2. At the far left of the control area, click the little plug icon to display the plug‐ins. This displays the plug‐in list on the left of the control area: the plug‐in list is still empty,...
Page 252
3. Click the slot with the “ + ” icon at the top of the plug‐in list. This opens the plug-in menu where you can select the desired plug‐in for loading (see be‐ low for a detailed description of the entries contained in the plug‐in menu). → upon your selection the selected plug‐in sits at the top of ...
Page 253
A few plug‐ins loaded. This down‐pointing arrow lets you open the plug‐in menu for slots already hosting a plug‐in. ► in the plug‐in list, click the down‐pointing arrow at the right of a plug‐in name to open the plug‐in menu for that slot. You can also right‐click ([ctrl]‐click on macos) the plug‐in...
Page 254
Furthermore, the plug‐in menu also allows you to replace the loaded plug-in with another one: ► to replace the plug‐in currently loaded in a slot, open its plug‐in menu and select another plug‐in in the menu. → the original plug‐in is replaced with the newly selected one. The rest of the plug‐in lis...
Page 255
Plug-in menu entry description external submenu lists the available external plug‐ins, i.E. The available vst/au instrument (first plug‐in slot of sounds only) and effect plug‐ins from third‐party man‐ ufacturers. Each entry is followed by the plug‐in type between brackets: (vst) or (au) . See secti...
Page 256
Note that the first two submenus native instruments and external only show the plug‐ins that are enabled in the plug‐ins page of the preferences panel. For more on this, see section ↑2.6.6, pref‐ erences – plug‐ins page . The edit commands ( cut , copy , and paste ) and preset management commands ( ...
Page 257
Loading a plug-in in place to load a plug‐in into the selected plug‐in slot, do the following: 1. Press shift + browse to open the plug‐in browser and browse the available plug‐ins. 2. On the left display, use knob 1 to select the type from internal , ni or external . The right display shows the lis...
Page 258
→ when you finally press the button 8 ( load ), your controller automatically switches back to control mode and the new plug‐in is loaded in the next plug‐in slot. All following plug‐ins are shifted one slot downwards to make room for the new plug‐in. Removing a plug-in to remove a plug‐in from its ...
Page 259
6.1.5 bypassing plug-in slots you can bypass (or “mute”) any plug‐in slot. When a plug‐in slot is bypassed, the plug‐in it con‐ tains is temporarily removed from the signal flow and does not process the audio passing through the slot. Instead, the incoming audio is directly sent to the next plug‐in ...
Page 260
In most cases the first plug‐in slot contains an instrument plug‐in (e.G., a sampler). Be careful: by‐ passing the slot will mute the whole sound! Bypassing a plug-in slot on the controller 1. Press the control button to enter control mode. 2. If you want to bypass a plug‐in of the master, press but...
Page 261
6.1.6 using side-chain some plug‐ins provide side‐chaining. This allows you to control their influence on the audio via another audio signal sent to their secondary, side‐chain input. This extra routing feature is descri‐ bed in details in section ↑13.1.3, using the side‐chain input . 6.1.7 moving p...
Page 262
3. Select the sound, group or the master where you want to move the plug‐in (see section ↑2.3.4, focusing on a group or a sound ). 4. Click the down‐pointing arrow of the target slot (the slot where you want to move the plug‐ in to). 5. In the plug‐in menu that opens, select paste . → the plug‐in wi...
Page 263
Way to recall plug‐ins with their parameters already set to specific values. In addition a plug‐in preset can be assigned as the default preset so the plug‐in opens with that preset automatically loaded. The maschine file format for native instruments plug‐ins allows you to save a preset in the for‐...
Page 264
The commands for saving and recalling plug‐in presets in the plug‐in menu. Plug-in menu entry description save saves your changes to the preset currently loaded. Save as… saves the current plug‐in settings as a new preset on your hard disk. Save as default… saves the current settings and assignments...
Page 265
Recalling plug-in presets all plug‐in presets you saved using the plug‐in menu are available in the browser, both in the software and from your controller. You can find each plug‐in preset automatically placed in the corresponding “instrument” or “effect” category in the file type selector of the br...
Page 266
2. Click the plug‐in drop‐down menu. 3. Click remove default preset in the menu to remove the default preset. → the default plug‐in preset is removed and the plug‐in will load with its initialized settings next time it is opened. You can also use the plug‐in manager in the preferences panel to gain ...
Page 267
Many of these parameters can be modulated and automated! For more information, see section ↑10.5, recording and editing modulation and ↑11.2.3, controlling parameters via midi and host automation , respectively. In case maschine cannot find the sample(s) loaded in a sampler plug‐in, a missing sample...
Page 268
6.2.1 page 1: voice settings / engine sampler parameters – page 1 of 6: voice settings and engine on the controller. Sampler parameters – page 1 of 6: voice settings and engine in the software. Parameter description voice settings polyphony here you can define a voice limit for the sound, that is th...
Page 269
Parameter description engine mode this allows you to select between different models for the sampling engine. Be‐ sides the default standard setting, the other options mp60 and s1200 emulate the sound of two legendary samplers that are often used in hip‐hop and similar genres of music. The latter co...
Page 270
Parameter description reverse if reverse is activated, the sample will be played backwards. Type selects from three different types of amplitude envelopes. See below for more information. Amplitude envelope the amplitude envelope section allows you to tailor your sample in terms of its loudness over...
Page 271
▪ ahd : ahd mode disables the sustain and release controls of the adsr envelope (see be‐ low), and replaces them with the hold parameter. Ahd mode is ideal for “fire and forget” be‐ havior, whereby you would like to have the sound trigger for a certain amount of time regard‐ less of how long you hol...
Page 272
Parameter description sustain (adsr only) sustain determines the constant level being kept after decay until the note ends. This can also be controlled by an external midi controller or keyboard us‐ ing the midi control change 64. Release (adsr only) release determines how long the sound takes to fa...
Page 273
Parameter description sr sr stands for “sample rate”: you can use it to lower the original sample rate in order to make the sound more lo‐fi. Bits allows you to lower the original bit depth of the sound, resulting in a more rough, digital sounding lo‐fi effect. Filter the filter selector in the filt...
Page 274
Sampler parameters – page 4 of 6: modulation envelope and destination in the software. Modulation envelope the modulation envelope section offers an additional envelope allowing further modification (or “modulation”) of specific sampler parameters according to the way you play on the pads. Its param...
Page 275
Parameter modulation destination pitch tune parameter of the pitch / gate section on the pitch / envelope page (page 2). Cutoff cutoff parameter of the filter section (with filter types lp2 , hp2 , bp2 only) on the fx / filter page (page 3). Drive drive parameter of the fx section on the fx / filter...
Page 276
Lfo controls description type here you can choose the shape of the lfo waveform. Available shapes are sine , tri (triangle), rect (rectangle), saw , and random . Speed controls the rate of the lfo measured in hertz (hz). If you choose to synchron‐ ize the speed by activating sync , it will show note...
Page 277
6.2.6 page 6: velocity / modwheel sampler parameters – page 6 of 6: velocity destination and modwheel destination on the controller. Sampler parameters – page 6 of 6: velocity destination and modwheel desti‐ nation in the software. Velocity destination this section allows you to use the input veloci...
Page 278
Parameter modulation destination cutoff cutoff parameter of the filter section (with filter types lp2 , hp2 , bp2 only) on the fx / filter page (page 3). Volume this allows you to modulate the volume, which is what velocity normally is used for. Modwheel destination here you can determine how incomi...
Page 279
6.3.1 opening/closing plug-in windows when you load a native instruments or external plug‐in into a plug‐in slot, you can open a float‐ ing window containing the user interface of that native instruments or third‐party instrument/ef‐ fect. Plug‐ins of native instruments platform products (reaktor, k...
Page 280
When a native instruments or external plug‐in has been loaded into a plug‐in slot, a little diagonal arrow appears left of the parameter pages’ tabs, at the top of the control area: the little diagonal arrow next to the parameter pages’ tabs. ► to open or close the floating window of a native instru...
Page 281
Tween default and additional view by clicking the “ + ” button in the plug‐in header: these views are also available in the plug‐in’s panel in the plug‐in strip (mix view in the soft‐ ware). For more information, please refer to section ↑12.4.4, custom panels for native in‐ struments plug‐ins . ▪ ed...
Page 282
▪ you can step through the parameter pages and tweak each parameter on your controller via the usual workflow directly after loading the native instruments or external plug‐in (see sec‐ tion ↑2.3.6, navigating channel properties, plug‐ins, and parameter pages in the control area ). ▪ the plug‐in par...
Page 283
Parameter pages may be assigned automatically using auto-mapping (see section ↑6.3.2, using the vst/au plug‐in parameters above) or created individually via learn mode . With learn mode, you can create custom pages containing only the desired parameters arranged to fit your per‐ sonal workflow. More...
Page 284
→ the pages tab lights up and the pages pane appears on its right. You are now ready to as‐ sign parameters to the parameter pages. The pages tab can be clicked only for native instruments or external plug‐ins and for the macro properties. For all other plug‐ins and channel properties, parameters an...
Page 285
( 3 ) add page button (“+” symbol) : click the little “ + ” after the last page label to append a new page. By default, pages are labeled “page 1,” “page 2,” etc. You can change page labels by defin‐ ing sections within your pages via the section label fields ( 2 ) — see above. ( 4 ) focus frame : i...
Page 286
The parameter slots’ context menu. The context menu contains following items: menu item description keyboard shortcuts rename rename the parameter. Ctrl + r / cmd + r learn activates the learn mode. Reset reset the parameter. Cut cut the parameter to paste it in another po‐ sition. Ctrl + x / cmd + ...
Page 287
The parameter pages’ context menu. The context menu contains the following items: menu item description keyboard shortcuts delete deletes current page with all assignments. Clear all clears all the assignments, and deletes all of the pages. 6.3.4 using vst/au plug-in presets for some of your native ...
Page 288
The factory content by clicking the ni logo on the right, then choosing the desired ni product in the drop‐down list underneath — and of course, you will find all these presets in the same loca‐ tions in the browser on your controller. You can also add to the maschine library the user presets you mi...
Page 289
Each vst/au instrument or effect might handle its presets (or patches, programs…) differently. Please refer to the plug‐in documentation to find out how to reveal its presets (or a particular set of presets) to the host. For example, in massive, absynth 5, and fm8, you need to enable the program lis...
Page 290
▪ the plug‐in’s first output pair is inserted in the usual plug‐in signal chain: this output pair is fed into the input of the next plug‐in slot (or sent to the channel output if the plug‐in is in the last plug‐in slot). ▪ the plug‐in’s additional outputs are made available as audio sources for othe...
Page 291
7 using the audio plug-in the audio plug‐in can playback samples (drums, percussion, basslines, guitar riffs, etc.) in sync with the tempo of your project. It has two modes: loop mode and gate mode. ▪ loop mode is the default setting where the loaded loop will play continuously whenever there is an ...
Page 292
Loading the audio plug-in the audio plug‐in can be loaded onto any sound within a group. As a maschine plug‐in, it sup‐ ports all usual plug‐in workflows. Hence, to know how to load, remove, replace, insert, move, copy/paste the audio plug‐in, as well as how to adjust the audio plug‐in parameters an...
Page 293
Element description tune transpose the tune (range: ‐36 – +36 semitones) of the audio plug‐in. You can use this knob to set the playback pitch of the loop to 'c', and then the loop's pitch will match the pitch of notes programmed into the pattern. To increase the tuning of the sample in semitones, t...
Page 294
7.1 loading a loop into the audio plug-in you can use the sampler plug‐in to record sound directly from a microphone, or from an electric instrument (such as an electric guitar) connected to your soundcard, to create your own loops. Alternatively, you can quickly audition loops within the maschine l...
Page 295
By default the audio plug‐in will playback in loop mode, meaning the sample will be repeated for the duration of the pattern regardless of the length of the sample. If you want to chop the loop and pitch it, switch to gate mode. For more information on gate mode, refer the following sec‐ tion ↑7.2, ...
Page 296
The audio plug‐in with a bass recording in loop mode. 7.3 using gate mode gate mode is used to chop and pitch selected parts of your sample by applying midi note events in the keyboard view of the pattern editor or by recording them using your controller. Each event is a gate for the sample; the len...
Page 297
Gate mode in the pattern editor with a sample and midi events. The process of using gate mode is as follows; load a loop onto a sound, select gate mode from the parameters of the audio plug‐in and then add midi events in the pattern in the regions where you want to chop and pitch your sample, or pre...
Page 298
8 using the drumsynths drumsynths are a powerful set of monophonic internal instrument plug‐ins (i.E. Instrument plug‐ ins included with maschine) that allow you to generate individual, fine‐tuned drum sounds for your music productions. Like any other instrument plug‐in, you can load them only in th...
Page 299
Managing drumsynths drumsynths are maschine plug‐ins and, as such, they support all usual plug‐in actions and pro‐ cedures. Hence, to know how to load, remove, replace, insert, move, copy/paste drumsynths, as well as how to adjust the drumsynth parameters and load/save presets, please refer to secti...
Page 300
◦ the advanced page provides access to more complex and finer adjustments to the drum sounds. ◦ the modulation page allows to adjust the playability of the drum by setting its velocity response. ▪ the main page always starts with a main section . The other sections on the page differ with each drums...
Page 301
▪ in the top part of the panel you can adjust the tune parameter, select the desired engine, ad‐ just the velocity response, and adjust the decay parameter (or the filter parameter for the shaker engine of the percussion). ▪ in the bottom part of the panel you find the other parameters adjusting the...
Page 302
The overall velocity sensitivity for both acoustic and electronic types of engines can be adjusted on the modulation page via the velocity control. 8.1.5 pitch range, tuning, and midi notes all drumsynths can be played chromatically: the pitch of the sound will be affected by the notes that you play...
Page 303
The kick panel in the plug‐in strip. As in every drumsynth, the engine can be selected via the engine selector on the main page. Each engine has a different character and set of parameters, as detailed in the following sec‐ tions. The kick provides following engines: ▪ sub (default): ↑8.2.1, kick – ...
Page 304
▪ push : ↑8.2.9, kick – push . For more information on engines, see ↑8.1.1, engines: many different drums per drumsynth . For general information on the kick and the other drumsynths, see ↑8.1, drumsynths – general han‐ dling . 8.2.1 kick – sub the sub engine is the default engine of the kick. Based...
Page 305
Element description bend adjusts the amplitude of the pitch envelope applied throughout the sound du‐ ration (punch), measured as a percentage. Available values range from 0.0 to 100.0 % (default: 6,8 %). At zero, the sound stays at its original pitch during its entire decaying phase. As the bend va...
Page 306
Element description scale section velocity adjusts the velocity response of the drum. Available values range from ‐100.0 % to 100.0 % (default value). At zero (mid course), the drum is played at full velocity, no matter how hard you hit the keys (or pads). From that mid position, by turning the knob...
Page 307
Element description decay adjusts the duration of the sound’s tail, measured as a percentage. Available values range from 0.0 to 100.0 % (default: 50.0 %). Bend adjusts the amount of pitch envelope applied throughout the sound duration, measured as a percentage. Available values range from 0.0 to 10...
Page 308
Modulation page as with all other engines and drumsynths, the modulation page contains one parameter: velocity . Element description scale section velocity adjusts the velocity response of the drum. Available values range from ‐100.0 % to 100.0 % (default value). At zero (mid course), the drum is pl...
Page 309
Element description impact adjusts the amount of attack and click, measured as a percentage. Available values range from 0.0 % (soft attack) to 100.0 % (maximum attack). The de‐ fault value is 75.0 %. Character section filter adjusts the timbre of the drum, measured as a percentage. Available values...
Page 310
The parameters described below are presented as they appear in the control area (arrange view). The same parameters are available in the plug‐in panel within the plug‐in strip (mix view) — for more information please refer to section 9.4 “the plug‐in strip” in the maschine 2.0 manual. Main page elem...
Page 311
Element description grind adjusts the grittiness of the “aero” component of the sound, measured as a percentage. Available values range from 0.0 to 100.0% (default: 45.0%). Low values produce a boomy reverberation. High values result in a crushed, digital “air” squashed into the drum sound. Note tha...
Page 312
The parameters described below are presented as they appear in the control area (arrange view). The same parameters are available in the plug‐in panel within the plug‐in strip (mix view). See ↑12.4, the plug‐in strip for more information on this. Main page element description main section engine sel...
Page 313
Modulation page as with all other engines and drumsynths, the modulation page contains one parameter: velocity . Element description scale section velocity adjusts the velocity response of the drum. Available values range from ‐100.0 % to 100.0 % (default value). At zero (mid course), the drum is pl...
Page 314
Element description snap emulates the air movement caused by the beater before the drum is hit. Therefore, it produces a snap in the waveform the length of which can be controlled through this parameter. Available values range from 0.0 to 100.0 % (default: 50.0 %). Impact adjusts how hard the drum i...
Page 315
8.2.7 kick – bold the bold kick is an acoustic bass drum emulation that provides an aggressive character and a punchy and dirty sound. It is capable of a range of sounds, from rock‐like kicks to more snappy and tight sub‐kicks. The parameters described below are presented as they appear in the contr...
Page 316
Element description scale section velocity adjusts the velocity response of the drum. Available values range from ‐100.0 % to 100.0 % (default value). At zero (mid course), the drum is played at full velocity, no matter how hard you hit the keys (or pads). From that mid position, by turning the knob...
Page 317
Element description skin tune adjusts the fine‐tuning of the skin of the drum, measured as a percentage. Available values range from 0.0 to 100.0 % (default: 50.0 %). Impact adjusts how hard the drum is hit, measured as a percentage. Available values range from 0.0 % (softest) to 100.0 % (hardest). ...
Page 318
8.2.9 kick – push the push kick is an acoustic bass drum emulation that provides an aggressive and brazen sound. It is essential for mixes where a dirty, tight and powerful kick is required. Its versatility also allows for noisy and clicky kicks. The parameters described below are presented as they ...
Page 319
Element description scale section velocity adjusts the velocity response of the drum. Available values range from ‐100.0 % to 100.0 % (default value). At zero (mid course), the drum is played at full velocity, no matter how hard you hit the keys (or pads). From that mid position, by turning the knob...
Page 320
The snare panel in the plug‐in strip. As with every drumsynth, the engine can be selected via the engine selector on the main page. Each engine has a different character and set of parameters, as detailed in the following sec‐ tions. The snare provides following engines: ▪ volt (default): ↑8.3.1, sn...
Page 321
▪ iron : ↑8.3.8, snare – iron ▪ clap : ↑8.3.9, snare – clap for more information on engines, see ↑8.1.1, engines: many different drums per drumsynth . For general information on the snare and the other drumsynths, see ↑8.1, drumsynths – general han‐ dling . 8.3.1 snare – volt the volt engine is the ...
Page 322
Element description osc mode selects the oscillator mode: if you select tonal (default), the engine uses two oscillators running in parallel, the higher of which is extra sensitive to velocity for increased expressivity. If you select punchy , the engine uses one oscillator with a pitch envelope. Os...
Page 323
8.3.2 snare – bit the bit snare is a thin, harsh, digital snare. The parameters described below are presented as they appear in the control area (arrange view). The same parameters are available in the plug‐in panel within the plug‐in strip (mix view). See ↑12.4, the plug‐in strip for more informati...
Page 324
Modulation page as with all other engines and drumsynths, the modulation page contains one parameter: velocity . Element description scale section velocity adjusts the velocity response of the drum. Available values range from ‐100.0 % to 100.0 % (default value). At zero (mid course), the drum is pl...
Page 325
Element description bend adjusts the pitch sweep of the sound, measured as a percentage. Available values range from ‐100.0 % to 100.0 % (default: 0.0 %). Focus adjusts the attack of the sound as well as the speed and shape of the pitch envelope, to produce a different quality of attack and sharpnes...
Page 326
Main page element description main section engine selects the engine used in the snare plug‐in. If you change this setting, please refer to ↑8.3, the snares . Tune adjusts the pitch of the drum played by the middle c, measured as a percent‐ age. Available values range from 0.0 % to 100.0 % (default:...
Page 327
Element description scale section velocity adjusts the velocity response of the drum. Available values range from ‐100.0 % to 100.0 % (default value). At zero (mid course), the drum is played at full velocity, no matter how hard you hit the keys (or pads). From that mid position, by turning the knob...
Page 328
Element description skin tune adjusts the fine‐tuning of the skin of the drum, measured as a percentage. Available values range from 0.0 to 100.0 % (default: 50.0 %). Impact adjusts how hard the drum is hit, measured as a percentage. Available values range from 0.0 % (softest) to 100 % (hardest). Th...
Page 329
Element description scale section velocity adjusts the velocity response of the drum. Available values range from ‐100.0 % to 100.0 % (default value). At zero (mid course), the drum is played at full velocity, no matter how hard you hit the keys (or pads). From that mid position, by turning the knob...
Page 330
Element description skin tune adjusts the fine‐tuning of the skin of the drum, measured as a percentage. Available values range from 0.0 to 100.0 % (default: 50.0 %). Impact adjusts how hard the drum is hit, measured as a percentage. Available values range from 0.0 % (softest) to 100.0 % (hardest). ...
Page 331
Element description scale section velocity adjusts the velocity response of the drum. Available values range from ‐100.0 % to 100.0 % (default value). At zero (mid course), the drum is played at full velocity, no matter how hard you hit the keys (or pads). From that mid position, by turning the knob...
Page 332
Element description skin tune adjusts the fine‐tuning of the skin of the drum, measured as a percentage. Available values range from 0.0 to 100.0 % (default: 50.0 %). Impact adjusts how hard the drum is hit. Available values range from 0.0 % (softest) to 100.0 % (hardest). The default value is 75.0 ...
Page 333
Element description scale section velocity adjusts the velocity response of the drum. Available values range from ‐100.0 % to 100.0 % (default value). At zero (mid course), the drum is played at full velocity, no matter how hard you hit the keys (or pads). From that mid position, by turning the knob...
Page 334
Element description impact adjusts how hard the drum is hit, measured as a percentage. Available values range from 0.0 % (softest) to 100.0 % (hardest). The default value is 75.0 %. Body adjusts the level of the snare body independently from level of the snare wires, which is adjusted on the advance...
Page 335
8.3.9 snare – clap a stalwart of electronic music, the classic analog clap never really sounded like a group of people clapping ‐ but that makes it all the more iconic! The parameters described below are presented as they appear in the control area (arrange view). The same parameters are available i...
Page 336
Element description scale section velocity adjusts the velocity response of the drum. Available values range from ‐100.0 % to 100.0 % (default value). At zero (mid course), the drum is played at full velocity, no matter how hard you hit the keys (or pads). From that mid position, by turning the knob...
Page 337
Element description skin tune adjusts the fine‐tuning of the skin of the drum, measured as a percentage. Available values range from 0.0 to 100.0% (default: 50.0%). Impact adjusts the amount of click or initial attack, measured as a percentage. Availa‐ ble values range from 0.0 to 100.0% (default: 7...
Page 338
Element description scale section velocity adjusts the velocity response of the drum. Available values range from ‐100.0% to 100.0% (default value). At zero (mid course), the drum is played at full velocity, no matter how hard you hit the keys (or pads). From that mid po‐ sition, by turning the knob...
Page 339
The hi‐hat panel in the plug‐in strip. As in every drumsynth, the engine can be selected via the engine selector on the main page. Each engine has a different character and set of parameters, as detailed in the following sec‐ tions. The hi‐hat provides following engines: ▪ silver (default): ↑8.4.1, ...
Page 340
For more information on engines, see ↑8.1.1, engines: many different drums per drumsynth . For general information on the snare and the other drumsynths, see ↑8.1, drumsynths – general han‐ dling . 8.4.1 hi-hat – silver the silver engine is the default engine of the hi‐hat. A classic analog hi‐hat t...
Page 341
Element description color adjusts the center frequency of the filter applied to the sound, measured in hertz. Available values range from 932.3 hz to 16.7 khz (default: 7.4 khz). The default position gives a standard metallic analog hi‐hat. Colored down, the sound is much more melodic and in the mid...
Page 342
8.4.2 hi-hat – circuit similar to the silver hi‐hat, the circuit hi‐hat uses a more complex oscillator for a more digital, ro‐ botic sound. The parameters described below are presented as they appear in the control area (arrange view). The same parameters are available in the plug‐in panel within th...
Page 343
Element description color adjusts the center frequency of the filter applied to the sound, measured in hertz. Available values range from 932.3 hz to 16.7 khz (default: 7.4 khz). The default position gives a standard metallic analog hi‐hat. Colored down, the sound is much more melodic and in the mid...
Page 344
Element description scale section velocity adjusts the velocity response of the drum. Available values range from ‐100.0 % to 100.0 % (default value). At zero (mid course), the drum is played at full velocity, no matter how hard you hit the keys (or pads). From that mid position, by turning the knob...
Page 345
Element description gate when enabled, the decay of the cymbal is choked by the end of the note. When disabled (default), the cymbal plays as a one‐shot sound, i.E. Until the end of its tail, no matter when the note is released, although the sound dura‐ tion will still depend on the decay parameter ...
Page 346
8.4.4 hi-hat – hybrid the hybrid hi‐hat is an acoustic emulation with a distinctive sound, crossing over from acoustic to electronic timbres. It provides authentic acoustic features such as sizzling available through the rattle parameter, and special electronic characteristics provided by the metall...
Page 347
Advanced page element description hybrid section bend adjusts the amount of a pitch envelope for sound design purposes. It is a bi‐ polar control ranging from ‐100.0 to 100.0% (default: 0.0%) rattle adjusts the amount of sizzling from the hi‐hat. It is more noticeable with long decays. Available val...
Page 348
With a single hi‐hat plug‐in, you could also recreate an open‐closed hi‐hat behavior by disabling gate and modulating the decay in your pattern. This rather advanced task might give you even fi‐ ner control over the duration of your various hi‐hat sounds, and thereby help you to give your hi‐ hat tr...
Page 349
The tom panel in the plug‐in strip. As in every drumsynth, the engine can be selected via the engine selector on the main page. Each engine has a different character and set of parameters, as detailed in the following sec‐ tions. The tom provides following engines: ▪ tronic (default): ↑8.5.1, tom – ...
Page 350
8.5.1 tom – tronic the tronic engine is the default engine of the tom. A fat, analog‐style tom with two tunable oscillators plus a tunable fm oscillator. The parameters described below are presented as they appear in the control area (arrange view). The same parameters are available in the plug‐in p...
Page 351
Element description harmonics section interval adjusts the interval between the two oscillators, measured in semitones and cents. Available values range from ‐0.50 to 13.50 (default: 6.50). At low values the oscillators are tuned close together, giving a detuned sound which can be used for basslines...
Page 352
8.5.2 tom – fractal the fractal tom is a modern electronic tom with a broad sonic range from pure and analog‐ sounding through organic and percussive through bell‐like to totally alien. It uses a tone oscillator and a feedback oscillator bank (like the one used in the fractal engine of the percussio...
Page 353
Element description color adjusts a simple filter which affects the brightness of the sound. Available val‐ ues range from 0.0 to 100.0 % (default: 50.0 %). Glide the tuning of the fractal tom is locked for each note; in other words the change in tuning is applied only when a new note is received. W...
Page 354
Element description freq b adjusts the pitch of oscillator b within the feedback oscillator bank, measured as a percentage. Available values range from 0.0 to 100.0 % (default: 75.0 %). Note that this control has no effect when fm and am are set to zero (see be‐ low). Fm adjusts the amount of freque...
Page 355
The parameters described below are presented as they appear in the control area (arrange view). The same parameters are available in the plug‐in panel within the plug‐in strip (mix view). See ↑12.4, the plug‐in strip for more information on this. Main page element description main section engine sel...
Page 356
Advanced page for this engine the advanced page does not contain any parameters. Modulation page as with all other engines and drumsynths, the modulation page contains one parameter: velocity . Element description scale section velocity adjusts the velocity response of the drum. Available values ran...
Page 357
Element description tune adjusts the pitch of the drum played by the middle c, measured in midi note numbers and cents. Available values range from 57.00 ( note a2 ) to 71.00 ( note b3 ). The default value is 57.00. Decay adjusts the duration of the sound’s tail, measured as a percentage. Available ...
Page 358
The percussion in the control area (main page depicted). The percussion panel in the plug‐in strip. As in every drumsynth, the engine can be selected via the engine selector on the main page. Each engine has a different character and set of parameters, as detailed in the following sec‐ tions. Using ...
Page 359
The percussion provides following engines: ▪ fractal (default): ↑8.6.1, percussion – fractal . ▪ kettle : ↑8.6.2, percussion – kettle . ▪ shaker : ↑8.6.3, percussion – shaker . For more information on engines, see ↑8.1.1, engines: many different drums per drumsynth . For general information on the s...
Page 360
Element description tune hold when tune hold is enabled, the tuning behavior is that of the fractal tom: the tuning is fixed until the next note is received (see ↑8.5.1, tom – tronic ). This allows you to create arpeggiated patterns by adjusting the tune parameter while a sequence of notes is playin...
Page 361
Element description freq b adjusts the pitch of oscillator b within the feedback oscillator bank, measured as a percentage. Available values range from 0.0 to 100.0 % (default: 50.0 %). Note that this parameter has no effect when fm and am are set to zero (see below). Freq c adjusts the pitch of osc...
Page 362
8.6.2 percussion – kettle the kettle percussion is an acoustic timpani emulation that provides an orchestral and rich sound. The parameters described below are presented as they appear in the control area (arrange view). The same parameters are available in the plug‐in panel within the plug‐in strip...
Page 363
Modulation page as with all other engines and drumsynths, the modulation page contains one parameter: velocity . Element description scale section velocity adjusts the velocity response of the drum. Available values range from ‐100.0 % to 100.0 % (default value). At zero (mid course), the drum is pl...
Page 364
Element description filter adjusts the bandwidth of the filter applied to the noise source, measured as a percentage. Higher settings result in a wider filter. Lower settings result in a narrower filter, measured as a percentage. Available values range from 0.0 to 100.0 % (default: 70.0 %). Grain ad...
Page 365
Element description fill (performer mode only) the fill parameter is designed to be set to none by default and played man‐ ually during performance or automated in the sequencer. By default, the shak‐ er plays a pattern according to the rate parameter on the advanced page (see below). When the fill ...
Page 366
Element description offset adjusts the timing offset of the shaker pattern. Fine adjustment will shift the pattern slightly, by less than one note division, affecting the feel of the shaker pattern in relation to the beat. Coarse adjustment will shift the pattern by en‐ tire note divisions, allowing...
Page 367
8.7 the cymbals the cymbal drumsynth can generate a variety of cymbal sounds. The crash engine selected for the cymbal in the control area (main page depicted). Using the drumsynths the cymbals maschine ‐ オペレーション マニュアル ‐ 367.
Page 368
The crash engine selected on the cymbal panel in the plug‐in strip. As in every drumsynth, the engine can be selected via the engine selector on the main page. Each engine has a different character and set of parameters, as detailed in the following sec‐ tions. The cymbal provides following engines:...
Page 369
Element description impact adjusts the amount of click or initial attack, measured as a percentage. Availa‐ ble values range from 0.0 to 100.0% (default: 70.0%). Width adjusts the perceived stereo image, measured as a percentage. At zero the sound is mono, at 100.0% the sound is a wide stereo image,...
Page 370
8.7.2 cymbal – ride the ride engine is an acoustic emulation that allows the cymbal to be hit in many different ways through the use of the edge and bell parameters. The sonic palette ranges from soft jazz‐like rides to more noisy cymbals. The parameters described below are presented as they appear ...
Page 371
Element description edge adjusts the point where the cymbal is hit, measured as a percentage. Hitting the edge of the cymbal (100%) creates a more chaotic sound, hitting it near the center (0.0%) creates a more high‐pitched sound. Available values range from 0.0 to 100.0% (default: 50.0%) bell adjus...
Page 372
9 using the bass synth bass synth is an internal fun and easy to use monophonic synthesizer module that allows you to quickly create expressive basslines. Like any other instrument plug‐in, load it into the first plug‐in slot of a sound to gain full control over its parameters in the control panel o...
Page 373
Managing the bass synth bass synth is a maschine plug‐in and, as such, supports all usual plug‐in actions and proce‐ dures. Hence, to know how to load, remove, replace, insert, move, copy/paste a bass synth, as well as how to adjust the bass synth parameters, and load/save presets, please refer to s...
Page 374
Common layout in the plug-in strip (mix view) in mix view, the plug‐in panel of the bass synth in the plug‐in strip provides easy access to pa‐ rameters and visualization of the oscillator waveform: the bass synth layout in the plug‐in strip. ▪ in the top row of the panel are the envelope mod. Amt. ...
Page 375
Main page element description osc section shape adjusts the waveform shape continuously from sine to square. To adjust the waveform shape, turn the shape knob by clicking and dragging upwards or downwards. The waveform shape can be viewed in the plug‐in strip of the mix view. Octave transposes the b...
Page 376
Element description note section glide time adjusts the time it takes to glide from one pitch to the next (range: 10 ms – 1000 ms). To adjust the amount of glide time, turn the glide time knob by clicking and dragging upwards or downwards. Advanced page for this module the advanced page contains jus...
Page 377
10 working with patterns creating a pattern is where the fun starts, because the sequencer really is the core of ma‐ schine. Both your controller and the software provide you with many powerful tools to create and edit your own beats. This chapter is organized as follows: ▪ general points on pattern...
Page 378
2 4 7 11 6 5 8 9 10 14 13 12 15 1 3 the pattern editor (group view depicted). ( 1 ) group view button : click this button to switch to group view. See section ↑10.1.5, group view and keyboard view . ( 2 ) keyboard view button : click this button to switch to keyboard view. See section ↑10.1.5, group...
Page 379
( 6 ) pattern manager button : opens/closes the pattern manager. The pattern manager gives you access to various management commands for your patterns. Notably, it allows you to select the pattern you want to edit in the pattern editor and use in the current scene of the arranger. It also provides v...
Page 380
It horizontally to zoom in/out while keeping the opposite border of the display at a fixed position in the pattern. Double‐click the main part of the bar to reset the zoom and display the entire pat‐ tern. In keyboard view ( 2 ) you will find a vertical zooming scroll bar with similar functionality ...
Page 381
1 2 3 the zooming scroll bar at the bottom of the pattern editor. Use the horizontal zooming scroll bar as follows: ▪ click the main part ( 1 ) of the scroll bar and hold the mouse button, then: ◦ drag your mouse horizontally to scroll through the event area on the time axis (common scroll bar behav...
Page 382
For more information on the group and keyboard view, see section ↑10.1.5, group view and key‐ board view . You can also adjust the height of the pattern editor in order to display more/less sound slots at once by resizing the arranger above — see section ↑15.1.1, navigating the arranger . Navigating...
Page 383
The follow function affects both the pattern editor and the arranger simultaneously (see section ↑15.1.2, following the playback position in your project for more information on the follow function in the arranger). Following the playback position on the controller to follow the playhead position in...
Page 384
10.1.4 jumping to another playback position in the pattern you can use the timeline above the event area to set the playback to the desired position. For example, this can be useful to check a particular transition between events in your pattern with‐ out waiting for the whole loop range to be loope...
Page 385
For more information on the step grid, see section ↑10.1.7, adjusting the step grid and the nudge grid . ▪ if playback is on, the playhead jumps to the closest position near your mouse cursor that re‐ tains the current playhead position relative to the pattern grid division. This allows seamless jum...
Page 386
► click the group view button (showing little rows) on the left of the pattern editor to switch it to group view: in group view each row of the event area represents a different sound slot. In group view, the pattern editor shows the events for all sounds in the group. This view is well suited for r...
Page 387
→ the event area now only shows notes for the selected sound. By adding or editing notes, you can choose their pitch in semitones depending on where you place them on the vertical axis, the lowest note being the lowest row. In keyboard view, the pattern editor shows all notes for a particular sound....
Page 388
See ↑5.1.1, the pad view in the software for more details on the various pad modes available on your controller. 10.1.6 adjusting the arrange grid and the pattern length the arrange grid defines regularly spaced‐out timings notably used in following situations: ▪ adjusting the pattern length (see be...
Page 389
Adjusting the pattern length you can adjust the length of your patterns to fit your needs. The pattern length is measured in bars and beats, and patterns can be up to 256 bars long. When you create a new empty pattern (see ↑10.7.3, creating patterns ), the pattern has the default length as defined i...
Page 390
Adjusting the pattern length on the controller in pattern mode you can adjust both the pattern length of the current pattern: 1. Press and hold pattern to enter pattern mode. You can also press pattern + button 1 to pin pattern mode so you can release pattern (see ↑2.3.2, pinning a mode on the con‐ ...
Page 391
Adjusting the grid using record prepare mode this extra method is very useful if you are about to start a new recording. Indeed, the record prepare mode (accessed by pressing the unlit rec button and holding it) is tightly integrated into the recording workflow of control mode. For all details pleas...
Page 392
Regardless of the current step grid resolution, the gray lines on the beats (quarter notes) and the black lines on the bars (notes) are always visible in the event area. Enabling or disabling the step grid ► to enable or disable the step grid, click the step grid button (showing a little grid icon) ...
Page 393
▪ by default, the nudge grid resolution is half a step, meaning that events will be nudged by half a step at a time. ▪ if you set the nudge grid resolution to a full step, the nudge grid will mirror the step grid and you can nudge events with the same resolution as when creating or quantizing events...
Page 394
Enabling/disabling and adjusting the step grid to change the step grid resolution: 1. Hold grid to enter grid mode. 2. Press button 4 ( step ) to access the step and nudge grid settings. The right display will show you which pad represents a resolution: 3. Select a step size by pressing the correspo...
Page 395
10.2 recording patterns in real time this section describes the various ways, features, and aids available on your controller to record patterns as you play them in real time: ▪ the most common method is called overdub recording. Alternatively you can use replace re‐ cording. Both are described in s...
Page 396
1. Press play to start the sequencer. The play button lights up. 2. Press rec to begin recording. The rec button lights up. 3. Now hit the pads you want to record and listen to what happens. Each hit will create an event in the pattern editor, the event length depends on how long you hold the pad. Y...
Page 397
▪ when you stop the sequencer (by pressing the lit play button). ▪ when you jump to another location in the project (see section ↑10.1.4, jumping to another playback position in the pattern ). ▪ when you switch your controller to another mode (by pressing, e.G., scene , pattern , etc.). ▪ when you s...
Page 398
You can also use the record prepare mode to adjust the length of an existing pattern. The record prepare mode on your controller 1. With rec disabled, press and hold rec to enter record prepare mode. After a second, the following displays appear: 2. While holding rec , to adjust the pattern length f...
Page 399
► click the metronome icon in the maschine header to enable/disable the metronome: the metronome can be heard only when the sequencer is playing! The metronome signal is sent to the cue bus. To know how to use the cue bus, see section ↑12.2.6, using the cue bus . You can customize the metronome in v...
Page 400
While adjusting the metronome settings you can enable/disable the metronome via button 2 ( metro ). This is strictly equivalent to pressing shift + play as mentioned above. 10.2.4 recording with count-in count‐in allows you to start the metronome before the sequencer and recording begins. This is ve...
Page 401
…and when the loop range doesn’t start at the beginning of a bar. You can also use the count‐in to start a recording in replace mode. Adjusting the count-in duration you can choose how long the metronome should be heard before the recording actually starts. In the software this is done via the count...
Page 402
Using input quantize on your controller 1. Press shift + grid to show the record settings. 2. Turn knob 5 ( quantize mode ) to enable ( on ) or disable ( off ) input quantization. → with input quantization enabled, as you are recording the pads your notes will be quantized according to the step size...
Page 403
The displays of your controller show the following: the step mode on the controller displays: the first bar of an eight‐bar pattern. The left display shows your entire pattern, and the right display focuses on the portion of the pattern corresponding to the steps controlled by your pads. The details...
Page 404
3. Press an unlit pad to create an event on that step. The pad lights up to indicate that there is an event on that step. The new event is one step long. The next time the playback position reaches that step the new event will be played. 4. Press a lit pad to remove that step. ⇨ the pad turns off an...
Page 405
In step mode each pad of your controller represents one step of a 16‐step sequence for the fo‐ cused sound. The size of the steps depends on the current step grid settings. Lit pads indicate events on the corresponding steps. For more information on the step grid, see section ↑10.1.7, adjusting the ...
Page 406
▪ obviously, the event position is defined by the pad you hit. Checking your sequence (right display) the step mode on the controller displays: the first bar of a four‐bar pattern. The right display of your controller provides more information on the sequence: ▪ individual events are represented by ...
Page 407
► if button 5 ( follow ) is disabled, press button 7 and 8 to manually switch to the previous/ next 16 steps both on your pads and on the right display. Adjusting your pattern (left display) the left display of your controller allows you to adjust a few settings for your pattern. You can adjust the ...
Page 408
These parameters only affect your next hits on the pads: they don’t modify the pitch/velocity of existing events, even if these are selected! To quickly modify the pitch, velocity, and position of events you have already created, use the quick edit shortcuts described in section ↑10.3.2, edit‐ ing e...
Page 409
Editing tool description knob 3 ( velocity ) adjusts the velocity of the selected events. If the events have different velocities, the velocities differences are retained as long as the limits (0 and 127) are not reached. When only one event is selected, its velocity is shown under velocity . If sev...
Page 410
Use the volume, swing, and tempo knobs for the quick edit shortcuts. 1. Press and hold the pad(s) of the step(s) you want to edit. If you want to adjust the last step you have created, skip this step: the last created event is automatically selected. You can also press the page buttons left of the d...
Page 411
1. Press and hold the pad representing the step you want to modulate (you may need to use button 7 and 8 to navigate beforehand to the desired part of the pattern). The displays will switch to a mode similar to control mode displaying parameter values. 2. Like in control mode, use button 2 or 3 to s...
Page 412
1 2 3 the edit mode selector. ► to choose a mouse edit mode, click the desired icon in the edit mode selector, at the bot‐ tom left of the pattern editor. You can also right‐click ([ctrl]‐click on macos) in the back‐ ground of the event area and select the desired mode from the context menu. ( 1 ) s...
Page 413
Action function creating notes (see ↑10.4.2, creating events/notes for details) double‐click in event area’s background creates note deleting notes (see ↑10.4.5, deleting events/notes for details) double‐click note delete selected notes right‐click (macos: [ctrl]‐click) delete selected notes selecti...
Page 414
Action function [ctrl] + drag left/right note border (macos: [cmd] + drag left/right border) freely moves the start/end of selected notes (over‐ rides the step grid quantization), thereby resizing the notes. Drag note vertically group view: moves selected notes to another sound of the group. Keyboar...
Page 415
10.4.2 creating events/notes in the software you can create new events anywhere in the event area using your mouse. The procedure depends on the active mouse edit mode (select, paint or erase). Each event is created at the beginning of the step in which your mouse cursor is located, accord‐ ing to t...
Page 416
10.4.3 selecting events/notes maschine provides you many ways to select events/notes in your pattern. This notably allows you to precisely define which events your next edits will be applied to. In the software you can select events with your mouse only if select mode is selected in the edit mode se...
Page 417
Quick selecting events and notes the quickest and easiest way to select events is the following: ► press shift + select + any dimmed pad to select all events for that sound (if pads are in group mode) or to select all notes at that pitch for the focused sound (if pads are in key‐ board mode). → the ...
Page 418
Selecting events on the controller with the pads in group mode. You have following selection tools at your disposal: selection tool description pads unlit pads indicate sounds for which the pattern has no events. Nothing hap‐ pens when you press them. Dimmed pads indicate sounds for which events can...
Page 419
Select mode: selecting notes (pads in keyboard mode) in keyboard mode, each pad represents a specific pitch of the focused sound. Selecting events on the controller with the pads in keyboard mode. You have following selection tools at your disposal: selection tool description pads unlit pads indicat...
Page 420
The total number of notes/events included in the current selection is shown in the right display. 10.4.4 editing selected events/notes once you have selected particular events, you can edit them in various ways. In the software you can edit events with your mouse only if select mode is selected in t...
Page 421
Quantization when editing a single event/note by default, all dragging actions on the time axis are quantized according to the step grid: ▪ when you drag a note (or its duplicate) horizontally, its original offset with the step grid is preserved, unless you drag the note near a grid line — in that c...
Page 422
► press [alt] + the left/right cursor key on your computer keyboard to nudge the selected notes by one nudge grid division. If no event is selected, all events in the pattern will be af‐ fected. See the hardware section below for more information on the nudge command. Your controller provides variou...
Page 423
Editing tool description knob 7 ( pitch ) transposes the selected events by semitones. If only one event is selected, its pitch is shown under pitch . If several events are selected, the field shows (multi) . See also the alternate method described below. Knob 8 ( velocity ) adjusts the velocity of ...
Page 424
1. To transpose the selected events down in semitones press shift + pad 13 ( semitone ‐ ); to transpose the selected events up press shift + pad 14 ( semitone + ). If nothing is se‐ lected, all event/notes in the pattern will be affected. 2. To transpose the selected events down in octaves press shi...
Page 425
► press select + erase + the desired pads to delete from the pattern all events for these pads. As soon as you hold select + erase , some pads light up to indicate where there is something to delete: ▪ if your pads are in group mode, the lit pads show you the sounds for which the pattern con‐ tains ...
Page 426
► while the pattern is playing, hold erase + the desired pad to progressively delete the events for that sound (if pads are in group mode) or the notes at that pitch for the focused sound (if pads are in keyboard mode) as they are reached by the playhead. → as long as you hold the pad, the correspon...
Page 427
1. To cut or copy the selected events, press [ctrl] + [x] or [ctrl] + [c] ([cmd] + [x] or [cmd] + [c] on macos), respectively. You can also right‐click ([ctrl]‐click on macos) in the back‐ ground of the event area and select cut or copy from the context menu. The selected events are placed in the cl...
Page 428
◦ all copied events retain their position relative to each other, both on the time axis and on the vertical axis (sound list in group view, pitches in keyboard view). ◦ if some of the pasted events go beyond the pattern’s end, the pattern is extended to the next pattern grid division after the last ...
Page 429
3. To paste them, press shift + pad 12 ( paste ). → the events will be pasted according to the same rules as when using the keyboard short‐ cuts in the software (see above). If no event is selected, all displayed events will be affect‐ ed: in keyboard view these are all events of the focused sound; ...
Page 430
Quantize and quantize 50% in the pattern editor context menu. To apply full or half quantization using the maschine software: 1. Select the events in the pattern editor you want to quantize. If nothing is selected, the whole pattern will be quantized. 2. To apply full quantization to the selected ev...
Page 431
1. Select the events you wish to quantize. If nothing is selected, the whole pattern content will be quantized. See ↑10.4.3, selecting events/notes to know how to select events. 2. To apply full quantization to the selected events, press shift + pad 5 ( quantize ). 3. To apply only a bit of quantiza...
Page 432
Choosing an input quantization on your controller on your controller the input quantization can be configured via the recording settings : 1. Press shift + grid to show the recording settings. 2. Turn knob 5 ( quantize mode ) to select the desired input quantization mode from the three modes availab...
Page 433
When adding variation to your patterns, please be aware random mode conforms to the selected scale. To access variation mode: 1. Select the group ( a – h ) containing the sound to which you want to apply the variation. 2. Press select + sound ( 1 – 16 ). 3. Press shift + pattern to access the variat...
Page 434
Element description time shift step set the amount of time shift per step. The value is applied to all notes and will move them randomly in both plus and minus values according to the overall percentage set here. Step can be changed from +/‐ 0‐50% in 5% increments. Press shift to change in finer inc...
Page 435
Element description note length steps set the length of a note in steps. The value ranges from 1 to 6 steps per note. Press shift to change in finer in‐ crements. Time shift step set the amount of time shift per step. The value is applied to all notes and will move them randomly in both plus and min...
Page 436
10.5 recording and editing modulation one of the really cool features of maschine is the ability to modulate nearly all maschine pa‐ rameters both on the controller and in the software in a very easy way. In maschine, modulation means the automatic change of maschine parameters from an in- ternal so...
Page 437
Please note that modulation and automation are not mutually exclusive: you can modulate a pa‐ rameter in maschine and automate it (e.G., from your host) simultaneously! As a result, the pa‐ rameter value will deviate (according to the recorded modulation) from its moving value defined by the automat...
Page 438
◦ sound’s and group’s output properties: the cue button in the audio page. ◦ group’s input properties: the root note knob in the midi page. At the sound and group level the same parameters are both automatable and modulatable. For more information on automation please refer to section ↑11.2.3, contr...
Page 439
▪ a modulation track is created for this parameter in the modulation pane of the control area (at the bottom of the pattern editor) containing the modulation points you have just record‐ ed. You can further edit the modulation track from there — see section ↑10.5.3, creating and editing modulation i...
Page 440
You can pin auto‐write mode by pressing shift + auto write ( f2 on older models). This allows you to have both hands free to tweak knobs 1–8 and record modulation for several parameters simultaneously! When you’re done, press auto write ( f2 on older models) again to stop record‐ ing modulation. If ...
Page 441
4. Click the little bar icon left of the control lane to display the modulation pane. → the modulation pane appears. The modulation pane showing the modulation track for the decay parameter (see on the left). The modulation pane contains following elements: ▪ the left part shows the modulator list s...
Page 442
The range of the vertical value scale left of the modulation track depends on the current, non‐ modulated value of the selected parameter: since modulation points set new values relative to the non‐modulated value of the parameter, this scale allows you to see at any time the real values that will b...
Page 443
Mouse edit mode available mouse actions ( 1 ) select mode to create modulation points, double‐click in the control lane — other points on this step will be replaced. To delete a modulation point, right‐click it ([ctrl]‐click it on macos). To edit an existing modulation point, drag it vertically (you...
Page 444
3. In the modulation pane click the “ + ” symbol at the end of the modulator list to create a new empty modulation track. A new modulator x entry appears at the end of the list ( x is an ordering number) and it is automatically selected. The corresponding modulation track is still empty. Moreover yo...
Page 445
→ all modulation points are deleted in all patterns of the group and you can start designing a new modulation for that parameter from scratch. Re-assigning a modulation track ► to change the parameter assignment of a modulation track, right‐click ([ctrl]‐click on ma‐ cos) the desired entry in the mo...
Page 446
You cannot create midi tracks for groups nor for the master. Creating and editing midi tracks is done in the midi pane of the control lane: create midi tracks in the midi pane of the control lane. 1. Click the desired sound in the sound list on the left of the pattern editor. 2. If the control lane ...
Page 447
6. Add and modify events in the new midi track via same editing tools as for modulation tracks (see ↑10.5.3, creating and editing modulation in the control lane ). → you have just created a new midi track! You will notice that one midi track is always present in the midi pane: the velocity track. Th...
Page 448
Use the pattern manager to manage your patterns. ▪ on the left you can see the list of the 16 pattern slots in the selected pattern bank. Slots containing a pattern show a colored bar on the left along with the pattern name. The other slots contain no pattern. The selected pattern is highlighted (th...
Page 449
Closing the pattern manager ► to close the pattern manager, click anywhere outside it. The pattern mode on your controller the pattern mode is where you select and manage your patterns. ► to enter pattern mode on your controller, press and hold pattern (you can pin it by pressing button 1 at the sam...
Page 450
The selected pattern is named basics. Selecting a pattern: 1. Open the pattern manager (see ↑10.7.1, the pattern manager and pattern mode ). 2. If it is not already selected, select the pattern bank containing the desired pattern by click‐ ing its pad grid on the right. The selected pattern bank is ...
Page 451
If you want to select a pattern already referenced by one or more clips in the arranger, you can click any of these clips to select and load the referenced pattern in the pattern editor. This way your arrangement won’t be modified. Selecting patterns and pattern banks on the controller to select a p...
Page 452
▪ if no pattern is selected, as soon as you create an event (in the empty event area of the soft‐ ware or by recording pads on your controller) a new pattern will be created for it! See section ↑10.4.2, creating events/notes for more information on creating events. ▪ if you double‐click in a cell of...
Page 453
→ a new empty pattern is created in the selected pattern slot. The new pattern is loaded in the pattern editor with an empty event area. Furthermore, this pattern is referenced by a clip for the selected group in the current scene in the arranger. This clip replaces any pre‐ vious clip for the group...
Page 454
1. Open the pattern manager (see ↑10.7.1, the pattern manager and pattern mode ). 2. If necessary, select the pattern bank containing the desired pattern by clicking its pad grid on the right. The selected pattern bank is surrounded by a white border and its patterns appear in the list on the left. ...
Page 455
→ the pattern is deleted. Alternate method 1. Press and hold pattern to enter pattern mode. 2. Press button 7 and 8 to select the desired pattern bank. 3. Press erase + the pad corresponding to the pattern you want to delete. → the pattern is deleted. If the desired pattern bank is already selected ...
Page 456
→ a new empty pattern bank is created and its pad grid appears in place of the “ + ” symbol. If the last pattern bank is empty, there is no “ + ” symbol under its pad grid and you cannot create any new pattern bank. Deleting a pattern bank to delete a pattern bank: 1. Open the pattern manager (see ↑...
Page 457
→ a new empty pattern bank is created and its content appears on the right display. If the last pattern bank is empty, there is no “ + ” symbol under button 8 and you cannot create any new pattern bank. Deleting a pattern bank on your controller to delete a pattern bank: 1. Press and hold pattern to...
Page 458
→ the pattern is renamed. In the arranger, all clips referencing this pattern in the arranger will mirror the new pattern name. Renaming patterns in the pattern manager to rename any pattern even if it is not selected: 1. Open the pattern manager (see ↑10.7.1, the pattern manager and pattern mode )....
Page 459
If you use maschine as a plug‐in, some hosts will utilize the [enter] key, as it is mapped to some function of the host software. In this case, click anywhere else in the maschine plug‐in window to confirm the name you have entered. Renaming patterns in the arranger you can also rename a pattern in ...
Page 460
3. Right‐click ([ctrl]‐click on macos) the desired pattern slot or the corresponding cell in the pad grid and select color from the context menu. A color palette appears. In the palette, the current color of the pattern is highlighted. 4. Select the desired color in the palette. You can also choose ...
Page 461
2. If necessary, select the pattern bank containing the desired pattern by clicking its pad grid on the right. The selected pattern bank is surrounded by a white border and its patterns appear in the list on the left. 3. Right‐click ([ctrl]‐click on macos) the pattern slot or the corresponding cell ...
Page 462
2. Right‐click (on macos: [ctrl]+click) the event area’s background and choose copy from the slot’s context menu: 3. Select the group in which you want to paste the pattern’s content. 4. Open the pattern manager, select (or create) an empty pattern, and close the pattern man‐ ager again. The selecte...
Page 463
→ the pattern is copied to the target pad. The target pad starts flashing and you can further copy/paste it to other slots! This procedure has following benefits: ▪ you can paste the copy into the pattern slot of your choice — empty or not. If the target pat‐ tern slot already contains a pattern, it...
Page 464
4. While holding the mouse button, drag your mouse toward the desired location. As the mouse cursor moves, the potential target slots are highlighted or an insertion line ap‐ pears at the potential places between slots where you can drop the pattern slot. 5. When the desired slot is highlighted or w...
Page 465
→ the pattern length can now be adjusted in finer increments according to the value of the step grid. 10.8 importing/exporting audio and midi to/from patterns in the pattern editor you can quickly export midi and audio from patterns and import midi to patterns via drag and drop. 10.8.1 exporting aud...
Page 466
3. If you want to export a single sound in the group, you can switch the pattern editor to key‐ board view, put the focus on the desired sound, and check that this sound is not muted (see section ↑5.4.1, mute and solo ) — otherwise the exported audio file will be silent! Alter‐ natively you can let ...
Page 467
You can export midi files using two methods: via drag‐and‐drop or via the group/sound context menu. Exporting midi via drag-and-drop you can render the selected pattern to a midi file by simply dragging it onto the target location on your operating system or directly into a midi channel of your host...
Page 468
1. Select the pattern you want to export midi from (see section ↑10.7.2, selecting patterns and pattern banks ). 2. To export midi from the entire group, switch the pattern editor to group view and right‐ click ([ctrl]‐click on macos) the desired group in the group list (left of the arranger) to ope...
Page 469
10.8.3 importing midi to patterns you can import midi files (extension “.Mid”) to patterns. This allows you to use in maschine midi files prepared with another application. This function is only available in the software. Importing midi data into a pattern that already contains data (note, modulatio...
Page 470
3. Right‐click ([ctrl]‐click on macos) the group in the group list and select import midi… from the context menu. You can alternatively right‐click ([ctrl]‐click on macos) the group name in the header above the sound list and select the same entry. 4. In the import midi dialog that opens, navigate t...
Page 471
4. Drag the midi file onto the desired group in the group list left of the arranger. → the midi file will be imported to the selected pattern of the group according to the import rules described below. If the pattern editor is in group view, you can also drag the midi file directly onto the event ar...
Page 472
◦ for each sound, midi notes will be imported at the default root note c3 — this ensures that the imported midi data will correctly trigger all maschine factory kits. ◦ the midi cc data will be copied to all sounds for which midi notes have been imported. ▪ if the midi file contains data on multiple...
Page 473
3. Right‐click ([ctrl]‐click on macos) the desired sound in the sound list and select import midi… from the context menu. 4. In the import midi dialog that opens, navigate to the desired midi file on your computer and click open to confirm. → the midi file will be imported to the selected pattern fo...
Page 474
4. Drag the midi file onto the desired sound in the sound list (left of the pattern editor). → the midi file will be imported to the selected pattern for that sound according to the im‐ port rules described below. If the pattern editor is in keyboard view, you can also drag the midi file directly on...
Page 475
4. Open the files pane of the browser and navigate to the desired midi file (see section ↑3.6, loading and importing files from your file system to know how to use the files pane). 5. Double‐click the midi file or click it and press [enter] on your computer keyboard. → the midi file will be imported...
Page 476
2. Drag and drop the multiple selection onto the desired group in the group list. → new patterns will be created for that group. Apart from this, each new pattern receiving the data from one of the midi files. Apart from this, each midi file will be imported as a sin‐ gle midi file to that group — s...
Page 477
2. Drag and drop the multiple selection onto the desired sound in the sound list. → new patterns will be created for that sound in the group, each new pattern receiving the data from one of the midi files. Only this sound will contain notes in these new patterns. Apart from this, each midi file will...
Page 478
11 audio routing, remote control, and macro controls this chapter describes a few important topics and features of maschine’s routing and assign‐ ment system. Understanding these will be of great help in numerous maschine workflows: ▪ we will explain how maschine’s audio routing works and how to tak...
Page 479
▪ at the bottom level, each sound has its own channel. The output of the sound’s channel is sent to its parent group. ▪ at the mid‐level, each group has its own channel, which sums all channels of the included sounds. The output of the group’s channel is sent to the master. ▪ at the top level, the m...
Page 480
11.1.1 sending external audio to sounds each sound can be configured to receive external audio signals. These audio signals can be com‐ ing from the following sources: ▪ outside maschine (from your audio interface if maschine is used in stand‐alone mode, or from your host if maschine is used in plug...
Page 481
The audio page of the input properties for a sound on the controller. Please refer to section ↑2.3.6, navigating channel properties, plug‐ins, and parameter pages in the control area to know how to access the audio page of the input properties in the software and from your controller. Controls descr...
Page 482
1. Click the mix view button on the left of the arranger to switch from arrange view to mix view: 2. Open the extended view of the mixer by clicking the down‐pointing arrow on the left of the mixer: 3. Check that the io button is active on the left of the mixer — if not, click it to enable it and di...
Page 483
5. At the top of the channel strip of the sound you want to configure, click the first field under the sound name and select the desired external input in the menu. This is equivalent to setting the source parameter described above. 6. Turn the little knob on its left to adjust the input gain. This ...
Page 484
11.1.2 configuring the main output of sounds and groups by default the outputs of all sounds in a group are sent to this group, where they are mixed to‐ gether and processed by the plug‐ins loaded in the group, if any. Similarly, by default the outputs of all groups are sent to the master, where the...
Page 485
Controls description audio section dest. Selects where you want to send the main audio output of your channel. For sounds, available options are none (no output), master , group (parent group, default setting), any other group or any other sound acting as bussing point (i.E. Containing an effect plu...
Page 486
◦ for groups: [group name] (e.G., drums ). ◦ for sounds: [group name]: [sound name]-[input number] (e.G., drums: kick‐1 ). ▪ in the selector display they are labeled as follows: ◦ for groups: [group letter+number] (e.G., a2 ). ◦ for sounds: [group letter+number]:s[sound number]-[input number] (e.G.,...
Page 487
The pair of knobs for each sound/group allows you to quickly adjust the channel level and panoramic position. For sound slots, the knobs are visible only when the pattern editor is in group mode. In keyboard mode, the knobs are not visible. Configuring the main outputs of sounds and groups in mix vi...
Page 488
2. Open the extended view of the mixer by clicking the down‐pointing arrow on the left of the mixer: navigate to the channel of which you want to configure the output: for a sound click the header of its parent group (or double‐click it if the mixer currently displays the group chan‐ nel strips), an...
Page 489
4. To select another destination for the channel’s output, click the first area under the level meter, and select the desired destination in the menu. This is equivalent to setting the dest. Parameter described above. 11.1.3 setting up auxiliary outputs for sounds and groups each sound or group of y...
Page 490
The aux page of the output properties (here for a group) in the software. The aux page of the output properties (here for a group) on the controller. Please refer to section ↑2.3.6, navigating channel properties, plug‐ins, and parameter pages in the control area to know how to access the aux page of...
Page 491
If maschine is running as a plug‐in, the external stereo outputs ext. 1 – 16 available in the dest. Selectors of the aux 1 and aux 2 section will correspond to virtual outputs in your host. This al‐ lows you to send auxiliary outputs of individual sounds or groups from maschine to their own mixer ch...
Page 492
4. Navigate to the channel of which you want to configure an auxiliary output: for a sound click the header of its parent group (or double‐click it if the mixer currently displays the group channel strips), and for a group simply ensure that its channel strip is visible (double‐ click the group head...
Page 493
11.1.4 configuring the master and cue outputs of maschine all channels routed to the master are mixed together and processed by the plug‐ins loaded in the master, if any. The result is then sent to the master output (that is, maschine’s main out‐ put). Besides, all channels currently routed to the c...
Page 494
Controls description audio section output selects where you want to send the master output of your maschine project. Available options are the 16 external stereo outputs ext. 1 – 16 . Level adjusts the overall volume level of the master output. This control is the same as the master volume slider in...
Page 495
2. Open the extended view of the mixer by clicking the down‐pointing arrow on the left of the mixer: 3. Click the background of the last header in the top right corner of the mixer. The master/cue channel strip appears underneath. In this master/cue channel strip, do the following to configure the o...
Page 496
2. To adjust the level and panoramic position of the main output, use the channel’s fader and balance control (above the fader), respectively. This is equivalent to setting the level or pan parameters in the main section, respectively (see above). 3. To select another destination for the master outp...
Page 497
1. Click the headphone icon in the strip’s header to show the controls for the cue channel. 2. To adjust the level and panoramic position of the cue output, use the channel’s fader and balance control (above the fader), respectively. This is equivalent to setting the level or pan parameters in the c...
Page 498
11.1.5 mono audio inputs each sound can be configured to receive external stereo or mono audio signals. You may use au‐ dio signals from outside maschine (from your audio interface if maschine is used in stand‐ alone mode, or from your host if maschine is used in plug‐in mode). Maschine offers eithe...
Page 499
Configuring external inputs for sounds in mix view you can also easily send stereo or mono external audio to sounds in maschine’s mixer: 1. Click the mix view button on the left of the arranger to switch from arrange view to mix view: 2. Open the extended view of the mixer by clicking the down‐point...
Page 500
3. Check that the io button is active on the left of the mixer — if not, click it to enable it and display the input/output settings of each channel strip. 4. If the mixer currently displays the group channels, in the top row of the mixer double‐click the header of the group containing the sound you...
Page 501
▪ the mixer displays the channel strips of all sounds in the selected group. Audio routing, remote control, and macro controls audio routing in maschine maschine ‐ オペレーション マニュアル ‐ 501.
Page 502
5. At the top of the channel strip of the sound you want to configure, click the first field under the sound name and select the desired external input in the menu. ▪ this is equivalent to setting the source parameter described above. 6. Turn the little knob on its left to adjust the input gain. Aud...
Page 503
Configuring external inputs for sounds in maschine all input channels, including individual mono l and r channels can be found at the bottom of the input selection drop‐down menus. The metering of mono inputs is shown as dual‐mono. To configure an external input for a sound: 1. Select the group and ...
Page 504
▪ controlling parameters via midi messages and host automation : you can control param‐ eters of channel properties and plug‐ins in your channels (sounds, groups, and master) via midi messages and host automation (when maschine is running as a plug‐in). This is descri‐ bed in section ↑11.2.3, contro...
Page 505
▪ midi input settings for a sound affect only that sound: incoming midi notes will trigger dif‐ ferent notes of this sound. Typically, this allows you to control a melodic instrument via midi. More precisely, the incoming midi notes will be routed to the first plug‐in slot of the sound. If the sound...
Page 506
The midi page of the input properties (here for a group) on the controller. Please refer to section ↑2.3.6, navigating channel properties, plug‐ins, and parameter pages in the control area to know how to access the midi page of the input properties in the software and from your controller. The midi ...
Page 507
Controls description source (stand‐alone and in manual mode only) select the midi port on which the sound or group will receive midi notes. Available entries are none (midi note input disabled, default setting), all (midi notes are received on all enabled input ports), and each enabled midi input po...
Page 508
If maschine is running as a plug‐in in a host and you have configured your scenes to be trig‐ gered via midi notes, the scene trigger has priority over any sound trigger set to the same midi channel. To configure midi control for scenes, please refer to section ↑15.5, triggering sections or scenes v...
Page 509
This is equivalent to setting the source parameter described above. If maschine is running as a plug‐in you see a midi in button instead. Click it to enable the midi input from the host. This is equivalent to enabling the active button described above. 5. Click the little field on its left to select...
Page 510
11.2.2 triggering scenes via midi the maschine hardware scene mode can be configured to send out midi (notes/program changes) which can be used to trigger scenes. When maschine runs as a plug‐in this midi data is sent to the host application. When maschine runs as a stand‐alone application this midi...
Page 511
▪ this opens the following dialog: ▪ click scene enabled from the dialog. 4. In the submenu that opens, select the source you want to use for changing the midi pro‐ gram change messages. A list of connected controller names appear in the drop‐down menu, or you can select none to disable the feature....
Page 512
11.2.3 controlling parameters via midi and host automation you can assign many parameters of the channel properties and plug‐ins located in your various channels (sounds, groups, and master) of your project to midi messages in order to control and automate them via midi. In addition, when maschine i...
Page 513
This section describes how to use automation in maschine — for more information on using modulation, please refer to section ↑10.5, recording and editing modulation . Please note that modulation and automation are not mutually exclusive: you can modulate a pa‐ rameter in maschine and automate it (e....
Page 514
Maschine 1.X owners: in previous maschine versions midi/host automation was only possible via the macro controls. Now midi/host automation and macro controls are unrelated: midi/host automation can be configured directly on parameters, independently of your macro control as‐ signments. Macro control...
Page 515
A few host automation assignments for the current parameter page. The following paragraphs describe in more details how to assign midi controls and host automa‐ tion ids to maschine parameters. Which maschine parameters are automatable? All the automatable parameters are found in plug‐ins or channel...
Page 516
You will notice that the rules for automatable parameters are the same as for modulatable param‐ eters except that modulatable parameters can only be found in sounds and groups (not in the master). In other words, at the sound and group level the same parameters are both automatable and modulatable....
Page 517
3. Click the enable label in the assignment field under any unassigned parameter to automati‐ cally assign that parameter to the next free automation id. → the assignment field displays the automation id for that parameter. The parameter is ready to be controlled from your host. Removing an automati...
Page 518
1. Click the down‐pointing arrow in the bottom left corner of the control area to open the as‐ signment area underneath. 2. On the left of the area, click the automation tab to show the automation pane, then in this pane click the midi tab. In this tab, the assignment fields for automatable paramete...
Page 519
For the learn mode and the resulting midi control to work, midi must be correctly configured in maschine. If maschine is running as stand‐alone application this is done in the midi page of the preferences panel — for more details please refer to section ↑2.6.3, preferences – midi page . If maschine ...
Page 520
11.2.4 selecting vst/au plug-in presets via midi program change if you have a native instruments or third‐party vst/au plug‐in loaded in a sound, you can re‐ motely switch presets (or patches, programs, etc.) in your plug‐in via midi program change mes‐ sages. For this to work, your plug‐in must exp...
Page 521
The midi output of sounds is configured on the midi page of the output properties for sounds. The midi page of the output properties is available for sounds only. Maschine 1.X owners: the midi page of the sound output properties replaces and extends the features of the midi out module available in p...
Page 522
Control description midi section dest. Selects the midi port on which the sound will send midi data. If maschine is running in stand-alone mode , available entries are none (midi output disabled, default setting), every enabled midi output port, as well as any sound in the same group containing a pl...
Page 523
2. Open the extended view of the mixer by clicking the down‐pointing arrow on the left of the mixer: 3. Check that the io button is active on the left of the mixer — if not, click it to enable it and display the input/output settings of each channel strip. 4. If the mixer currently displays the grou...
Page 524
5. At the bottom of the channel strip of the sound you want to configure, click the bigger field left and select the desired midi port in the menu. This is equivalent to setting the dest. Parameter described above. 6. Click the little field on its right to select a midi channel. This is equivalent t...
Page 525
11.3 creating custom sets of parameters with the macro controls macro controls enable you to control in one same location a selection of parameters coming from different sources. Available in every channel (sounds, groups, and master), macro controls are very useful for playing live since you can ch...
Page 526
11.3.1 macro control overview each macro control can be assigned to one destination with the full range of the selected pa‐ rameter. On the other hand, the same parameter can be the destination of more than one macro control. To know which parameters you can assign to a macro control, consider this ...
Page 527
Assigning macro controls from parameters assigning a parameter as a macro from a channel or plug‐in properties is quick and easy. You can simply right‐click ([ctrl]‐click on macos) a parameter name and select which macro level you want to assign it to. To assign a macro control directly from a param...
Page 528
2. Click the down‐pointing arrow in the bottom left corner of the control area to reveal the assignment area underneath: 3. Click the pages tab in the left part of the assignment area: → the pages tab lights up and the pages pane appears on its right. You are now ready to as‐ sign macro controls to ...
Page 529
1 2 3 7 6 5 4 the control area with macro properties displayed and the pages pane active in the as‐ signment area underneath. ( 1 ) delete page button (“x” symbol) : click the little “ x ” after a page name to delete this param‐ eter page. ( 2 ) add page button (“+” symbol) : click the little “ + ” ...
Page 530
( 7 ) target selector : displays and selects the target parameter of the selected macro control in‐ dicated by the focus frame ( 5 ). This multi‐level drop‐down widget allows you to quickly navigate through the structure of the channel to the desired parameter. The detailed procedure is ex‐ plained ...
Page 531
2. Upon your selection in the previous menu, the menu takes the name of your selection, and another menu may appear to the right which allows you to refine your search (e.G., by listing all parameter pages of the selected plug‐in or channel properties). This continues until a pa‐ rameter is reached ...
Page 532
Menu item description keyboard shortcuts rename rename the macro. Ctrl + r / cmd + r reset reset the macro. Cut cut the macro to paste it in another posi‐ tion. Ctrl + x / cmd + x copy copy the macro. Ctrl + c / cmd + c paste paste a cut or copied macro to a new posi‐ tion. Ctrl + v / cmd + v assign...
Page 533
12 controlling your mix the default view of the maschine software is the arrange view, which contains the arranger at the top, the control area in the middle, and the pattern editor / sampler editor at the bottom. The arrange view is best suited to organize your melodies and rhythms in the timeline:...
Page 534
The mix view button. ► click the mix view button at the top left of the arranger to switch between the arrange view and the mix view. ► press shift + navigate to switch between the arrange view and the mix view in the ma‐ schine software. 12.1.2 mix view elements when you switch the maschine softwar...
Page 535
1 2 3 the mix view, with the mixer (1) at the top, the plug‐in chain (2) in the middle, and the plug‐in strip (3) at the bottom. ( 1 ) mixer : at the top, the mixer shows you at a glance the level and routing settings for all sounds of the focused group, or all groups in your project. You can change...
Page 536
12.2 the mixer sitting in the top part of the mix view, the mixer is ideal to quickly see and adjust the level and routing settings of different channels in one go. The mixer in the maschine software. The mixer provides a classic mixing desk layout containing a certain number of channel strips . The...
Page 537
▪ whether the mixer is minimized or not, and which sections are enabled for display: ↑12.2.2, adjusting the mixer layout . 12.2.1 displaying groups vs. Displaying sounds the mixer provides two display modes, allowing you to focus on the current context: ▪ group level : the mixer shows channel strips...
Page 538
Mixer displaying the sound level the mixer can alternatively display the sounds slots of a particular group : 1 2 3 4 in this mode the desk’s input strips ( 1 ) represent all sounds of the focused group, while the out‐ put strip at the far right ( 2 ) represents that focused group. At the top of the...
Page 539
12.2.2 adjusting the mixer layout no matter which of the group or sound level is currently displayed in the mixer, you can adjust its layout as described below in order to focus on your current task. Maximizing/minimizing the mixer you can minimize/maximize the mixer so that it shows only the group ...
Page 540
Choosing what to display in the channels. From top to bottom: ▪ io button : click it to show/hide the input and output settings (both midi and audio) in the channel strips. ▪ plug-in icon : click it to show/hide the plug‐in lists in the channel strips. ▪ aux button : click it to show/hide the auxili...
Page 541
Whichever channel strip is focused, the plug‐in strip at the bottom of the mix view shows the plug‐ ins loaded in that particular channel (see section ↑12.4, the plug‐in strip ). 12.2.4 managing your channels in the mixer the mixer provides the same sound and group management commands as the arrange...
Page 542
Management command action renaming channels double‐click the channel name in the header, type the desired name on your computer keyboard, and press [enter] to confirm (or [esc] to cancel). You can also open the channel’s context menu and select rename . See section ↑4.2.3, renaming sound slots and ↑...
Page 543
Adjusting settings on the fly the mixer provides an interesting feature not available in arrange view: you can quickly change the settings in any channel strip currently displayed without having to put the channel under fo‐ cus beforehand: simply click the desired setting in any of the displayed cha...
Page 544
1 2 3 4 5 6 7 8 a complete channel strip in the mixer (sound on the left, group and master on the right). ( 1 ) header : displays the name and index (letter + number) of the group or number of the sound. Headers in the mixer’s top row are for groups, headers in the second row (sound level only) are ...
Page 545
▪ other management commands: right‐click ([ctrl]‐click on macos) the header background to open the channel’s context menu (see section ↑12.2.4, managing your channels in the mix‐ er ). ( 2 ) audio input settings (sound strips only): allows you to adjust the audio input routing. Visible only if the i...
Page 546
▪ drag the little horizontal slider at the top to adjust the panoramic position of the channel in the stereo field. This is equivalent to the pan parameter in the audio page of the channel’s output properties (see ↑11.1.2, configuring the main output of sounds and groups ). ▪ click the mute button t...
Page 547
Available settings in the master and cue channel strips the master and the cue channel strips are similar to the sound/group channel strips described above, except for the following elements (numbers refer to the picture in the previous para‐ graph): ▪ the mute button in the fader section ( 5 ) is n...
Page 548
In arrange view, the equivalent of the headphones button is the cue switch found on the audio page of the sound’s and group’s output properties (see section ↑11.1.2, configuring the main output of sounds and groups ). The mute and solo of channels don’t apply when these channels are sent to the cue ...
Page 549
12.3 the plug-in chain in the middle of the mix view, right under the mixer, you see an horizontal bar listing all plug‐ins loaded in the focused channel: the plug-in chain . In the plug‐in chain, plug‐ins are arranged into an horizontal series, the audio travelling from left to right through each p...
Page 550
12.4 the plug-in strip in the lower part of the maschine window, the mix view provides an intuitive representation of all plug‐ins loaded in the channel (sound, group, or master) currently under focus: the plug-in strip . The plug‐in strip shows the loaded plug‐ins as a series of plug-in panels , ea...
Page 551
Click a plug‐in in the plug‐in chain to display its panel in the plug‐in strip below. If the maschine window is not wide enough for all plug‐in panels to be displayed at once, an horizontal scroll bar appears at the bottom of the plug‐in strip to display the hidden part. Use the horizontal scroll ba...
Page 552
Use the vertical scroll bar to display the rest of the plug‐in. 12.4.1 the plug-in header for all types of plug‐ins (internal, native instruments, and external) the plug‐in panel displays a plug-in header at the top: controlling your mix the plug‐in strip maschine ‐ オペレーション マニュアル ‐ 552.
Page 553
1 2 3 4 the plug‐in header at the top of the plug‐in panel. The plug‐in header can contain following elements, from left to right: ( 1 ) open plug-in window button (native instruments and external plug‐ins only): click the little arrow icon to open/close the plug‐in interface in an external window. ...
Page 554
12.4.2 panels for drumsynths and internal effects for drumsynths and internal effects, the panels in the plug‐in strip provide intuitive visual repre‐ sentations of the plug‐ins and their parameters. The plug‐in panel of a drumsynth and two internal effects. As with all other plug‐ins, the panels fo...
Page 555
For an exhaustive description of the parameters available in each panel, please refer to chapter ↑8, using the drumsynths for drumsynths and chapter ↑14, effect reference for internal ef‐ fects. Parameter modulation is not indicated in the panel for internal plug‐ins. As a consequence, the val‐ ue o...
Page 556
Sampler – main pane 1 2 3 4 5 6 7 the sampler in the plug‐in strip. ( 1 ) pane selector : click main or zone to show the corresponding pane in the plug‐in. ( 2 ) sample waveform : shows the waveform or the sample used in the selected zone. It pro‐ vides the same features as the waveform found in the...
Page 557
( 4 ) amp envelope section : allows you to adjust the type parameter and the envelope param‐ eters from the pitch/envelope page in the control area. For more details, see section ↑6.2.2, page 2: pitch / envelope . ( 5 ) saturation, lo fi, and filter sections : allows you to adjust the parameters fro...
Page 558
The sampler in the plug‐in strip. ( 1 ) pane selector : click main or zone to show the corresponding pane in the plug‐in. ( 2 ) sample map : allows you to adjust the key and velocity ranges of your zones. This the same as the map view available in the zone page of the sample editor. For more details...
Page 559
▪ absynth 5’s default view shows the main elements of the perform window of absynth 5: controlling your mix the plug‐in strip maschine ‐ オペレーション マニュアル ‐ 559.
Page 560
▪ massive’s default view shows specific parts of the synth view (the eight macro controls at the top and the modulation pages underneath): controlling your mix the plug‐in strip maschine ‐ オペレーション マニュアル ‐ 560
Page 561
▪ guitar rig’s default view shows a mini rack with a reduced version of the global header at the top: as with all other plug‐ins, the panel for native instruments plug‐ins shows the plug‐in header at the top containing a button for opening the plug‐in in a floating window as well as the name of the ...
Page 562
Click the little “+” in the header to switch between default and additional view. Macos users: the vst plug‐in of a native instruments product must be installed for this product’s default view (and additional view, if any) to appear in the plug‐in strip. If you normally use the au version of this na...
Page 563
Maschine will always show the open floating windows of the focused channel (sound, group or master). In this channel you can have as many open floating windows as you see fit. When you set the focus to another channel, all open floating windows disappear, possibly replaced by those for native instru...
Page 564
▪ the floating window also displays the plug‐in header at the top. In addition to the header’s elements described in section ↑12.4.4, custom panels for native instruments plug‐ins , this header contains an additional edit button (showing a pencil icon) allowing you to switch to the edit view, which ...
Page 565
The mix mode on your controller and the mix view in the software are independent from each oth‐ er: switching views in the software does not switch the mode on your controller, and inversely — for example, you can use your controller in mix mode while displaying the arrange view in the soft‐ ware. F...
Page 566
The focus is strictly equivalent in mix mode and in control mode: the sound or group focused in mix mode will also be focused in control mode, and inversely. Adjusting the level and pan parameters once you have selected the desired channels for display (see above), do the following to adjust the cha...
Page 567
13 using effects at each project level (sound, group and master) it is possible to add effects in form of plug‐ins. Each sound, each group and the master can have an unlimited number of insert effects loaded in their plug‐ins slots. In each plug‐in slot you can load an internal, native instruments o...
Page 568
Choose the channel in which the effect is to be inserted 1. If you want to apply the effect to the master (to process the audio of the whole project), click the master tab in the top left corner of the control area. 2. If you want to apply the effect to a group (to process the audio of the whole gro...
Page 569
Load the effect in a new slot 1. At the far left of the control area, click the little plug‐in icon to display the plug‐ins of the selected channel: the icon lights up. The plug‐in list appears nearby, showing a stack of all plug‐ins already loaded in the channel: in the plug‐in list each plug‐in ha...
Page 570
If you have selected a sound and its plug‐in list is empty, the plug‐in menu also shows all available instrument plug‐ins. 3. Click the desired entry in the list. If you have vst/au effect plug‐ins installed you may also load them from the menu by selecting the native instruments (for native instrum...
Page 571
Notes and hints on loading effects in the software ▪ instead of clicking the “ + ” icon to load the effect in a new slot, you can also click the down‐ pointing arrow on the right of an existing slot to open the plug‐in menu: the effect selected in the menu will replace the plug‐in currently loaded i...
Page 572
2. If it’s not already open, open the extended view of the mixer by clicking the down‐pointing arrow at the left of the mixer: 3. Check that the plug‐in icon is active on the left of the mixer — if not, click it to display the plug‐in list in each channel strip. Then, put the focus on the channel (m...
Page 573
3. To set the focus to a sound channel : if the mixer is currently displaying the group channel strips, in the mixer’s top row double‐click the blank space in the header of the group con‐ taining the desired sound, then click the header of the desired sound in the row below. If the mixer is currentl...
Page 574
3. If you want to apply the effect to a group (to process the audio of the whole group), press button 2 to select the group tab and press the group button a – h corresponding to the desired group. If the desired group is in another bank, before you select the group you first need to press shift + th...
Page 575
→ the effect is loaded in the selected plug‐in slot and it is automatically displayed on your controller. Now you can edit the effect parameters using knobs 1–8 and the page buttons — see section ↑2.3.6, navigating channel properties, plug‐ins, and parameter pages in the control area for more inform...
Page 576
Here we provide a reminder of every operation available on the effects both in arrange view and mix view. Concerning the procedures listed below, the only difference between arrange view and mix view is the way to open the plug‐in menu: in arrange view you open it by clicking the plug‐in slot’s down...
Page 577
Action procedure open/close the effect window arrange view: click the little window icon in the top left corner of the parameter area (at the left of the first page tab). Mix view: in the plug‐in strip under the mixer, click the little arrow in the top left corner of the effect panel. Save the curre...
Page 578
Action procedure native instruments and ex- ternal effects open/close the effect window press the lit button 6 ( plug-in ). You will find more details on plug‐in operation in section ↑6.1, plug‐in overview . You will find more details on the specific operations available for native instruments and e...
Page 579
The side‐chain input page of the compressor plug‐in in the control area. The side‐chain input page of the compressor plug‐in on the controller. Please refer to section ↑2.3.6, navigating channel properties, plug‐ins, and parameter pages in the control area to know how to access parameter pages. The ...
Page 580
Parameter description gain adjusts the input level of the side‐chain signal fed into the plug‐in. Filter section filter activates a filter on the side‐chain input. This filter can be useful to select on‐ ly a specific frequency range of the side‐chain signal to control the plug‐in. Center freq adjus...
Page 581
Maschine in stand-alone mode please make sure that you have connected an external audio signal source to your audio inter‐ face and that the inputs of the audio interface are activated. To do this: 1. Select the preferences… entry from the file menu to open the preferences panel. 2. In the audio pag...
Page 582
See ↑2.6.2, preferences – audio page for more information on the audio page of the preferences panel. Maschine in plug-in mode if maschine is running as a plug‐in in a host environment, the maschine plug‐in can receive audio from the host only. Please refer to your host documentation to find out how...
Page 583
In this example, we will assume that you routed some audio channels of your host to the first vir‐ tual input pair of maschine. 13.2.2 step 2: set up a sound to receive the external input we describe here the procedure in arrange view. You can also do this in mix view — see section ↑11.1.1, sending ...
Page 584
7. Press navigate + pad 1 to select the audio parameter page. You can also press the page left button until it turns off, since the audio page is the first page of the input properties. You will now see two parameters at the bottom of the left display: source (which selects the source) and gain (whi...
Page 585
In section ↑13.2.2, step 2: set up a sound to receive the external input above, the plug‐in list should be empty: 2. Click the “ + ” icon at the top of the plug‐in list. The plug‐in menu opens and shows a list of all available instrument and effect plug‐ins. 3. Click the desired effect in the list. ...
Page 586
4. If you have selected the first plug‐in slot of a sound, turn knob 2 to select the vendor from internal , or the name of a vendor, e.G. Ni (native instruments). ▪ the right display shows only effect plug‐ins of the type you have selected. 5. Turn the jog wheel or knob 5 to browse the available plu...
Page 587
1. Choose the empty sound you want to use as send effect: on the left of the arranger click the group containing that sound, on the left of the pattern editor click the desired sound slot, and click the sound tab in the top left corner of the control area. 2. At the far left of the control area, cli...
Page 588
4. Click the desired effect in the list. If you have vst/au effect plug‐ins installed you may also load them from the menu by selecting the native instruments (native instruments products) or external (third‐party products) submenu at the top of the list. → upon selection the effect is loaded and it...
Page 589
5. Press button 6 ( plug-in ) to show the plug‐in slots of the selected sound. Since we have selected an empty sound, you see (none) under button 7/8 and these but‐ tons are inactive (i.E. There are no plug‐ins to navigate yet). 6. Press shift + browse to open the plug‐in browser and browse the avai...
Page 590
You could also load an effect preset from the browser instead of using the plug‐in menu. For more information on how to load effect presets, see ↑3.2, searching and loading files from the library . Now that the effect is loaded, we suggest that you rename the sound slot to the plug‐in name: this wil...
Page 591
2. If you want to route a group’s output to the send effect, press button 2 to select the group tab, if necessary press shift + the group button a – h corresponding to the bank containing the group, and press the group button a – h corresponding to the desired group. 3. If you want to route a sound’...
Page 592
Sound number (in the example underneath we selected the entry a1:s1-1 for the aux 1 output). 8. Use knob 2 ( aux 1 level ) to adjust the level of the signal sent to that auxiliary output. The signal of each auxiliary output is taken by default after the main output level control has been applied. Th...
Page 593
▪ cpu load : send effects can be of great help to save cpu power. Using one reverb for many sounds and groups instead of loading another reverb in each sound/group makes a big dif‐ ference on the cpu load. You can adjust at which extent the reverb must be applied on each sound/group via the respecti...
Page 594
To use several sounds plugged in series, use the procedure described in the previous section ↑13.3, creating a send effect to send the output of each sound to the input of the next one in the sequence. Which of the main, aux 1, and aux 2 output to use? Each sound provides three distinct outputs: mai...
Page 595
Groups of the multi fx type in the library pane. Using effects creating multi‐effects maschine ‐ オペレーション マニュアル ‐ 595.
Page 596
14 effect reference maschine provides a healthy selection of more than 20 different effect plug‐ins that can be quickly applied to sounds, groups and the master, all as insert effects. By using maschine’s powerful routing system, it is also easy to setup send effects, build complex effect chains or ...
Page 597
14.1 dynamics 14.1.1 compressor this is a classic compression effect to control the dynamic information of an audio signal. You can use the compressor to fatten up your drums or to control signals that have a very wide dy‐ namic range. In addition to the legacy classic mode, the compressor provides ...
Page 598
Parameter description mode section mode selects between two operation modes: classic (default setting) and feed‐ back . Whereas classic mode generates a cleaner and more precise com‐ pression, feedback mode introduces a subtle change in transient shape and frequency responsiveness. The memory‐based ...
Page 599
The compressor on the controller: main page. Side-chain input page the compressor in the control area: side‐chain input page. Parameter description input section source selects the audio signal you want to use as side‐chain signal to control the plug‐in. Available options are none (side‐chain disabl...
Page 600
Parameter description center freq adjusts the center frequency of the filter. Width adjusts the bandwidth of the filter. On your controller the outputs available in the source parameter are labeled as in the display of the source selector described above. For more information on how to use the side‐...
Page 601
The gate panel in the plug‐in strip. Main page the gate in the control area: main page. Parameter description depth section threshold this value determines the threshold at which the gate starts to work. Higher values will let only the loudest parts of the signal through the gate. Time section attac...
Page 602
Parameter description release the time the gate will take to release the input signal after it rises above the threshold. Output section mix mix lets you adjust the amount of the effect in relation to the dry original audio signal. The gate on the controller: main page. Side-chain input page the gat...
Page 603
Parameter description input section source selects the audio signal you want to use as side‐chain signal to control the plug‐in. Available options are none (side‐chain disabled, default setting), the outputs of all (other) sounds , and the outputs of all (other) groups. In the menu these outputs are...
Page 604
Input level meter in the gate panel (plug-in strip) in the plug‐in strip, the gate panel offers an extra feature not available in the control area: the threshold fader (corresponding to the threshold parameter of the main page in the control area) provides a level meter for visual monitoring of the ...
Page 605
The transient master in the control area. Parameter description depth section input gain adjusts the level of the input signal. This allows you to offset the overall level once you have set the desired effect, in order to counterbalance the gain or loss of level that might occur. Attack sharpens/sof...
Page 606
14.1.4 limiter the limiter does two things: firstly it ensures that the signal level stays below 0 db, thus prevent‐ ing digital clipping. But it can also increase the overall perceived volume by reducing the thresh‐ old. It is recommended to place the limiter in a master plug‐in slot. However, plea...
Page 607
Element description depth section (trans‐ parent mode only) threshold this value determines the threshold where the limiter kicks in. If you use it to prevent your signal from clipping, leave it at 0 db; if you want to make your sig‐ nal louder, dial the knob to the left. Available values range in d...
Page 608
Element description input section source selects the audio signal you want to use as side‐chain signal to control the plug‐ in. Available options are none (side‐chain disabled, default setting), the outputs of all (other) sounds, and the outputs of all (other) groups. In the menu these outputs are l...
Page 609
The limiter on the controller: side‐chain input page. Input level meter in the limiter panel (plug-in strip) in the plug‐in strip, the limiter panel offers an extra feature not available in the control area: the threshold fader (corresponding to the threshold parameter of the main page in the contro...
Page 610
Main page the maximizer in the control area: main page. Parameter description depth section amount this parameter is used to adjust the amount of the maximizer effect. Turn the knob clockwise to increase the loudness of the signal. Curve controls the compression knee; higher values tend to result in...
Page 611
Parameter description input section source selects the audio signal you want to use as side‐chain signal to control the plug‐in. Available options are none (side‐chain disabled, default setting), the outputs of all (other) sounds , and the outputs of all (other) groups. In the menu these outputs are...
Page 612
14.2 filtering effects 14.2.1 eq use the eq to boost or cut selective frequencies of the audio signal. The eq is mainly a tool to tailor your audio signal to taste by cutting out selected frequencies or boosting others, but can also be used as a dj‐style cut‐and‐boost effect. Please note that in the...
Page 613
Parameter description low section freq frequency selector for the low frequency band. Ranges from 20 hz to 8 khz. Gain this determines how much the selected frequency is increased/attenuated by. Low-mid section freq frequency selector for the first mid‐frequency band. Ranges from 40 hz to 16 khz. Ga...
Page 614
Width / output page the eq in the control area: width / output page. Parameter description low-mid section width bandwidth control for the first mid‐frequency band. High-mid section width bandwidth control for the second mid‐frequency band. Output section gain gain control for the eq altogether. The...
Page 615
The filter panel in the plug‐in strip. Main page the filter in the control area: main page. Parameter description type section mode here you can select between four different filter modes: lp (low‐pass), bp (band‐pass), hp (high‐pass), and notch . Depending on the mode selected, the following parame...
Page 616
Parameter description amount this defines how much the filter gets modulated by the modulation source. Source here you can select between three different modulation sources: lfo , lfo sync , and envelope . Depending on your choice for the modulation source, the following parameters appear to the rig...
Page 617
Side-chain input page the filter in the control area: side‐chain input page. Parameter description input section source selects the audio signal you want to use as side‐chain signal to control the plug‐in. Available options are none (side‐chain disabled, default setting), the outputs of all (other) ...
Page 618
For more information on how to use the side‐chain input, please refer to section ↑13.1.3, using the side‐chain input . The filter on the controller: side‐chain input page. 14.2.3 cabinet the cabinet emulation is a cabinet and microphone component that proves full control over all the (post‐amp) stag...
Page 619
Main page element description cabinet section cabinet selects from four different cabinet types, which includes: ▪ american cabinet ▪ british cabinet ▪ vintage cabinet ▪ modern cabinet microphone section microphone selects from six different microphone types, which includes: ▪ dynamic 57 ▪ dynamic 4...
Page 620
The chorus panel in the plug‐in strip. The chorus in the control area. Parameter description mod section rate the rate knob defines how fast the phase (and thus the perceived pitch) of the detuned signal is being modulated. Amount the amount of the chorus effect. Output section mix mix lets you adju...
Page 621
14.3.2 flanger classic flanger effect with lfo and envelope modulation. The flanger sounds a bit like the cho‐ rus, but the difference between them is that the flanger modulates the signal faster, it is equip‐ ped with a feedback mechanism, and can be synchronized to the tempo of the project. The fl...
Page 622
Parameter description source here you can select the modulation source of the flanger: available options are lfo , lfo sync , and envelope . Depending on your selection, the parameter to the right will change. Speed (lfo) defines the speed of the lfo in a range from 0.03 hz up to 8 hz. Speed (lfo sy...
Page 623
The fm panel in the plug‐in strip. Fm in the control area. Parameter description freq section rate this is for adjusting the speed of the fm modulation. Split the split control determines the extent to which the fm effect is applied to high frequencies via a crossover. Turn to the right to affect hi...
Page 624
The fm on the controller. 14.3.4 freq shifter the freq shifter shifts selected frequencies of the audio signal by a user‐specified amount. With high frequencies it sounds like a pitch shifter; with low frequencies it sounds like a special cho‐ rus. The freq shifter panel in the plug‐in strip. The fr...
Page 625
Parameter description fine fine‐tune the frequency here. Output section feedback adjusts the amount of output signal fed back into the input. Increasing this parameter will increase the intensity of the effect. Stereo this parameter widens the stereo field of the effect. Invert inverts the settings ...
Page 626
The phaser in the control area. Parameter description main section frequency this defines the center frequency of the phaser. Feedback adjusts the amount of output signal fed back into the input. 8pole activating this causes the phaser to use the 8pole mode, resulting in a more intense phasing effec...
Page 627
The phaser on the controller. 14.4 spatial and reverb effects 14.4.1 ice this is a special reverb for getting cold and metallic sound. Ice includes a bank of self‐oscillating filters for interesting and colorful effects. In the project “come into my disco” from the ma‐ schine factory library, you ca...
Page 628
Parameter description room section color with lower settings, the general sound is a bit more muffled. The higher the color value, the brighter it sounds. Ice the “ice” factor: higher values sound more metallic. Size adjust the size of the virtual room here. Output section mix mix lets you adjust th...
Page 629
The metaverb in the control area. Parameter description room section size adjust the size of the virtual room here. Eq section low low band eq to cut or boost bass frequencies. High high band eq to cut or boost high frequencies. Position section pan this pans the dry signal. This is useful because t...
Page 630
14.4.3 reflex this is a special resonating reverb. At moderate settings the reflex can be useful to emulate small, “tight” rooms. At more extreme settings, it can produce interesting artificial, metallic tex‐ tures. Automating the color parameter usually yields very pleasing results. The reflex pane...
Page 631
Parameter description size adjust the size of the virtual room here. Output section mix mix lets you adjust the amount of the effect in relation to the dry original audio signal. The reflex reverb on the controller. 14.4.4 reverb (legacy) this reverb is best for most common applications. The reverb ...
Page 632
The reverb in the control area. Parameter description room section room this allows you to choose one of four basic characteristics of the reverb: general , bright , guitar , and shatter . Size adjust the size of the virtual room here. Eq section low low band eq to cut or boost bass frequencies. Hig...
Page 633
The reverb on the controller. 14.4.5 reverb the reverb effect provides three different modes which are described in this section. The room reverb panel in the plug‐in strip. Reverb room the room mode is suited to drum and percussive sounds, and particularly sounds good when used on snares. Modulate ...
Page 634
The reverb effect in the plug‐in strip. The reverb in the control area (main page depicted). Main page element description room section mode allows you to choose one of three basic modes of reverb: room , hall , and plate (default: room ). Reverb time adjusts the reverb decay time. Turn clockwise to...
Page 635
Element description damping adjusts damping of the high frequencies in the reverb signal. Damping refers to the rate at which the high frequencies decay. This effect causes the sound to become gradually muffled and warmer. Available values range from 0.0 to 100.0% (default: 50.0%). Modulation sets t...
Page 636
Reverb hall the reverb hall mode is a spacious and natural reverb that is particularly suited to tonal sounds. When used with a high reverb time setting it provides a very lush reverb making it also suitable for ambient or experimental music. Modulate the room size , and pre delay parameters to crea...
Page 637
Element description reverb time adjusts the reverb decay time. Turn clockwise to increase decay. Available val‐ ues range can be adjusted in seconds from 0.5s to 20.2s (default: 2.2s). Room size adjust the size of the simulated room. Turn clockwise to increase the per‐ ceived size of the room and re...
Page 638
Element description eq section high cut adjusts the high frequencies in the reverberated signal. Available values range in kilohertz from 20.0 khz to 2.0 khz (default: 20.0 khz). Low shelf adjusts the low‐frequency content in the reverberated signal. Available values range in decibels from ‐0.0 db t...
Page 639
Parameter description main section mode allows you to choose one of three basic modes of reverb: room , hall , and plate (default: room ). Decay adjusts the damping of the plate, which directly affects the decay time of the reverb. Eq section low shelf controls the low‐frequency content in the rever...
Page 640
The beat delay panel in the plug‐in strip. Main page the beat delay in the control area: main page. Parameter description delay section time the time parameter defines the delay length in note values. The available values depend on the unit defined by the unit parameter on the unit page (see below)....
Page 641
Parameter description color defines the basic frequency of the feedback circuit: lower values result in a deeper sound, whereas higher values brighten the sound. Split controls the difference in frequency between left and right channel. At full left, this control is disabled. Output section stereo t...
Page 642
The beat delay on the controller: unit page. 14.5.2 grain delay by chopping the input into small “grains” and rearranging them as a cloud, the grain delay is use‐ ful for creating ambient textures. Increase size, space and density to quickly transform any sound into an evolving ambient texture. As a...
Page 643
Parameter description grain section pitch determines the pitch of the grains: low values result in a deep, slowly re‐ peating grain, high values speed up the grain, making it sound faster and higher. Size defines the length of the grains. Jitter introduces artifacts into the grains. Reverse produces...
Page 644
Parameter description output section stereo this parameter widens the stereo field of the effect. Values go from 0 % (no stereo) to 100 % (full stereo). The grain delay on the controller: output page. 14.5.3 grain stretch the grain stretch effect uses granular synthesis to manipulate the speed and p...
Page 645
Parameter description master section on enables the effect. Every time this control is switched on, the grain stretch effect buffers incoming audio for 32 x 1/16th step. Time section stretch defines the time‐stretch amount. Set to 50.0 % for half speed. Loop sets a loop length, in 1/16th steps. Pitc...
Page 646
The resochord panel in the plug‐in strip. The resochord in the control area. Parameter description pitch section mode here you can select between the two modes of the resochord: chord and string . In chord mode, the 6 combs are tuned according to various chords. In string mode, the 6 combs are cente...
Page 647
Parameter description brightness this is to determine the basic sound characteristic of the resochord: higher values will brighten the sound by adding high frequencies. Feedback adjusts the amount of output signal fed back into the input. Decay with decay you adjust how fast the resochord fades out....
Page 648
The distortion in the control area. Parameter description main section drive determines the basic amount of distortion. Color at lower settings, the general sound is a bit more muffled; the higher the settings, the brighter it sounds. Feedback adjust the amount of output signal fed back into the inp...
Page 649
14.6.2 lofi the lofi effect reduces the bit depth (or bit resolution) and sample rate of the audio signal for an interesting “vintage” effect at subtle settings, and heavy digital distortion at extreme settings. The lofi panel in the plug‐in strip. The lofi in the control area. Parameter description...
Page 650
Parameter description output section mix mix lets you adjust the amount of the effect in relation to the dry original audio signal. The lofi on the controller. 14.6.3 saturator the saturator is a flexible tool allowing you to apply various types of saturations to your signal. The saturator offers th...
Page 651
The saturator in classic mode in the control area. Classic mode – parameter description main section mode selects between classic , tape , and tube saturation modes. All other pa‐ rameters vary according to the mode selected here. Input controls the input gain of the effect. Increasing input will al...
Page 652
The saturator in tape mode in the control area. Tape mode – parameter description main section mode selects between classic , tape , and tube saturation modes. All other pa‐ rameters vary according to the mode selected here. Input controls the input gain of the effect. This affects the amount of tap...
Page 653
Tube mode – parameter description main section mode selects between classic , tape , and tube saturation modes. All other pa‐ rameters vary according to the mode selected here. Charge in tube mode the saturator provides a negative feedback loop that at‐ tenuates the level at the saturator’s input ac...
Page 654
The analog distortion panel in the plug‐in strip. The analog distortion in the control area (main page depicted). Main page element description mode section mode select between two distortion modes: analog and mulholland (default: mulhol‐ land ). Distortion section saturation sets the amount of satu...
Page 655
Element description tone sets the frequency for the high cut filter. Filtering the harmonically rich dis‐ torted signal produces a softer tone. Available values range from 0.0 to 100.0% (default: 100.0%). Focus switches the frequency range of the processed signal, pulling it slightly fur‐ ther forwa...
Page 656
▪ stutter : stutter is a beat‐mangling effect, great for adding glitches and fills to drum patterns and more. For more information see section ↑14.7.6, stutter . ▪ tremolo : tremolo is a tremolo/vibrato effect, useful for adding expression and movement on the fly. For more information see section ↑1...
Page 657
Filter perform fx in the control area. Main page parameter description mode section mode select an effect. Touchstrip section engage activates the filter. Frequency sets the cutoff frequency according to the min/max range parameters. Filter type selects from low pass, band pass and high pass modes. ...
Page 658
Parameter description saturation section saturation sets the input gain of the filter. Out level sets the output gain of the filter. 14.7.2 flanger a comb filter effect with more than a few tricks up its sleeve. Get performance‐ready flanger or phaser effects, or expose its wild side – setting highe...
Page 659
Flanger perform fx in the control area. Main page parameter description mode mode select an effect. Touchstrip engage activates the effect. Frequency controls the volume of the comb filter. Flanger decay controls the decay time. Saturation controls the saturation in the feedback path, producing a di...
Page 660
Setup page parameter description color polarity flips the phase of the signal in the feedback loop. Negative polarity lowers the pitch by an octave and produces a slightly hollower sound. Tone offers the choice between flanger mode, essentially a straightforward comb filter or short delay, and phase...
Page 661
Burst echo perform fx in the control area. Main page parameter description mode mode select an effect. Touchstrip engage activates the effect. When activated, feeds a burst of signal into the effect according to the length set by the feed parameter. Ts assign assigns the control to feedback or time....
Page 662
Setup page parameter description routing mix mode mix mode sets the routing of the signal: ▪ in mix mode, the dry signal is passed unprocessed and the wet signal is added on top according to the wet level pa‐ rameter. ▪ in replace mode, the dry signal is muted after the first rep‐ etition, leaving o...
Page 663
Reso echo perform fx in the plug‐in strip. Reso echo perform fx in the control area. Main page parameter description mode mode select an effect. Touchstrip effect reference perform fx maschine ‐ オペレーション マニュアル ‐ 663.
Page 664
Parameter description engage activates the effect. Frequency controls the frequency of the filters in the filter bank, altering the ton‐ ality of the signal. Echo time sets the delay time. Feedback sets the delay feedback. Pump controls the amount of compression applied to the feedback loop. Wet lev...
Page 665
Ring perform fx in the plug‐in strip. Ring perform fx in the control area. Main page parameter description mode mode select an effect. Touchstrip effect reference perform fx maschine ‐ オペレーション マニュアル ‐ 665.
Page 666
Parameter description engage activates the effect. Frequency controls the frequency of the ring modulators. Osc spread controls the frequency spread of the ring modulators. At low spread values, the ring modulators converge to a single modulation frequency. At higher spread values, the oscillator fr...
Page 667
14.7.6 stutter turn the intensity up, and down again with stutter. This beat‐mangling effect adds creative dy‐ namics like glitches, fills, and expressive pitch‐bending crescendos to drum patterns and more. Stutter perform fx in the plug‐in strip. Stutter perform fx in the control area. Effect refer...
Page 668
Main page parameter description mode mode select an effect. Touchstrip engage controls a hard bypass. Activating the control commences looping, re‐ leasing the control bypasses the effect. Length can be assigned to length (loop length, by default) or pitch (relative pitch) using ts assign . Ts assig...
Page 669
Parameter description direction controls the looping direction— forward (always forward), reverse (al‐ ways reverse) or both . In both mode, direction is forwards by default on engage and whenever the most recent control movement was up‐ wards, or reverse whenever the most recent control movement wa...
Page 670
Tremolo perform fx in the plug‐in strip. Tremolo perform fx in the control area. Main page parameter description mode mode select an effect. Touchstrip effect reference perform fx maschine ‐ オペレーション マニュアル ‐ 670
Page 671
Parameter description engage enables and disables the effect. Position controls the tremolo and vibrato rate and depth, within the ranges de‐ fined by the min and max parameters on the second page. Tremolo trem/vibr controls the balance between tremolo (modulation of amplitude) and vibrato (modulati...
Page 672
14.7.8 scratcher scratcher warps your sounds with turntable motion effects that can get other‐worldly. Apply a ‘brake’ to a sound, then scratch with it – just like on vinyl. Or use the pitch shifter delay to thicken the sound and create alien‐sounding sweeps. Scratcher perform fx in the plug‐in stri...
Page 673
Main page parameter description mode mode select an effect. Touchstrip engage engages the turntable brake, enabling scratch control. When released, the effect is bypassed entirely. Position controls the brake speed (higher = slower brake), the scratch position (higher = forward) and the delay time (...
Page 674
15 working with the arranger the arranger is the big area located in the upper part of the maschine window, right under the header. The maschine arranger has two different views: ideas view and arranger view which are also reflected on your controller. Each view has a specific purpose in the workflo...
Page 675
1 2 3 the ideas view for creating and experimenting with musical ideas free from the time‐ line. ( 1 ) scenes : this area displays all the current scenes in your project. After creating a scene by clicking the + symbol, you can build the scene by selecting a pattern from each group. By click‐ ing ea...
Page 676
The arranger view the arranger view allows you to structure your song by allowing you to assign the scenes you created in the ideas view to sections, and move them around to quickly create a larger musical structure. 3 4 2 1 the arranger view for organizing your musical ideas into a song on the time...
Page 677
15.1.1 navigating the arranger the arranger can be scrolled and zoomed in or out to fit your current needs. Navigating the arranger horizontally (time) a zooming scroll bar is available at the bottom of the arranger. This tool allows you to both scroll and zoom in/out horizontally in the event area ...
Page 678
The classic scroll bar right of the arranger. You can also adjust the height of the arranger in order to display more/less groups at once by dragging its bottom right corner vertically with your mouse: drag the handle to adjust the arranger’s height. Navigating the arranger view from the controller ...
Page 679
15.1.2 following the playback position in your project if the arranger doesn’t display the entire loop range currently selected, at some point the play‐ head will go beyond the portion of your project currently displayed in the arranger and you might loose track of the playback position. To prevent ...
Page 680
→ both button 8 and the follow label underneath light up. In the software the arranger will now switch to the next portion of your project (with the same zoom factor) as soon as the playhead reaches the end of the portion displayed. You can press navigate again to leave navigate mode and switch to a...
Page 681
Jumping to other sections in the maschine software in the software, the perform grid and the retrigger setting can be adjusted in the maschine header: adjusting the perform grid and retrigger setting. ► to adjust the perform grid, click the value left of the sync label in the maschine header and sel...
Page 682
Jumping to other sections using the controller to adjust the section sync setting: 1. Press and hold grid to enter grid mode (or pin it by pressing grid + button 1). 2. Press button 2 to select perform . ⇨ on the right display you see the available section sync values. The current value is highlight...
Page 683
15.2.1 scene overview in the software, all scenes can be managed from the ideas view: ► to open ideas view, click the arranger view button at the left on the arranger. → when the button is unlit ideas view is active, when the button is lit arranger view is active. The ideas view. ▪ at the top you ca...
Page 684
▪ cells showing a name represent scene slots containing a scene. ▪ empty cells represent empty scene slots. This grid of cells corresponds to the pads on your controller: ▪ the fully lit pad indicates the selected scene slot. ▪ dim lit pads indicate scene slots containing a pattern. ▪ unlit pads rep...
Page 685
15.2.3 assigning and removing patterns each pattern placed in the arranger (ideas view or arranger view) references one of the patterns available in the pattern editor for the corresponding group. In the ideas view, each column represents a group. After selecting a scene it is possible to as‐ sign a...
Page 686
▪ the corresponding pattern will now be played by that scene. ▪ additionally this pattern is loaded in the pattern editor, ready to be modified. Patterns and the pattern editor are described in chapter ↑10, working with patterns . Creating a new empty pattern in ideas view you can also create a new ...
Page 687
Both your pads and the right display give you an overview of the available patterns. Dim lit pads indicate the available patterns. If a pattern already exists in the selected scene for that group, the referenced pattern is highlighted and its pad is fully lit. ► while you are holding pattern , press...
Page 688
Selecting a scene in the ideas view to select a scene in the ideas view, do the following: ► select the desired scene by clicking its name at the top of the ideas view: → the scene name is now highlighted to indicate that this scene is selected. Once a scene has been selected… once you have selected...
Page 689
If the last scene bank is selected and not empty, you will see a “ + ” under button 8: pressing but‐ ton 8 will create a new, empty pattern bank — section ↑15.2.6, creating and deleting scene banks for more info. Selecting a scene 1. Press navigate + button 2 ( ideas ) to enter ideas view. 2. To sel...
Page 690
Instead of deleting the scene, which removes it entirely, you can also clear the scene: this will only remove its content — the scene will stay in your arrangement, but empty. For more information on clearing scenes, see section ↑15.2.7, clearing scenes . Deleting scenes on the controller to delete ...
Page 691
1. Press navigate + button 2 ( ideas ) to enter ideas view. 2. Press and hold scene to enter scene mode. 3. Press button 7 and 8 to select the desired scene bank. 4. Press shift + button 6 ( delete ) to delete the selected scene bank. → the scene bank is deleted including all its scene, if any. The ...
Page 692
15.2.8 duplicating scenes the ideas view allows you to duplicate a scene. This feature works in connection with settings made in the default page of the preferences. Together they offer you options to: ▪ duplicate scenes ▪ duplicate scenes and patterns ▪ link when duplicating sections for more infor...
Page 693
1. Press navigate + button 2 ( ideas ) to enter ideas view. 2. Press scene then the pad corresponding to the scene you want to duplicate. 3. Press any unlit pad to duplicate the scene. → the selected scene is duplicated in accordance with the setting in the default page of the preferences. For more ...
Page 694
→ the scene takes its new place. On your controller in scene mode, you can now select this scene via the pad corresponding to its new location. 15.2.10 making scenes unique if a scene is referencing the same patterns you can make a separate (unique) copy of the scene and its patterns by selecting un...
Page 695
Making scenes unique using the controller to make a scene unique using your controller: 1. Press navigate + button 2 ( ideas ) to enter ideas view. 2. Press and hold scene to enter scene mode. 3. Press button 7 and 8 to select the desired scene bank. 4. Press the pad corresponding to the scene you w...
Page 696
Appending a scene to the arrangement using the controller using your controller you can append a scene to the arrangement. 1. Press navigate + button 2 ( ideas ) to enter ideas view. 2. Press and hold scene to enter scene mode. 3. Press button 7 and 8 to select the desired scene bank. 4. Press butto...
Page 697
The pad grid and select rename from the context menu: the scene name gets highlighted and editable. 2. Type a name and press [enter] on your computer keyboard to confirm (or press [esc] to cancel you change). → the scene is renamed. If you use maschine as a plug‐in, some hosts will utilize the [ente...
Page 698
1. Right‐click ([ctrl]‐click on macos) the name of the desired scene in the arranger or in the scene manager, and select color from the context menu. A color palette appears. In the palette, the current color of the scene is highlighted. 2. Select the desired color in the palette. You can also choos...
Page 699
15.3 using arranger view in maschine, a song is made of a variable number of scenes, which represent the different parts of the song — e.G., intro, verse, chorus, break, another verse… by assigning your scenes to sections to the timeline in the arranger view you can start to organize your track. The...
Page 700
Use the section manager to manage your sections. ▪ on the left you can see the list of the 16 section slots in the selected section bank. Slots containing a section show a colored or white bar on the left along with the section name. The other slots contain no section. The selected section is highli...
Page 701
The top row of the arranger. The only difference between the section manager and the arranger’s top row is that the section manager allows you to manage your section banks, which is impossible in the arranger’s top row. Apart from this, actions in the arranger’s top row and in the section manager ar...
Page 702
▪ turn knob 5 and 6 to zoom and scroll the arrangement, respectively. You can also enable button 3 ( follow ) and let the right display follow the playhead as it travels through your arrangement — see section ↑15.1.2, following the playback position in your project for more information. Apart from t...
Page 703
15.3.3 assigning a scene to a section now you have created an empty section on the timeline of the arranger, you can now add a scene from the ideas view to the arranger view. To add a scene to a section on the timeline of the arranger: ► right‐click ([cmd] + click on macos) a section slot and select...
Page 704
► select the desired section by clicking its name at the top of the arranger view: → the section name is now highlighted and underlined to indicate that this section is select‐ ed. Selecting a section and a section bank in the section manager to select a section in the section manager, do the follow...
Page 705
3. Select the desired section by clicking the slot with its name in the list on the left or by click‐ ing its cell in the selected pad grid on the right. → the section slot and the corresponding cell on the right are now highlighted to indicate that this section is selected. Once a section has been ...
Page 706
Selecting sections and section banks on the controller selecting a section bank to select a section located in another section bank than the one currently selected, you first need to select that other section bank: 1. Press navigate + button 3 to enter arranger view. 2. Press scene + button 7 or 8 t...
Page 707
▪ if you have selected a section within the current loop range via the page buttons, the loop range and the playback position stay untouched. Selecting sections and section banks on the controller selecting a section bank to select a section located in another section bank than the one currently sel...
Page 708
1. Click and hold the section name in the arranger. 2. While holding the mouse button, drag your mouse horizontally in the arranger to the de‐ sired location. As the mouse cursor moves, an insertion line appears at the potential places where you can drop the section. 3. When the insertion line appea...
Page 709
3. Press button 7 and 8 to select the section bank containing the section you want to move. 4. Press the pad of the section you want to move. Alternatively you can select the section by pressing the page buttons. 5. Turn knob 1 ( position ) to move the selected section to another position in your ar...
Page 710
Truncated pattern marker will appear on the right‐hand side of the section to indicate that a section of the pattern is hidden: ▪ if a section has been manually shortened, only the visible part of the pattern within the set length will be audible. ▪ scenes always start at the beginning of the sectio...
Page 711
► click and drag the end marker of the section to the left. → the scene will be shortened, and if the adjustment is shorter than the referenced pattern a small truncated clip marker will appear on the right‐hand side of the section to indicate that a part of the scene is hidden. Only the visible par...
Page 712
3. Select the pad relating to the section you want to adjust. 4. Turn knob 4 to adjust the length of the section as required. Turning the knob left will short‐ en the section, turning it right will lengthen the section. 5. Press shift and turn knob 4 to change the section length in smaller increment...
Page 713
2. In the pattern editor, open the pattern manager and click the desired pattern slot to select it (see section ↑10.7.2, selecting patterns and pattern banks for more information). → upon your selection, the pattern is inserted into the selected section: ▪ the pattern replaces any previous pattern f...
Page 714
▪ the corresponding pattern will not be played by that section anymore. ▪ the pattern itself is left untouched. ▪ if the pattern was the longest in the section, the section is automatically reduced in size to the next longest pattern. 15.3.8 duplicating sections the arranger view allows you to dupli...
Page 715
1. Press navigate + button 3 ( arranger ) to enter arranger view. 2. Press scene then the pad corresponding to the section you want to duplicate. 3. Press any unlit pad to duplicate the section. → the selected section is duplicated in accordance with the setting in the default page of the preference...
Page 716
1. Press shift + scene . 2. Select the section you want to make unique by pressing the pad. 3. Press button 2 unique . → the section will become independent of any sections it was linked to and the patterns can be edited without affecting any the original sections. 15.3.9 removing sections to remove...
Page 717
4. Press the pad corresponding to the section you want to remove. Alternatively you can se‐ lect the section by pressing the page buttons. 5. Press button 6 ( remove ). → the section is removed from the arrangement. The next sections shift ahead to fill the gap. Alternate method 1. Press navigate + ...
Page 718
The pad grid and select rename from the context menu. The scene name is highlighted and editable. 2. Type a name and press [enter] on your computer keyboard to confirm (or press [esc] to cancel you change). → the scene is renamed. If you use maschine as a plug‐in, some hosts will utilize the [enter]...
Page 719
► right‐click ([ctrl]‐click on macos) the name of the desired section in the arranger view, and select clear from the context menu. → the section is cleared. 15.3.12 creating and deleting section banks a new section bank is automatically created once you fill an entire bank with sections. Deleting s...
Page 720
Using the software or controller it is possible to quickly reset a section to back to auto length in order to return to the section to its default state and reveal any truncated (hidden) content. When auto length is enabled, the manual length settings are discarded and the section is re‐ sized accor...
Page 721
15.3.14 looping activate a loop to repeatedly play a section of the arrangement. Once a loop is activated the sections within the range of the loop play until the loop is deactivated. You can use the range to repeatedly play a particular part of a song. This can be good for composing, practicing a p...
Page 722
Activating or deactivating a loop in the software to activate a loop using the software: ► click the loop button in the header to activate or deactivate the loop. When the loop is activated the sections within the loop range are repeated. Setting the loop range using the controller set the start, en...
Page 723
Studio track or live performance? If you are composing a studio track that you plan to export as is, you can arrange your sections so that your whole track can be played in one go from the very first section to the very last one. Please refer to section ↑4.4.3, exporting audio for information on exp...
Page 724
▪ if playback is on, the playhead jumps to the closest position near your mouse cursor that re‐ tains the current playhead position relative to the arranger grid division. This allows seamless jumps that don’t break the rhythm of your music. If the pattern grid is set to off (i.E. Disa‐ bled) or qui...
Page 725
Jumps based on the step grid you can also jump by finer increments: ► hold shift and press the locate buttons (showing left/right arrows) in the transport section to jump to the previous/next step, according to the current step grid settings. → depending on the playback state, the following will hap...
Page 726
Program change numbers : some host applications send program change numbers in the range [0–127] instead of [1–128]. In that case, the pc number 0 will trigger section/scene slot 1, pc 1 will trigger section/scene slot 2, etc. Please refer to the documentation of your host to know in which range it ...
Page 727
1. In scene option click the enabled checkbox to enable scenes in the ideas view to be trig‐ gered. In section option, click the enabled checkbox to enable sections in the arranger view to be triggered. 2. In the source submenu, select the name of your controller. 3. In the trigger submenu for scene...
Page 728
2. Click the current arrange grid value to open the drop‐down menu. 3. Select a new value for the arrange grid. → the selected arrange grid value is applied. On your controller: 1. Press the shift + follow ( grid ) button to access the grid page. 2. Press button 3 to select arrange . 3. Press button...
Page 729
To disable the arrange grid ► press button 8 or pad 16 to select off . → the arrange grid is disabled. 15.7 quick grid the quick grid setting allows you to quickly and conveniently set the most common pattern lengths using your controller. Quick grid is only accessible from your controller. When the...
Page 730
16 sampling and sample mapping maschine allows you to record internal or external audio signals using your audio interface with‐ out having to stop the sequencer. This is a useful feature if you want to record your own sam‐ ples, or rearrange loops that you have created yourself using maschine. You ...
Page 731
2. Click the sample editor button on the left of the pattern editor to switch to the sample edi‐ tor. The sample editor appears and displays the sample content of the focused sound. 3. In the sample editor, click the desired tab at the top to access the corresponding page: ▪ the record page allows y...
Page 732
▪ the edit page allows you to apply destructive edits to existing samples: ↑16.3, editing a sample . ▪ the slice page allows you to create slices from your existing samples: ↑16.4, slicing a sam‐ ple . ▪ the zone page allows you to assign your samples to particular note and velocity ranges (called z...
Page 733
The record page in the software. Opening the record page on the controller ► in sampling mode, press button 1 to access the record page. The record page looks as follows: the record page on the controller. 16.2.2 selecting the source and the recording mode at the bottom of the record page, the param...
Page 734
Adjusting the source and mode of the recording in the software. Selecting the source to record ► click the source selector on the left to select the type of source you want to record: ▪ to record external audio signals connected to your audio interface, select ext. Ster. (for ster‐ eo signals) or ex...
Page 735
Don’t want to set any duration limit to the recording. At any time you can click stop to stop the recording before the duration defined by length has been reached — the recording will then stop at the next bar. ▪ detect : if detect is selected, you can set a certain threshold using the threshold con...
Page 736
Furthermore, if you have selected an external signal ( ext. Ster. Or ext. Mono selected in source ), an additional monitor section appears on the right. In this section, activate the mon‐ itor button to send the input signal to the cue bus of maschine, allowing you to hear on a separate channel (e.G...
Page 737
You can easily record the output of a particular sound by setting source to internal , soloing this sound and selecting its parent group in the input selector! You can also set source to internal , choose as input a group with a drum kit loaded, and re‐ cord your live improvisations on the pads whil...
Page 738
The level meters above the recording section show you at any time the level of the selected audio source. For example, this can come in handy to adjust the appropriate threshold in detect mode. For this purpose, in detect mode the level meters provide a little down‐pointing arrow indi‐ cating the th...
Page 739
◦ the recording will start at the next bar. Until then the start button reads a flashing wait‐ ing label and the waiting for the next bar… message appears in the information bar above the waveform display. ◦ once the recording has started, the audio is recorded for the duration set by the length con...
Page 740
▪ the recording is mapped to a new zone covering the entire key and velocity ranges in the zone page, which makes your new sample directly playable from the pad of its sound slot (or from all your pads if pads are in keyboard mode). Any existing zones will be replaced. For more information on zones,...
Page 741
◦ the recording will start as soon as the input signal exceeds the threshold value. Until then button 5 flashes, the label under it reads waiting , and a waiting for input… message appears underneath. During this waiting phase you can also start the recording manually by pressing button 5 ( waiting ...
Page 742
16.2.5 checking your recordings you can visualize the last recordings you have made in the current sound: 1 2 3 4 5 the waveform display and the information bar displaying a recording. ( 1 ) waveform display shows the waveform of the recording currently selected in the recording history ( 5 ) — by d...
Page 743
Command description open containing folder opens the folder on your hard disk containing the sample, providing quick ac‐ cess to the original file. Save sample as… opens a save sample as dialog allowing to save the recorded sample under an‐ other name and/or to another location on your computer. ( 2...
Page 744
Right‐click (macos: [ctrl]‐click) any mini waveform in the recording history to open a context menu with the following commands: command description delete deletes the displayed sample from the recording history. This has the same ef‐ fect as clicking the little cross at the top right corner of the ...
Page 745
Using the recording history all the recordings you have made since you opened the current project are stored in the record‐ ing history. The following actions are available: ▪ to navigate your various recordings, press button 7 ( prev ) and button 8 ( next ). ▪ the selected recording is automaticall...
Page 746
Which sample is shown in the edit page? The edit page ( edit page on your controller) always displays the sample of the zone currently selected (see section ↑16.5.3, selecting and managing zones in the zone list for more informa‐ tion on selecting zones), and all your actions in that page will affec...
Page 747
1 2 3 4 7 5 6 the edit page in the software. ( 1 ) waveform display shows the waveform of the sample for the focused zone. The waveform display provides follow‐ ing tools: ▪ drag any sample onto the waveform to replace the current sample for the focused zone. If there is no sample loaded yet, this a...
Page 748
▪ loop range : if a loop has been defined in the sample, it is also indicated on the waveform. You can then adjust the loop by dragging its borders, and move the entire loop by dragging its title bar. Loops can be created and adjusted in the zone page — see section ↑16.5.4, se‐ lecting and editing z...
Page 749
( 3 ) timeline shows the time scale in seconds. ( 4 ) zooming scroll bar click the main part of the scroll bar and drag your mouse horizontally to scroll through the wave‐ form on the horizontal axis (time), or drag it vertically to zoom in/out on the same time axis. You can also click the left or r...
Page 750
▪ above the waveform, the information bar indicates the name and length of the sample. ▪ the sample can be played back at any time by pressing the corresponding pad on your con‐ troller. When the sample is played back, the playhead indicator (vertical line) shows you the current play position within...
Page 751
The edit page on the controller, page 2 of 2: adjusting the selection range of the sample. Parameter description start (knob 1) adjusts the start point of the selection range in the sample. End (knob 2) adjusts the end point of the selection range in the sample. Hold shift when turning the knobs to ...
Page 752
The playback settings of the sample (e.G., tune, amplitude envelope, etc.) can be adjusted on the zone page. See section ↑16.5.4, selecting and editing zones in the map view for more informa‐ tion. The audio toolbar. The audio toolbar provides following audio processing functions: command descriptio...
Page 753
Time stretching / pitch shifting when you select stretch in the audio toolbar, the bottom of the edit page switches to the fol‐ lowing set of controls: the stretch controls at the bottom of the edit page. These controls allow you to adjust the parameters of the time stretching / pitch shifting funct...
Page 754
Parameter description src bpm (source bpm, beat mode only) allows to define the tempo of the original audio (in bpm). This tempo is defined in different ways according to the auto dtct value: if auto dtct is enabled, you can set the length (in bars) of the original audio. You can choose between 1/2,...
Page 755
Audio editing functions on the right display of the controller. 1. Use button 5 and 6 to select the desired audio function. 2. Press button 8 to perform the selected audio function → the audio function will be performed on the selected region in your sample, as defined by the start and end parameter...
Page 756
Parameter description silence this silences the selected region of the sample. Cut this deletes the selected region from the sample and places it into the clip‐ board for later use. Copy this copies the selected region of the sample to the clipboard for later use. Paste this pastes the cut/copied re...
Page 757
Parameter description formant c (formant correction) enables/disables the formant correction. Formant correction allows the pitch‐ shifted audio to retain the timbre (or “color”) of the original audio as much as possible. This is especially useful for melodic instruments. Mode selects from the two a...
Page 758
In beat mode, if you set a target tempo ( new bpm ) that is smaller than a tenth of the original tempo ( src bpm ), button 8 ( apply ) will be grayed out and disabled. Set a higher target tempo to enable the button again! ► once you have set the parameters to the desired values, press button 8 ( app...
Page 759
▪ if you have just recorded a sample, it will directly appear here. If you have recorded more than one sample, the sampled selected in the recording history (by default the last recorded sample) will appear here — see section ↑16.2, recording a sample for more information on how to record samples. ▪...
Page 760
The slice page 1 on the controller. 16.4.2 adjusting the slicing settings at the bottom of the slice page, you can adjust the settings used to define where the various slices will be created in the sample. Adjust the slicing settings at the bottom of the slice page. Any change to these settings will...
Page 761
Parameter description auto‐snap (manual mode only) the sample slicer manual mode auto‐snap feature automatically aligns slice points to the nearest transient as you manually trigger the slicing from the pads. It can be turned off so that slice points are instead placed exactly where you trigger them...
Page 762
Parameter description engine section (detect mode only) zero‐x (zero crossing, detect mode only) when mode is set to detect , activate zero‐x to force the detected slices to be created on the closest locations where the audio signal crosses the zero val‐ ue. This can be helpful to avoid clicks when ...
Page 763
Note that we haven’t applied any slicing yet: for now your pads only allow you to prelisten how the proposed would sound after you apply the slicing. Applying the slicing will be described in section ↑16.4.5, applying the slicing . Slicing parameters following parameters are available: parameter des...
Page 764
Parameter description bpm (bpm mode) selects how the tempo is defined: if you select auto , maschine will calculate the tempo automatically. If you select manual , you can enter the tempo in bpm manually. Adjust if bpm is set to auto , you can choose between the tempo that maschine de‐ tected, or ha...
Page 765
Live slicing using maschine to manually add slices to a sample using the pads on your controller: 1. Press the sampling button to enter the sampling page. 2. Press button 3 to select slice to enter the slice mode. 3. Turn knob 1 to select manual mode. ▪ pad 1 will begin to flash to indicate that the...
Page 766
Deleting all slices after they have been applied to the pattern editor if you have committed your slices using the apply option, you must return to edit mode and apply the delete all option to fully remove them from the keyzone and pattern. To delete all slices after they have been applied: 1. Press...
Page 767
3 4 1 2 5 manually adjusting your slices. ( 1 ) waveform display shows the selected sample with a couple of spread vertical lines in the waveform: this is where the slices are going to be applied (i.E. Cut). ▪ hover a slice with the mouse to select it (it is highlighted). Little “ s ” and “ e ” mark...
Page 768
Command description open containing folder opens the folder on your hard disk containing the sample, providing quick ac‐ cess to the original file. Save sample as… opens a save sample as dialog allowing to save the slice under as a distinct file on your computer. By default, you can adjust slices wi...
Page 769
Displays the file name and the length of the selected sample. Click and hold the little play icon on the left to play back the whole sample on the cue bus (see section ↑12.2.6, using the cue bus for more information). Click the little circle (or pair of circle) at the far right to switch the wave‐ f...
Page 770
The edit mode in the slice page. In slice edit mode following parameters and commands are available: parameter description selection section slice (knob 1) selects the slice to edit. The display will show you which slice is currently se‐ lected. You can also use the pads to select slices starting fr...
Page 771
16.4.5 applying the slicing once you are satisfied with the proposed and/or manually adjusted slices (see section ↑16.4.2, adjusting the slicing settings ), you can apply the slicing in order to actually cut the original sam‐ ple and create these slices. This is done via the three elements at the bo...
Page 772
◦ the slices will be mapped to individual notes of this sound, starting with the bottom c (c‐2 in maschine convention). The base key of the sound will be set to the bottom c as well (see section ↑5.1.3, adjusting the base key for more information on the base key). Any previous content in the sound w...
Page 773
◦ if slices are exported to a sound, the sequence of notes will contain one note for each pitch. Any existing notes for that sound will be replaced. Notes for other sounds in the pattern will stay untouched. ◦ if slices are exported to a group the sequence of notes will contain one note for each sou...
Page 774
Applying a sliced sample to a sound if you drag a slice to a group in the group list (at the left of the arranger), it will be exported to the first sound slot of that group. Any sound loaded in that sound slot will be replaced. When applying a sliced sample to a sound in an otherwise empty group, t...
Page 775
To export the slices to a sound: 1. Select the group containing the target sound by pressing its group button a – h . If your project has more than eight groups, you can use button 3 and 4 to first select the desired group bank. The selected group button starts flashing and the corresponding group i...
Page 776
At any time you can press button 7 ( cancel ) to cancel the export and return to the slice page. Exporting a single slice instead of exporting all slices, you can also export the selected slice only: 1. Press button 7 ( apply to ). The controller switches to the selection mode described above. 2. Pr...
Page 777
► select a sound slot, then open the sample editor (by clicking the button with the waveform icon on the left of the pattern editor), and click the zone tab to show the zone page. The zone page (here for an empty sound). Opening the zone page on your controller ► in sampling mode, press button 4 to ...
Page 778
1 2 3 4 5 6 the zone page: an overview. ( 1 ) zone list button : shows/hides the zone list ( 4 ). ( 2 ) sample view button : switches the zone page between map view and sample view ( 5 ). ( 3 ) information bar : displays the file name and the length of the sample in the focused zone. Click and hold ...
Page 779
Sample view button is enabled). The map and sample views are explained in detail in section ↑16.5.4, selecting and editing zones in the map view and ↑16.5.5, editing zones in the sample view , respectively. ( 6 ) zone settings : displays the parameters for the focused zone. See section ↑16.5.6, adju...
Page 780
► drag a sample from the browser’s library or files pane or from your operating system onto the empty area in the zone list. Or 1. Click the “ + ” at the end of the zone list. A load sample dialog opens up. 2. Navigate to the desired audio file on your operating system and press [enter] to confirm. ...
Page 781
1. Right‐click ([ctrl]‐click on macos) the desired entry in the zone list and select load sam‐ ple… in the menu that opens. A load sample dialog opens up. 2. Navigate to the desired audio file on your operating system and press [enter] to confirm. → the dragged or selected sample replaced the previo...
Page 782
▪ the other selected zones are highlighted in white. Their settings are not displayed anywhere, however they will be affected by your actions in the zone list and in the map view (see sec‐ tion ↑16.5.4, selecting and editing zones in the map view for more on this). Mouse/keyboard action command mult...
Page 783
Moving zones in the list you can move your zones across the zone list via drag and drop: 1. Select the zone(s) you want to move. 2. Click and hold the mouse button, and drag your mouse vertically. As the mouse pointer moves, an insertion line appears at various places between the exist‐ ing entries....
Page 784
The sample can be played back on the cue channel at any time by pressing the corresponding pad on your controller. When the sample is played back, the playhead indicator (vertical line) shows you the current play position within the waveform on the right display. For more information on the cue chan...
Page 785
1 2 4 3 the map view of the zone page. ( 1 ) sample map the sample map shows all zones contained in your sound. ▪ the horizontal axis represents keys (or pitches) from c‐2 to g8, while the vertical axis repre‐ sents velocities from 0 to 127. ▪ each zone is depicted as a rectangle defining a specific...
Page 786
( 2 ) virtual keyboard below the mapping view, the virtual keyboard represents the entire key scale. The root note of the selected zone is indicated by the colored key. You can drag this key with the mouse to modi‐ fy the root key. ( 3 ) horizontal zooming scroll bar click the main part of the scrol...
Page 787
Mouse/keyboard action command press [ctrl]+[a] ([cmd]+[a] on macos) selects/deselects all zones. When deselecting, only the fo‐ cused zone remains selected. Edit commands drag the left/right border of a zone adjusts the key range for the selected zones. Drag the higher/lower border of a zone adjusts...
Page 788
Command description delete removes the selected zone(s) from the sample map. Map as drum kit reduces the selected zones to one note over the full velocity range and puts the zones next to each other upwards from the middle c (c3). The actual note assigned to each zone depends on the zone position in...
Page 789
5 2 1 4 3 the sample view of the zone page. ( 1 ) waveform display shows the waveform of the sample for the focused zone. The waveform display provides follow‐ ing tools: ▪ use the scroll wheel of your mouse to zoom in/out. You can also use the zooming scroll bar ( 3 ). ▪ play range markers (4) and ...
Page 790
Command description open containing folder opens the folder on your hard disk containing the sample, providing quick ac‐ cess to the original file. Save sample as… opens a save sample as dialog allowing to save the sample of the focused zone under another name and/or to another location on your comp...
Page 791
The zone settings in the software. The various sections always display the values for the focused zone. If the maschine window is not wide enough to display all zone settings at once, a horizontal bar appears underneath to scroll to the desired section of parameters. Following parameters are availab...
Page 792
By moving the loop’s start and end points closer to each other you can shrink the loop to very small values on‐the‐fly, thereby creating very interesting glitch effects in a live situation. The loop will always stay within the play range of the sample. Therefore, when moving the sam‐ ple’s playback ...
Page 793
Parameter description key lo (lowest key) sets the lowest note (key) of the focused zone. Alternatively, you can drag the left border of the zone in the map. Key hi (highest key) set the highest note (key) of the focused zone. Alternatively, you can drag the right border of the zone in the map. Vel ...
Page 794
Parameter description start (knob 1) adjusts the playback’s start point in the sample of the focused zone. End (knob 2) adjusts the playback’s end point in the sample of the focused zone. ► hold shift when turning the knobs to adjust the parameters in finer increments. In the waveform on the right d...
Page 795
By moving the loop’s start and end points closer to each other you can shrink the loop to very small values on‐the‐fly, thereby creating very interesting glitch effects in a live situation. Page 3 – tune / mix parameters the tune / mix page contains parameters controlling pitch‐ and level‐related as...
Page 796
Parameter description attack (knob 1) adjusts how quickly the sample/slice reaches full volume after being triggered. Decay (knob 2) adjusts how fast the sample/slice dies down. Hold shift when turning the knobs to adjust the parameters in finer increments. Page 5 – map parameters the map page conta...
Page 797
▪ drag your mouse vertically to adjust the key range: with your mouse in the lower half of the sample map the zone will cover the root key only; dragging your mouse up in the upper half of the sample map will extend the zone’s key range up to one octave above the root key; with your mouse at the top...
Page 798
→ a new zone is created that contains the added sample. Your controller automatically switches back to sampling mode and the new zone is selected and appears on the right display, ready to be tweaked. While in the browser you can press button 6 ( cancel ) to return to sampling mode without load‐ ing...
Page 799
17 appendix: tips for playing live maschine is a very hands‐on tool for producing music as well as for performing live. Here we have specifically gathered some tips to help you when playing live. If you are used to playing live, you may not need them, but maybe you will find some new ideas to integr...
Page 800
17.1.5 consider using a limiter on your master this sounds rather conservative, but if you want to avoid digital distortion caused by an overload of your audio interface, this is a useful safety measure. However, you might experience a some‐ what squashed and dull sound if you overuse the limiter by...
Page 801
This technique to create a breakdown: solo a given sound such as a kick drum, then build the track up again by bringing the muted sounds back in one at a time with the mute button. See ↑17.2.4, use note repeat for more on this. 17.2.2 use scene mode and tweak the loop range scene mode is useful to t...
Page 802
17.3 special tricks 17.3.1 changing pattern length for variation try a short pattern grid resolution like a quarter or eighth note and change the pattern length (see section ↑10.1.6, adjusting the arrange grid and the pattern length ) to create variations of a pattern. If you select an even smaller ...
Page 803
18 troubleshooting if you are experiencing problems related to your native instruments product that the supplied documentation does not cover, there are several ways of getting help. Before getting help please make sure you have downloaded the latest maschine software from native access. 18.1 knowle...
Page 804
18.3 registration support if problems occur during the product activation procedure, please contact our registration sup‐ port team: www.Native-instruments.Com/regsuppfrm . 18.4 user forum in the native instruments user forum, you can discuss product features directly with other users and with exper...
Page 805
19 glossary in this glossary you will find short definitions for numerous terms used in the maschine context. If you have any doubts about the meaning of a word, this is the place to check! Arranger the arranger is the big area located in the upper part of the maschine window, right under the header...
Page 806
Itself but instead it becomes available for other sounds and groups to process their audio. You then only have to set up the desired sound(s) and group(s) of your project to send some of their audio to this bussing point. This basically is the way to set up send effects in maschine! Channel properti...
Page 807
Event events are the individual drum hits or notes that make up a pattern. In the pattern editor, events are visually represented by rectangles in the step grid. Depending on the current view in the pat‐ tern editor, you can see events for all sounds slots (group view) or for the select sound slots ...
Page 808
Header the header is the topmost row of controls in the maschine software window. It contains global settings, such as the master volume slider, the transport controls, controls for global swing, tempo, time signature, etc. Keyboard view keyboard view is the view of the pattern editor in which only ...
Page 809
Mute and solo muting allows you to bypass a sound or a group, whereas soloing is pretty much the opposite: it mutes all other sounds or groups so that only the soloed sound or group is played. The combi‐ nation of muting and soloing is a useful means both to play live and to test different sequences...
Page 810
Plug-in a plug‐in is an instrument or effect unit, either internal or external (by native instruments or a third‐party manufacturer), that can be loaded into a plug‐in slot to produce or alter sound. When a plug‐in is loaded into a plug‐in slot, the plug‐in appears in the plug‐in list in the left pa...
Page 811
Scene a scene is a combination of patterns for each group. They can be used to combine patterns in order to create musical ideas. Scenes are created in the ideas view and then added to sections in the arranger view to create an arrangement. Section sections are references to a specific scenes on the...
Page 812
Step steps are elementary time blocks. They are notably used to apply quantization or to compose patterns from your controller in step mode. All steps together make up the step grid. In the software’s pattern editor, steps are visualized by vertical lines. You can adjust the step size, e.G., to appl...
Page 813
Index a ableton link connecting to a network [94] joining a link session [94] amplitude envelope (sampler) [270] arrange grid [388] arranger definition [805] switching views [674] arranger view [699] definition [31] [805] groups [676] pattern area [676] sections [676] timeline [676] arranger view bu...
Page 814
C channel groove properties [223] input properties (audio page) [480] [580] macro properties [525] output properties (audio page) [484] output properties (aux page) [489] channel properties [478] definition [806] groove [223] input [480] [580] macro [525] output [484] [489] [493] choke all notes [22...
Page 815
D delay effects [639] delete events/notes (controller) [424] events/notes (software) [424] group [189] digital distortion [649] display brightness [86] distortion [647] avoiding [800] driver selecting an audio driver [66] drum program files importing [200] duplicate group [185] pattern (software) [4...
Page 816
Manipulating [575] maximizer [609] metaverb [628] multi‐effect [593] phaser [625] plate reverb [638] reflex [630] resochord [645] reverb [631] saturator [650] send effect [586] send effect definition [811] transient master [604] eq [612] eq (filter mode) [273] equalizer [612] event definition [807] ...
Page 817
G gate [600] grain delay [642] grain stretch [644] groove [223] groove properties [223] definition [807] group applying effects to [567] color [181] copying and pasting [185] creating [178] definition [32] [807] deleting [189] duplicating [185] groove properties [223] group list [156] input properti...
Page 818
K key [209] [216] keyboard mode (controller) [207] quick erasing notes [424] quick selecting events [417] selecting notes [419] keyboard view definition [808] l latency [67] [799] lfo [614] [621] [625] library [96] importing your own files [148] library pane [98] limiter [606] using [800] link group...
Page 819
M macro control definition [808] macro controls [525] making sections unique [715] maschine library [96] maschine software stand‐alone or plug‐in [59] master applying effects to [567] definition [32] [808] groove properties [223] introduction [156] macro properties [525] output properties [493] maxi...
Page 820
N name group [180] pattern [457] scene [696] sound slot [167] native instruments plug-ins [278] native kontrol standard [57] nks [57] normalize exporting audio [198] note repeat [801] notes cut/copy/paste (controller) [428] cut/copy/paste (software) [426] deleting (controller) [424] deleting (softwa...
Page 821
P pad modes definition [809] pad modes (controller) [206] pad sensitivity [86] pads choke groups [210] link groups [213] recording [395] parameter creating snapshots using lock [239] parameter page definition [809] navigating [49] parameter pages controlling parameters via host automa‐ tion [512] co...
Page 822
Selecting (controller) [451] selecting (software) [449] selecting events/notes (controller) [416] selecting events/notes (software) [416] step sequencer (controller) [402] transposing events/notes (controller) [423] transposing events/notes (software) [420] pattern bank creating (controller) [456] c...
Page 823
Plug‐ins page [80] prehear [126] [127] definition [810] pre-listening samples [126] [127] preset external plug‐ins [287] native instruments plug‐ins [287] saving plug‐in presets [262] using vst/au presets [287] project definition [32] [810] saving with samples [192] q quantization definition [810] q...
Page 824
S sample definition [810] exporting with group [191] exporting with project [192] importing into library [148] missing [150] pre‐listening [126] [127] sample editor [730] definition [810] sample rate exporting audio [198] reducing (effect) [649] selecting [67] sampler plug-in [266] amplitude envelop...
Page 825
Creating (controller) [702] creating (software) [702] definition [33] [811] duplicating (controller) [714] [715] duplicating (software) [714] moving (controller) [708] removing (controller) [716] removing (software) [716] selecting (controller) [706] [707] selecting (software) [703] section arrange ...
Page 826
Soloing [218] sound list [156] triggering via midi notes [504] sound list [156] sound slot naming [167] number [219] resetting [175] soundcard [800] input and output routing [65] selecting inputs and outputs [65] settings [65] stand-alone application [59] step definition [812] step button [402] step...
Page 827
V variation accessing mode [433] adding to pattern [432] applying settings to selected sound [433] humanize mode parameters [433] random mode parameters [434] velocity scaling [86] view switching [34] vst plug-ins [278] vst/au definition [810] z zone page controller [777] software [776] index maschi...

